Генерация скриптов для переноса Foreign Keys и Triggers
Для успешного переноса базы нужно создать соответствующие Triggers и Foreign Keys. Для этого выполните следующие шаги:
1) Нажмите правой кнопкой мыши на базе SQL 2005 и выберите Tasks, затем Generate Scripts.
2) В появившемся окне убедитесь, что опция Script All Objects in the selected Databases не включена и нажмите Next.
3) Установите все элементы в False кроме следующих:
a. Include IF NOT EXISTS — поставьте TRUE
b. Script Owner — постаьте TRUE
c. Script of SQL Version, выберите SQL SERVER 2000
d. Script foreign keys, поставьте TRUE
e. Script Triggers, поставьте TRUE
Нажмите Next.
4) Появится следующее диалоговое окно. Убедитесь, что вы выбрали ONLY THE TABLES базы данных и нажмите Next.
5) На следующем экране выберите Select All и нажмите Next.
6) Выберите, как сохранить созданные скрипты (скопируйте их в Клипбоард). Нажмите Next.
7) Нажмите Finish.
После выполнения этой процедуры, мы перемещаемся в SQL SERVER 2000. Здесь, используя Query Analyzer, нужно выполнить сгенерированные скрипты, используя базу данных master. Вставьте созданные на предыдущем шаге скрипты в Query Analyzer и выполните их. После этого Foreign Keys и Triggers базы данных будут созданы.
После выполнения описанных шагов вы получите полностью работающую базу под SQL Server 2000.
Goal #2 – Configure the Cluster
By
installing the cluster on both nodes, you have also created a new tool called
the Cluster Administrator. With this tool, you can configure your cluster for
optimal use. You can run the tool like you do most other tools in Windows 2000,
by going to Control Panel and selecting Administrative Tools. When you first run
Cluster Administrator, you’ll notice that the cluster is configured awkwardly.
By default, each shared disk you assigned earlier resides in its own group under
Groups.
I
prefer to keep similar resources together. Drives that I see that will be
primarily used by a SQL Server on Server1 will be grouped together and likewise
for Server2’s drives. With that in mind, I create two new groups: Server1 and
Server2. I then place the drives from each independent group into one of the two
groups. You’ll also notice that there is a Cluster Group where the quorum
drive resides. Leave this group alone.
In
Cluster Administrator, if you get lost, right-click. For example to move the
drive to one of the two groups right click on the resource and click Move to New
Group. Then, specify which group you’d like to move to. Once you have all the
drives except the quorum drive moved to one of the two new groups, delete the
empty groups. You can then test a failover by right clicking on the group and
selecting Move Group. You will then see the resources fail, go to Online
Pending, then to Online on the new server.
You
may also want to configure the primary owner of each drive. You can do this by
right-clicking on the resource and clicking Properties. Which group you place
your resources in is very important. A resource can only act as a dependent on
another resource that is in the same cluster group.
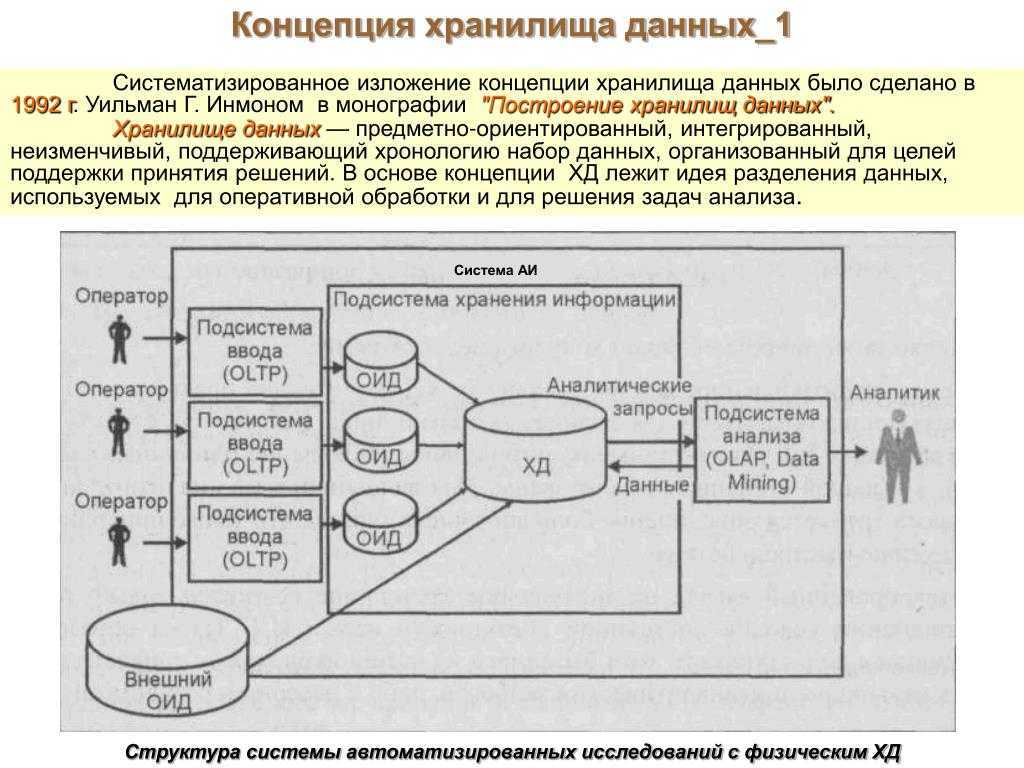
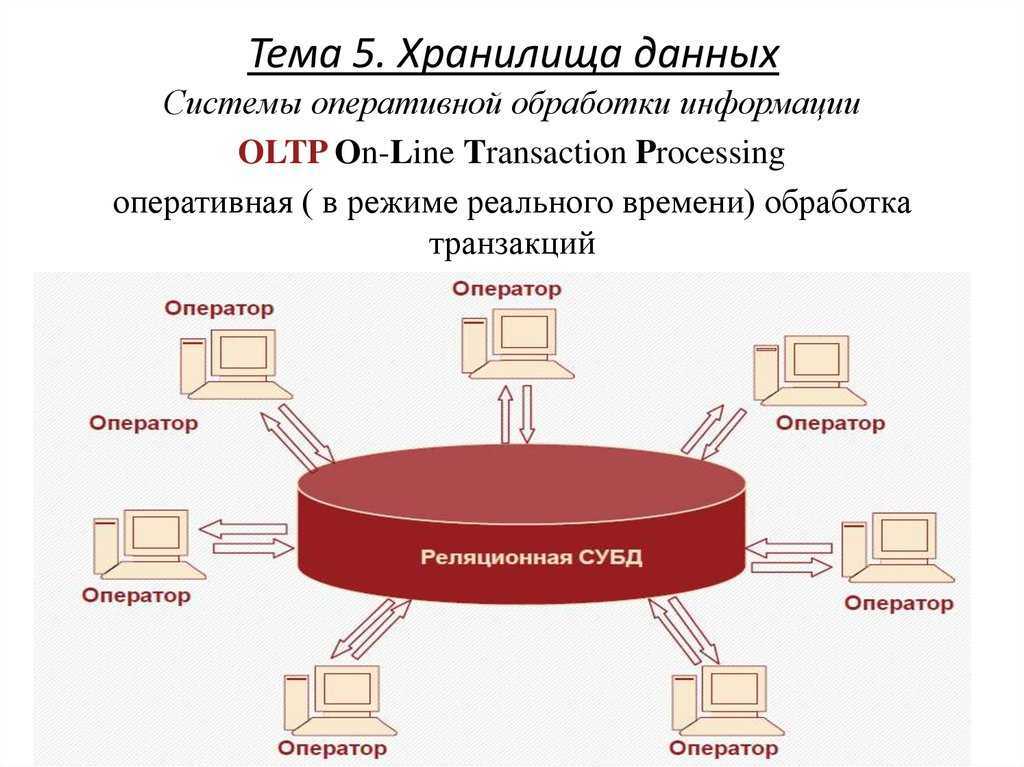
Расширенные средства администрирования
SQL Profiler теперь позволяет подключаться к серверу, как и SQL Query Analyzer. Можно использовать шаблоны для трассировки (ранее для этого использовался мастер Create Trace Wizard и описания трассировки, хранимые в реестре), предопределенные шаблоны: Dead Lock, Replay, Tuning, Stored Procedure и т.п. Помимо этого поддерживается трассировка по размеру (size-based trace) и времени (time-based trace) и новые события для Data File Auto Grow, Data File Auto Shrink, Log File Auto Grow, Log File Auto Shrink, Show Plan All, Show Plan Statistics и Show Plan Text. Ряд расширенных хранимых процедур, использовавшихся ранее для трассировки, заменен внутренними серверными хранимыми процедурами.


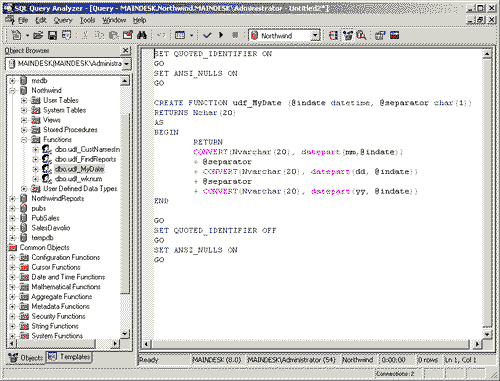
Новый SQL Query Analyzer включает браузер объектов Object Browser, позволяющий получать информацию об объектах базы данных, в том числе пользовательские и системные таблицы, представления, хранимые процедуры, расширенные хранимые процедуры и функции.
Кроме того, реализованы интегрированная трассировка, связь с Tuning Wizard, клиентская статистика, встроенный отладчик T-SQL (отладка хранимых процедур, глобальные и локальные переменные, стек вызовов), выделение синтаксиса цветом (различные цветовые схемы для SQL Server 6.5, 7.0 и 2000).
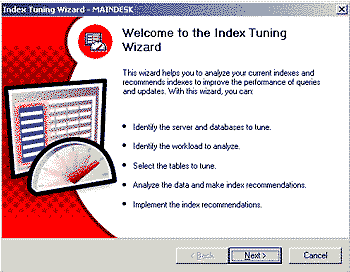
Мастер Index Tuning Wizard интегрирован с SQL Query Analyzer (вместо Index Analysis в предыдущей версии). Добавлена поддержка индексированных представлений (Indexed View) и индексов для вычисляемых колонок.
Удаляемые индексы отображаются на отдельной странице.
SQL Mail теперь поддерживает ODBC вместо DB-Library, Extended MAPI (вместо Simple MAPI в предыдущей версии), UNICODE и параметры типа Long. Web Assistant также поддерживает UNICODE и параметры типа Long.
Варианты поставки SQL Server 2000
Microsoft планирует выпустить следующие варианты поставки SQL Server 2000:
- SQL Server 2000 Enterprise Edition. Наиболее полная версия продукта, подходящая для любой организации. Рассчитан на работу с мощными компьютерами, поддерживает до 32 процессоров и 64 Гбайт памяти (благодаря использованию механизма Address Windowing Extensions, AWE, поддерживаемого в Windows 2000 Advanced Server и DataCenter Server).
- SQL Server 2000 Standard Edition. Версия, предназначенная для малых и средних организаций. Может использоваться в SMP-системах, поддерживает до четырех процессоров и 2 Гбайт памяти.
- SQL Server 2000 Personal Edition. Версия для отдельных пользователей, содержащая полный набор административных средств и реализующая практически всю функциональность Standard Edition. Помимо работы с серверными операционными системами, может функционировать под Windows 2000 Professional, Windows NT Workstation и Windows 98. Поддерживает два процессора, базы данных любого размера, но оптимизирована на одновременную работу не более чем пяти пользователей.
- SQL Server 2000 Developer Edition. Версия предназначена для разработчиков и представляет собой версию Enterprise Edition, но без лицензии на внедрение созданных приложений.
- SQL Server 2000 Desktop Engine (MSDE). Ядро базы данных без пользовательского интерфейса, средств администрирования, OLAP-средств, библиотек и Books Online. Кроме того, ограничен размер создаваемой базы данных.
- SQL Server 2000 Windows CE Edition. Версия SQL Server 2000 для устройств, работающих под управлением Windows CE. Обеспечивает программную совместимость с другими версиями SQL Server 2000, позволяя создавать приложения для широкого класса устройств — от компьютеров high-end до мобильных устройств.
А теперь перейдем к рассмотрению основных новинок в SQL Server 2000.
Goal #3 – Install SQL Server
So far,
we’ve only clustered the drives but nothing more. Let’s make this a little
interesting by adding some added resources like MS DTC and SQL Server. In
installing SQL Server there are only a few additional steps that you may not be
used to. Before we begin, make sure each of your nodes is online.
-
Install
MS DTC separately
.
To install the clustered version of MS DTC, go to a command line and type
comclust (it will be in your path). You will see the MS DTC resource created
as shown below. This resource is located in the Cluster Group in Cluster
Administrator. Perform the same action on the any other nodes in the cluster
as well.
-
Start
installing SQL Server 2000 as you would normally
. The first unusual screen you will see is where you
normally specify if you’re going to install locally or remotely. You now
have an added option of a Virtual Server.
- After
you step through the license agreement, you will be asked to specify an
IP address and subnet for your virtual SQL Server name. Type the virtual
IP address and the subnet will automatically fill itself in for you. Next,
select the network connection to use then click Add. That will transfer the
data to the bottom box.
- You
will then need to specify the drives where the data files will be
placed as shown below. You will only see drives that the node owns. If
there is a drive that you don’t see in this list, go back to Cluster
Administrator and move the group over to the server where you’re
installing SQL Server. When click Back to go back a screen in the
installation wizard then Next to refresh the list of drives. There is a bug
in the installation wizard that you will need to watch carefully here. If
you specify a drive here, the wizard pretty much ignores the drive selection
and you will need to manually re-select the drive in a moment.
- In
the Cluster Definition screen, you will need to specify which nodes SQL
Server will be installed on.
-
You
then need to specify an administrative account for the cluster
. Again, I would use the clustacct that we
established in Step 1 of Goal 1.
-
Specify
an instance name
.
If this is the first SQL Server in the cluster, then you can make it the
default instance. If this is the second instance in your cluster, you must
use an instance name and a different virtual server name a few steps ago.
There are special notes about this in my previous article.
-
Confirm
the directories and type of installation
. Again, there is a bug in the wizard that will require you to
possibly change the Data Files option again. The wizard will default to the
first drive in the group so if you wish to specify a new drive, change it
here.
-
Continue
the installation as you would normally in SQL Server
. The rest of the installation is exactly like the
normal installation path. The only difference is when SQL Server goes to
copy the files, you cannot see the progress because it’s copying the files
and configuring both nodes. This process may take up to 15 minutes so be
patient. Don’t assume that nothing is happening on the server.
-
-
Reboot
both servers
.
Reboot the server where you installed SQL Server from first, followed by the
second node.
After
rebooting the servers you can install SQL Server on the second node. Install it
exactly the same way but you’ll need to assign another virtual SQL Server name
and IP address. You’ll also need to use and instance name for the second node.
There are special notes in my previous article about using an instance name. I
would recommend rebooting one more time after you’ve installed the second
instance, although it is not required.
After that, you’re ready to install Service Pack 1 for SQL Server 2000.
Goal #4 – Configuring the Cluster for SQL Server
SQL Server
is now running on both instances. If you’ve installed two instances of SQL
Server (one on each node), then you’re running in Active/Active mode. You’re
now ready to go to Cluster Administrator and perform the final configuration
steps for SQL Server. By default, if you’re using multiple shared drives, SQL
Server in a cluster will not be optimally configured.
To
configure the resources properly, open Cluster Administrator and go to your
first server’s group that you installed SQL Server on. If you’re running
multiple data drives for a SQL Server, they will not be accessible until you
make the SQL Server service a dependency on these drives. In other words, you
can’t place backups or any data files on the M drive until the SQL Server
service is set as dependency to the M drive. You wouldn’t want the SQL Server
service starting until all your drives are ready. To make the SQL Server service
dependent on the drives, you must first fail the service by right-clicking on
the SQL Server service in Cluster Manager (shown below) and select Failover. You
can then right-click on the SQL Server service here and select properties.
You will
notice by going to the Dependencies tab that the service is only dependent on
the primary data drive and the virtual SQL Server name. To add additional
resources click Modify.
As you can
see below, I’ve made the SQL Server service additionally dependent on the M
and N drive by selecting the drives then clicking the à
button. After you’ve added your resources click OK.
You will
then need to restart the SQL Server service by right-clicking on the service and
selecting Start. Now, all the drives you specified will be available to
Enterprise Manager and T-SQL. To complete the configuration, you can perform the
same action on the second node if necessary.
You’ve
now completed the basic clustering of SQL Server and Windows 2000! For
additional help on this topic, you can post questions in the In
The Enterprise forum. In future articles, I will discuss how to cluster
Analysis Services, which is not nearly as simple as clustering SQL Server.
Заключение
В этом обзоре мы рассмотрели некоторые новинки, появившиеся в Microsoft SQL Server 2000. Естественно, в рамках одной статьи невозможно осветить все изменения, улучшения и дополнения, реализованные в данной версии. Так, например, проблема использования именованных экземпляров сервера заслуживает более детального (нежели приведенное ниже) рассмотрения. Тем не менее несколько слов на эту тему хотелось бы сказать.
В SQL Server 2000 появилась возможность использования именованных экземпляров — одновременно может работать до 15 копий SQL Server. По умолчанию запускается одна копия SQL Server:
net start MSSQLSERVER
Именованные экземпляры запускаются командой:
net start MSSQLSERVER$InstanceN (где N - от 1 до 15)
После того как продукт выйдет (а это должно произойти в конце нынешнего года), мы еще раз обратимся к теме новинок в SQL Server 2000 и более подробно остановимся на тех, которые нам не удалось рассмотреть в этом обзоре. Мы также планируем опубликовать ряд статей, посвященных программированию с использованием SQL Server.