Сервер 1С:Предприятие на Ubuntu 16.04 и PostgreSQL 9.6, для тех, кто хочет узнать его вкус. Рецепт от Капитана
Если кратко описать мое отношение к Postgres: Использовал до того, как это стало мейнстримом.
Конкретнее: Собирал на нем сервера для компаний среднего размера (до 50 активных пользователей 1С).
На настоящий момент их набирается уже больше, чем пальцев рук пары человек (нормальных, а не фрезеровщиков).
Следуя этой статье вы сможете себе собрать такой же и начать спокойную легальную жизнь, максимально легко сделать первый шаг в мир Linux и Postgres.
А я побороться за 1. Лучший бизнес-кейс (лучший опыт автоматизации предприятия на базе PostgreSQL).
Если, конечно, статья придется вам по вкусу.
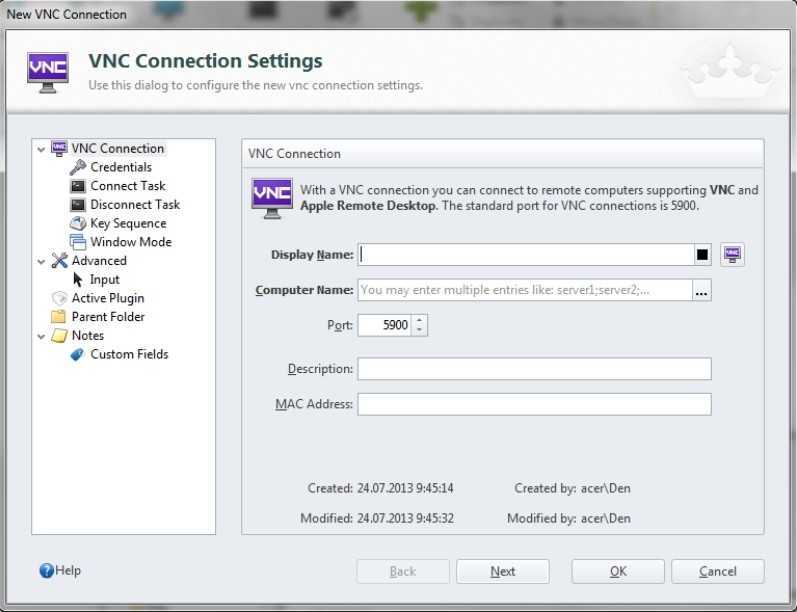
Смена пароля
Для смены пароля на подключения к VNC, вводим команду:
vncpasswd
Система напишет, в каком файле на данный момент хранится пароль и запросит ввод нового:
Using password file /root/.vnc/passwd
Password:
Warning: password truncated to the length of 8.
Verify:
Would you like to enter a view-only password (y/n)? n
* как видим, файл для хранения пароля в данном примере — /root/.vnc/passwd; требование по минимальной длине пароля — 8 символов; также после ввода нового пароля система предложит ввод пароля на режим «только для чтения».
Если необходимо указать конкретный файл, в котором должен хранится пароль, вводим, например, такую команду:
vncpasswd /etc/vnc/passwd.txt
Настройка межсетевого экрана
По умолчанию Xrdp прослушивает порт на всех интерфейсах. Если вы запускаете брандмауэр на своем сервере Ubuntu (что вы всегда должны делать), вам нужно будет добавить правило, которое будет разрешать трафик на порт Xrdp.
Чтобы разрешить доступ к серверу Xrdp с определенного IP-адреса или диапазона IP-адресов, в этом примере , выполните следующую команду:
Если вы хотите разрешить доступ из любого места (что крайне не рекомендуется по соображениям безопасности), запустите:
Для повышения безопасности вы можете настроить Xrdp для прослушивания только на локальном хосте и создать туннель SSH, который безопасно перенаправляет трафик с вашего локального компьютера на порт на сервер на том же порту. Другой безопасный вариант — установить OpenVPN и подключиться к серверу Xrdp через частную сеть.
Подключение к серверу Xrdp
Теперь, когда вы настроили сервер Xrdp, пора открыть клиент Xrdp и подключиться к серверу.
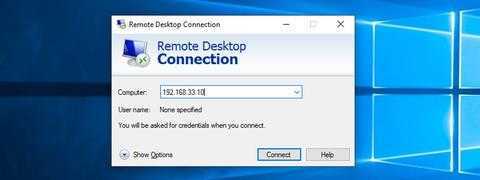
Если у вас есть ПК с Windows, вы можете использовать клиент RDP по умолчанию. Введите «удаленный» в строке поиска Windows и нажмите «Подключение к удаленному рабочему столу». Это откроет клиент RDP. В поле «Компьютер» введите IP-адрес удаленного сервера и нажмите «Подключиться».
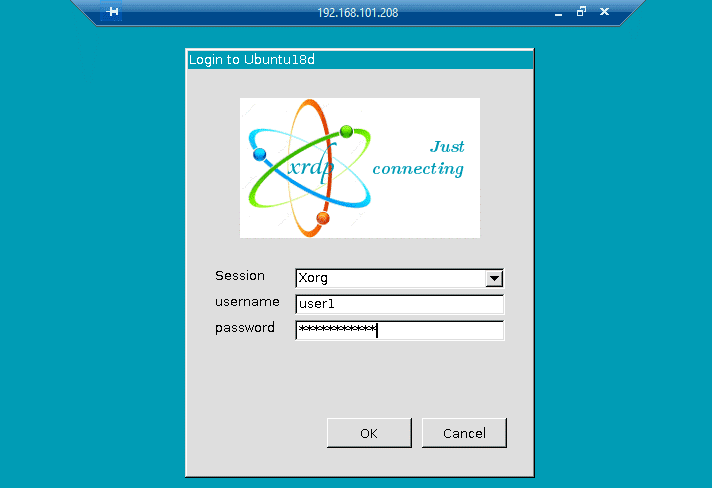
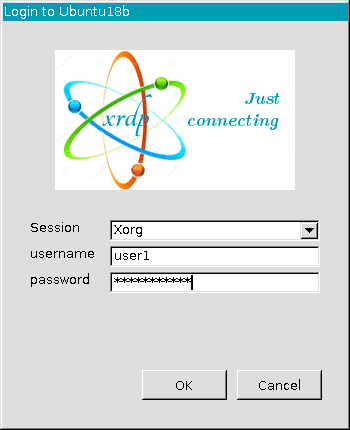
На экране входа в систему введите свое имя пользователя и пароль и нажмите «ОК».

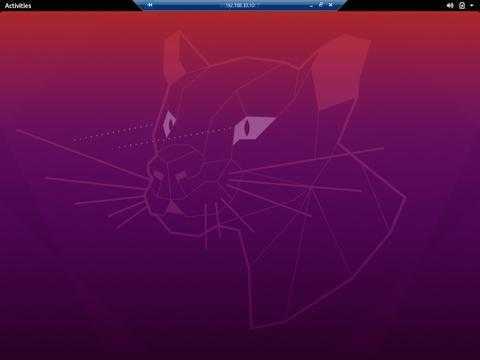
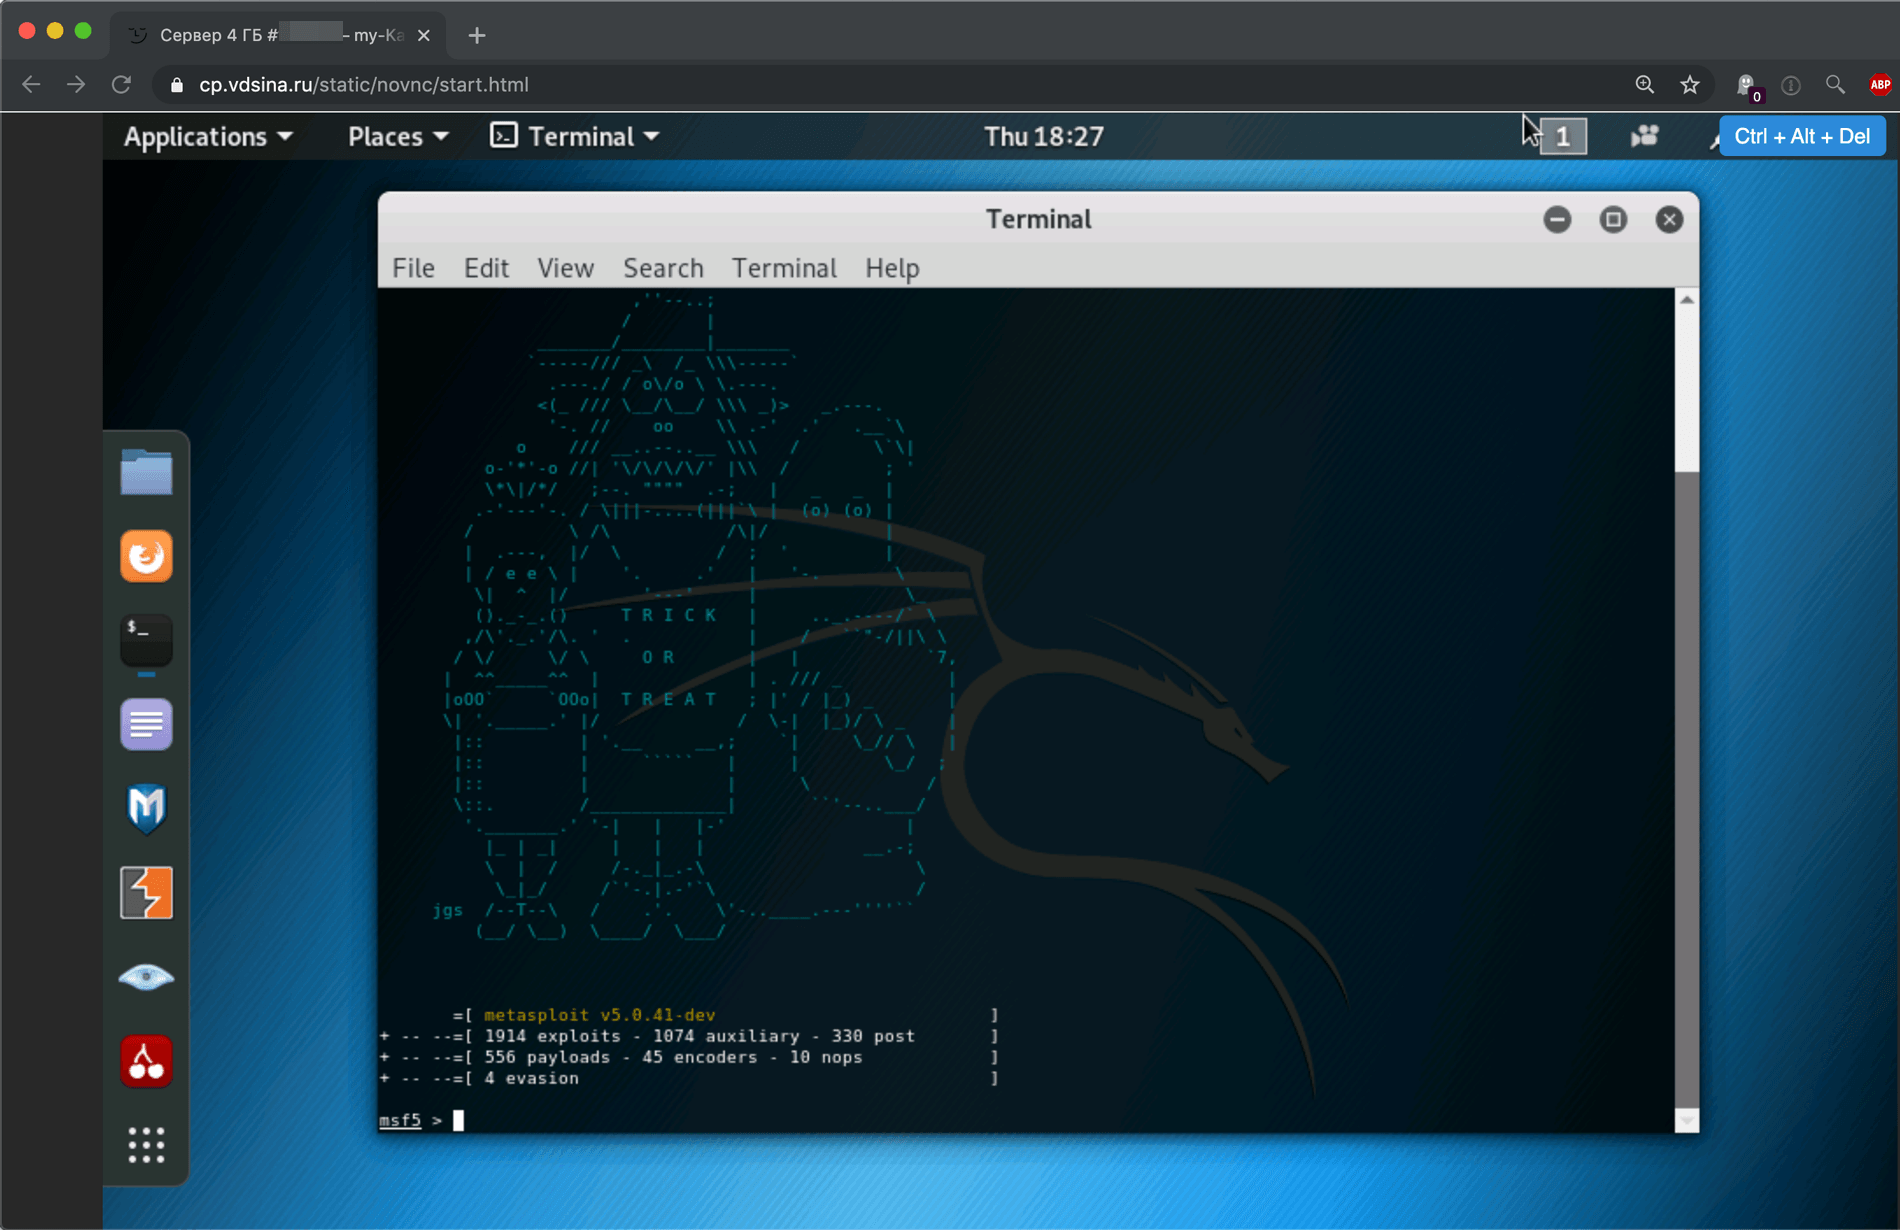
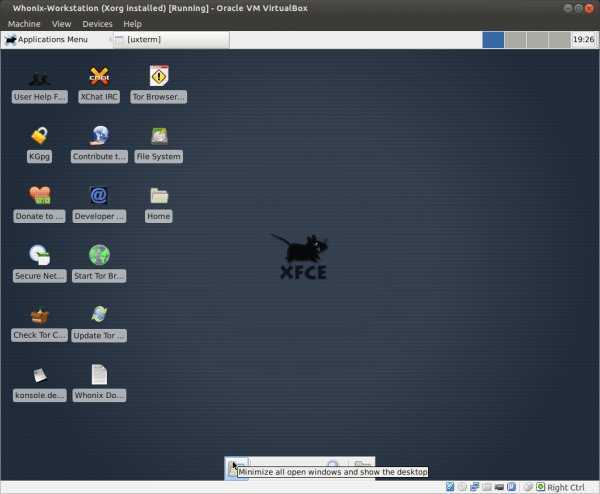
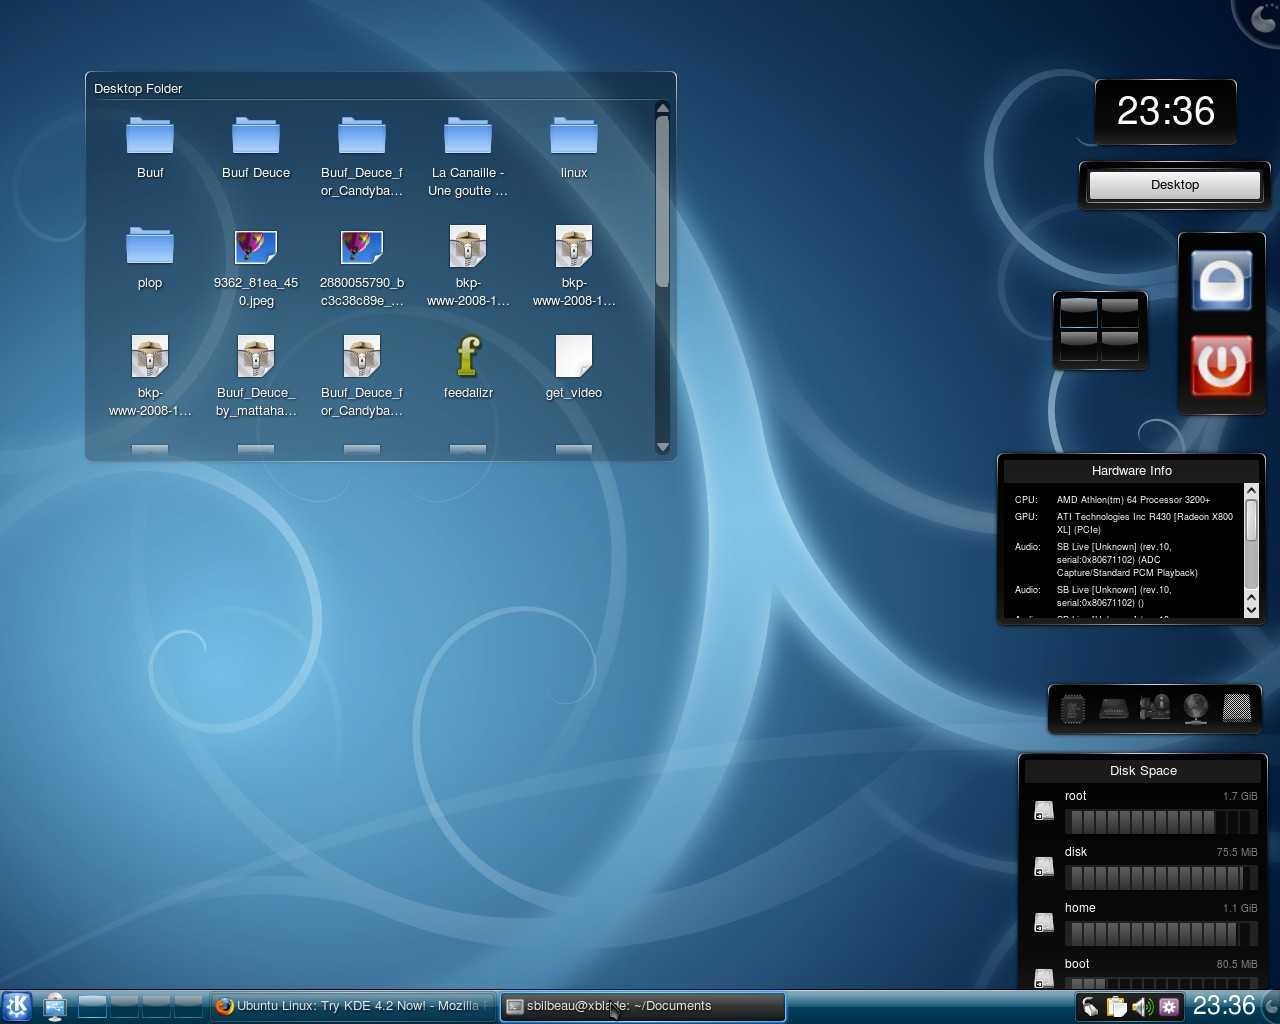
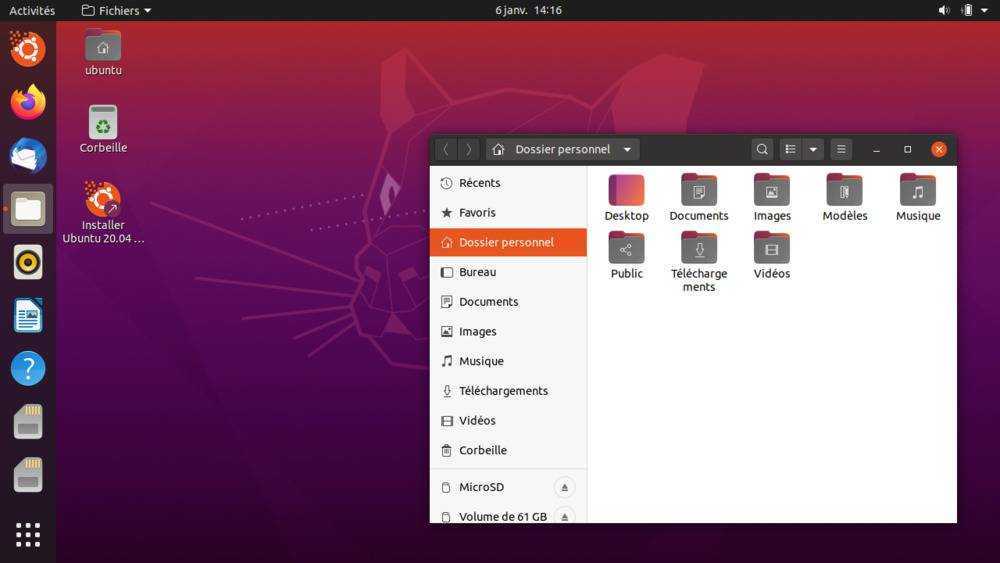
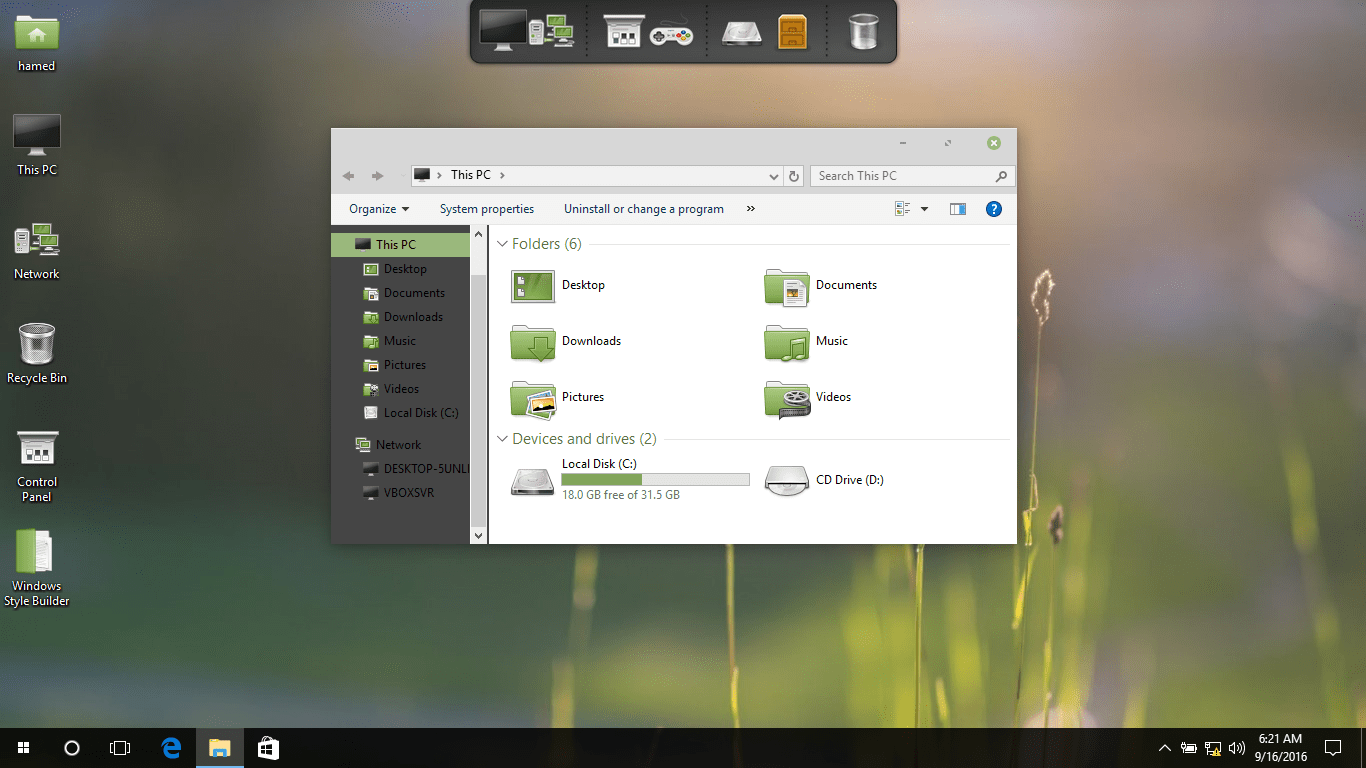
После входа в систему вы должны увидеть рабочий стол Gnome или Xfce по умолчанию. Это должно выглядеть примерно так:
Теперь вы можете начать взаимодействие с удаленным рабочим столом со своего локального компьютера, используя клавиатуру и мышь.
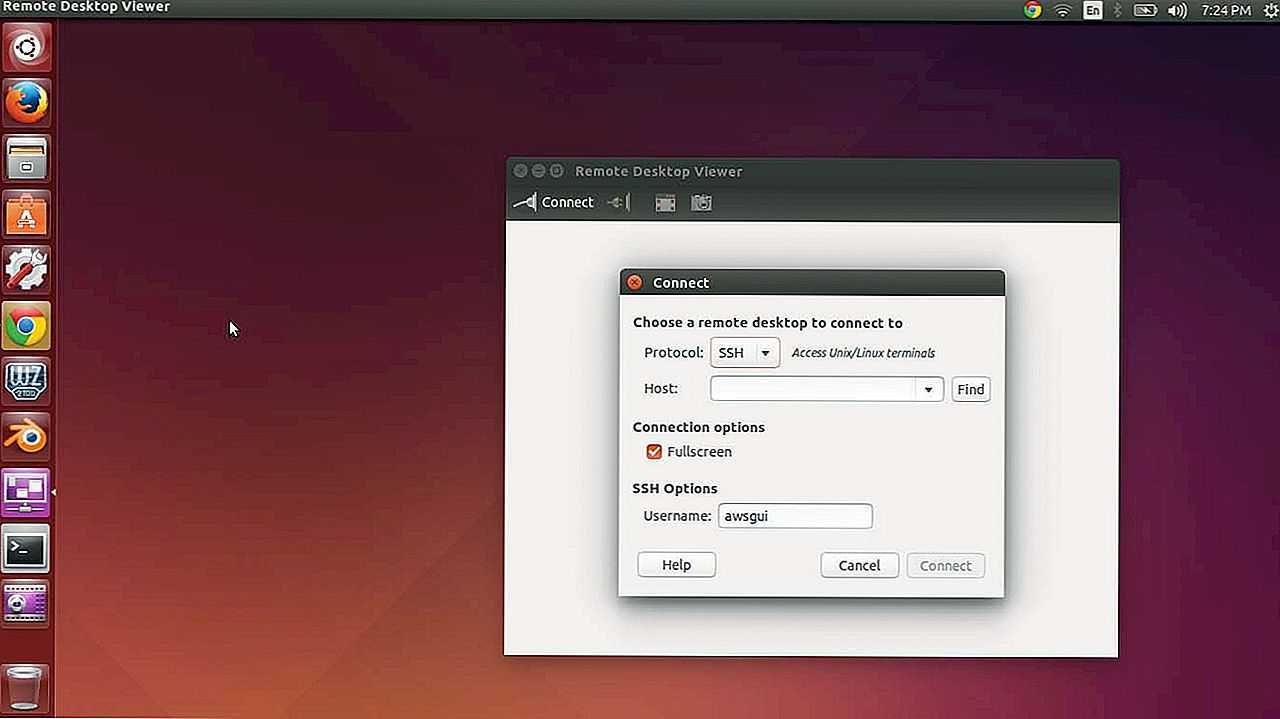
Если вы используете macOS, вы можете установить приложение Microsoft Remote Desktop из Mac App Store. Пользователи Linux могут использовать RDP-клиент, например Remmina или Vinagre.
Сервер 1С:Предприятие на Ubuntu 16.04 и PostgreSQL 9.6, для тех, кто хочет узнать его вкус. Рецепт от Капитана
Если кратко описать мое отношение к Postgres: Использовал до того, как это стало мейнстримом.
Конкретнее: Собирал на нем сервера для компаний среднего размера (до 50 активных пользователей 1С).
На настоящий момент их набирается уже больше, чем пальцев рук пары человек (нормальных, а не фрезеровщиков).
Следуя этой статье вы сможете себе собрать такой же и начать спокойную легальную жизнь, максимально легко сделать первый шаг в мир Linux и Postgres.
А я побороться за 1. Лучший бизнес-кейс (лучший опыт автоматизации предприятия на базе PostgreSQL).
Если, конечно, статья придется вам по вкусу.
Настройка межсетевого экрана
По умолчанию Xrdp прослушивает порт на всех интерфейсах. Если вы запускаете брандмауэр на своем сервере Debian, что вы всегда должны делать, вам нужно будет добавить правило, которое будет разрешать трафик на порт Xrdp.
Предполагая, что вы используете ufw для управления брандмауэром, выполните следующую команду, чтобы разрешить доступ к серверу Xrdp с определенного IP-адреса или диапазона IP-адресов, в этом примере :
Если вы хотите разрешить доступ из любого места (что крайне не рекомендуется по соображениям безопасности), запустите:
Если вы используете nftables для фильтрации подключений к вашей системе, откройте необходимый порт, выполнив следующую команду:
Для повышения безопасности вы можете настроить Xrdp для прослушивания только на локальном хосте и создать туннель SSH, который безопасно перенаправляет трафик с вашего локального компьютера на порт на сервер на том же порту. Другой безопасный вариант — установить OpenVPN и подключиться к серверу Xrdp через частную сеть.
Step 4 — Testing the RDP Connection
In this step, you will test the RDP connection from your local machine. The sections below include actions for testing the connection on Windows, macOS, and Linux machines.
Testing the RDP Connection on Windows
To test the connection using the Remote Desktop Connection client on Windows, first launch the Remote Desktop Connection app.
Enter your remote server’s public IP and username into the fillable text boxes for Computer and User name. You may need to press the down arrow for Show Options to input the username:
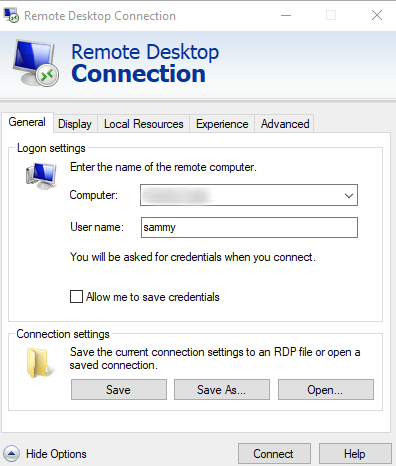
Press the Connect button. If you receive an alert that the , check that you have turned on the Remote Desktop option in your system settings.
Press Yes if you receive the identity verification popup:
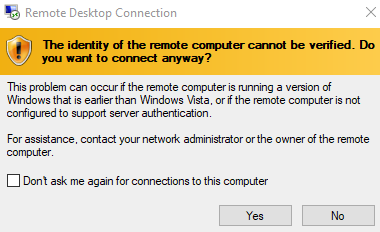
Then, enter your remote server’s username () and the password you created for user during the initial server setup. Press Ok.
Once you have logged in, you should be able to access your Ubuntu Desktop environment:
Using RDP, you successfully connected to your remote Ubuntu server from your local machine. You can close it with the exit button when you have finished using your graphical desktop.
Testing the RDP Connection on macOS
To test the connection using the Remote Desktop Connection client on macOS, first launch the Microsoft Remote Desktop Connection app.
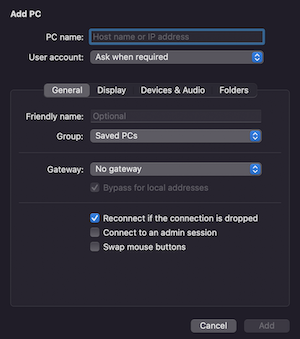
Press Add PC, then enter your remote server’s public IP in the fillable box:
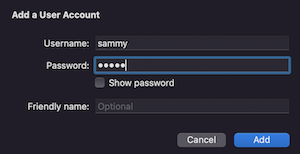
You can Add a user account when setting up the connection:
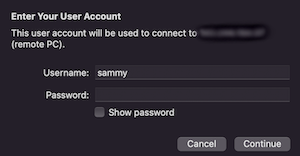
If you do not add a user during setup, you will be prompted for your user login credentials:
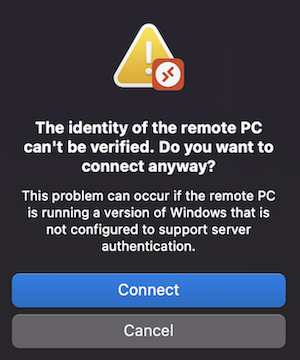
Press Yes to bypass the identity verification popup:
Once you have logged in, you can access your Ubuntu remote desktop. You can close it with the exit button when you have finished using your graphical desktop.

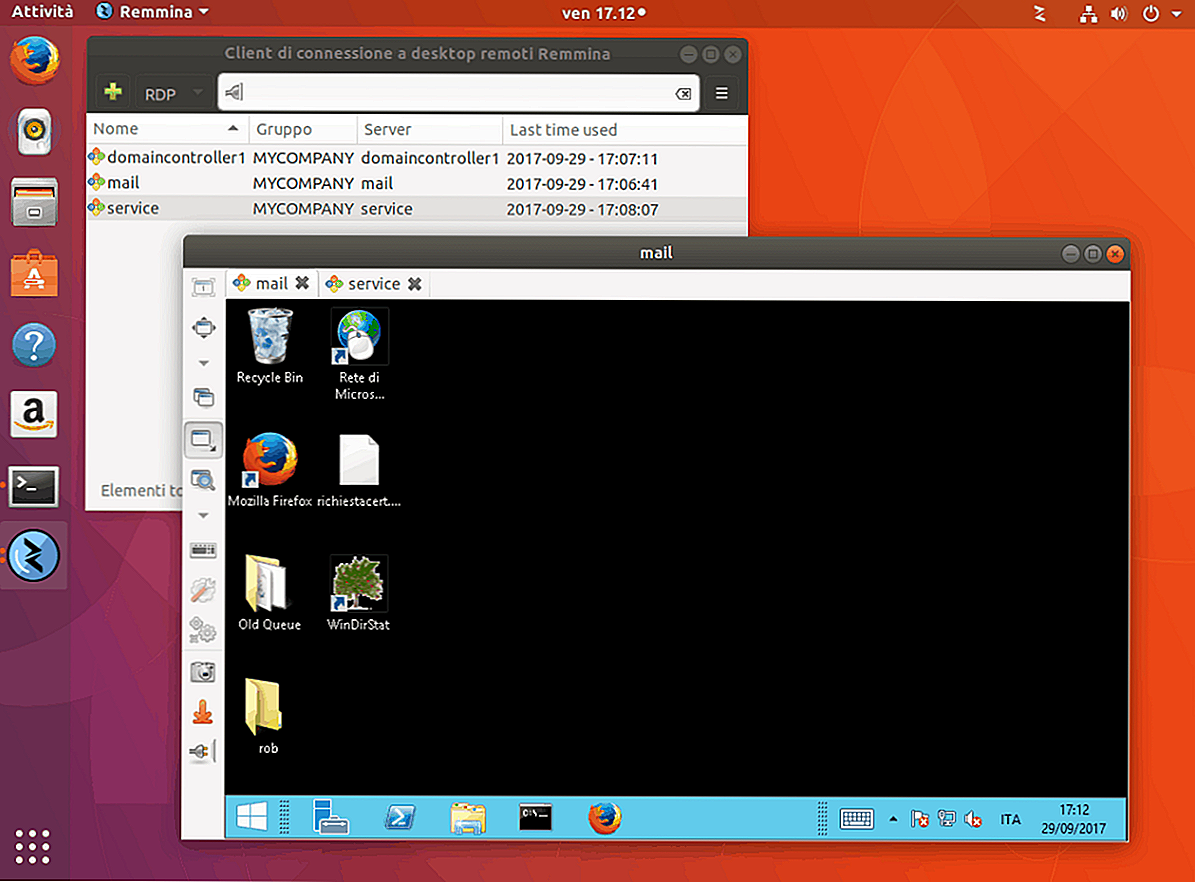
Testing the RDP Connection on Linux
You will need an RDP client to test the RDP connection on a local Linux machine. First, install the RDP client for Ubuntu:
Select if prompted to complete the installation. This command will install Remmina, an open-source remote desktop client on your Ubuntu system using . For other Linux distributions, you can review the Remmina documentation for installation.
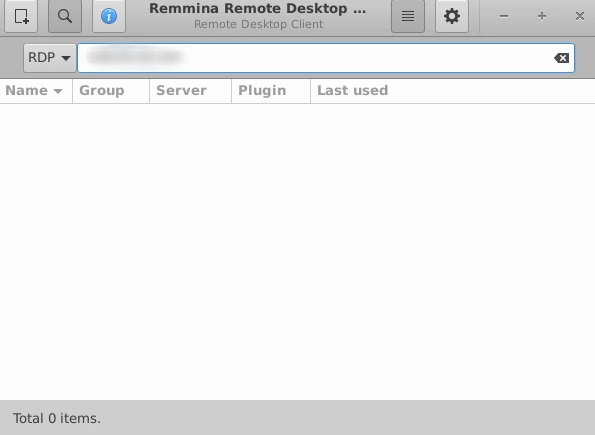
Once installed, launch the application on your local Linux machine and enter your remote server’s public IP in the fillable box. Press Enter on your keyboard to connect to your remote desktop.
Then, enter your remote server’s username (for this tutorial, the username is ) and the password you created for the user during the initial server setup. Press Ok.
You may need to enter your user’s password again to unlock the remote desktop.
Once you have logged in, you should be able to access your Ubuntu Desktop environment.
Using RDP, you successfully connected to your remote Ubuntu server from your local machine. You can close it with the exit button when you have finished using your graphical desktop.
Once you have ensured the remote connection works, you can use this sequence whenever you need to use the graphical interface for your remote Linux server.
Почему удаленное подключение к Ubuntu из Windows?
Есть несколько причин, по которым вам может понадобиться удаленное подключение к вашему компьютеру Ubuntu. Возможно, вы на работе и вам необходимо войти в свой домашний компьютер. Кроме того, у вас может быть компьютер с Ubuntu в одной комнате, а компьютер с Windows — в другой. Возможно, вы хотите запускать обновления в Ubuntu или получать доступ к файлам.
Программы для Windows, мобильные приложения, игры — ВСЁ БЕСПЛАТНО, в нашем закрытом телеграмм канале — Подписывайтесь:)
В качестве альтернативы вы можете использовать сервер Ubuntu для данных, веб-сайт или даже игру. В любом случае, способ настройки удаленного соединения сэкономит много времени и усилий.
У вас есть три основных варианта установки удаленного соединения с машиной Ubuntu, работающей в среде рабочего стола по умолчанию:
- Удаленный рабочий стол (RDP)
- Виртуальные сетевые вычисления (VNC)
- Стороннее программное обеспечение для удаленного рабочего стола
Сначала, однако, вам нужно сделать некоторые приготовления:
- Включить переадресацию портов на маршрутизаторе удаленного устройства
- Найти IP-адрес
- Установить SSH
Давайте посмотрим на это по очереди.
Часто встречающиеся ошибки 1С и общие способы их решения Промо
Статья рассчитана в первую очередь на тех, кто недостаточно много работал с 1С и не успел набить шишек при встрече с часто встречающимися ошибками. Обычно можно определить для себя несколько действий благодаря которым можно определить решится ли проблема за несколько минут или же потребует дополнительного анализа. В первое время сталкиваясь с простыми ошибками тратил уйму времени на то, чтобы с ними разобраться. Конечно, интернет сильно помогает в таких вопросах, но не всегда есть возможность им воспользоваться. Поэтому надеюсь, что эта статья поможет кому-нибудь сэкономить время.
Подключение к серверу Xrdp
Теперь, когда вы настроили сервер Xrdp, пора открыть клиент Xrdp и подключиться к серверу.
Если у вас есть ПК с Windows, вы можете использовать клиент RDP по умолчанию. Введите «удаленный» в строке поиска Windows и нажмите «Подключение к удаленному рабочему столу». Это откроет клиент RDP. В поле «Компьютер» введите IP-адрес удаленного сервера и нажмите «Подключиться».
На экране входа в систему введите свое имя пользователя и пароль и нажмите «ОК».
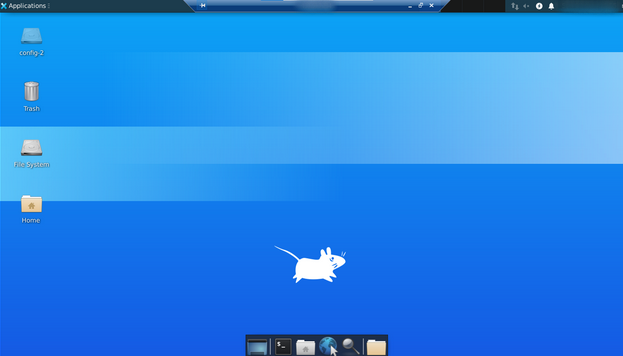
После входа в систему вы должны увидеть рабочий стол Xfce по умолчанию. Это должно выглядеть примерно так:
Теперь вы можете начать взаимодействие с удаленным рабочим столом XFCE со своего локального компьютера, используя клавиатуру и мышь.
Если вы используете macOS, вы можете установить приложение Microsoft Remote Desktop из Mac App Store. Пользователи Linux могут использовать RDP-клиент, например Remmina или Vinagre.
Prerequisites and assumptions
The following conditions should be met in order to have the best results while using the script
- We assume that your machine is connected to internet while performing the installation. This is needed as additional packages and software needs to be downloaded and installed on your Ubuntu machine
- The script runs against a supported Operating system (Ubuntu 16.04.x, Ubuntu 18.04.x,Ubuntu 19.10, Ubuntu 20.04)
- The Official Ubuntu distribution needs to be used (we do not support other Ubuntu flavors – so far !!)
- No additional Desktop interface is used ( xRDP session will be showing Ubuntu Gnome Desktop with the Dock menu or Unity if running Ubuntu 16.04)
- Sound functionality is present on the computers if you sound feature is available as well
How to view a Linux system on a Windows xrdp connection
Open the CMD line in Windows with the Start > Run > CMD combination.
Run the following command to open the Remote Desktop client and connect to the remote machine:
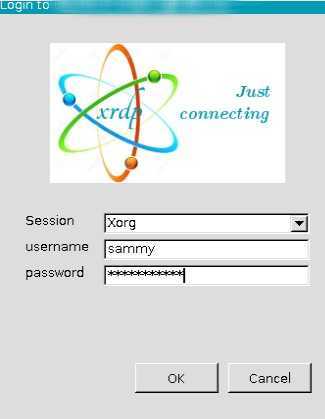
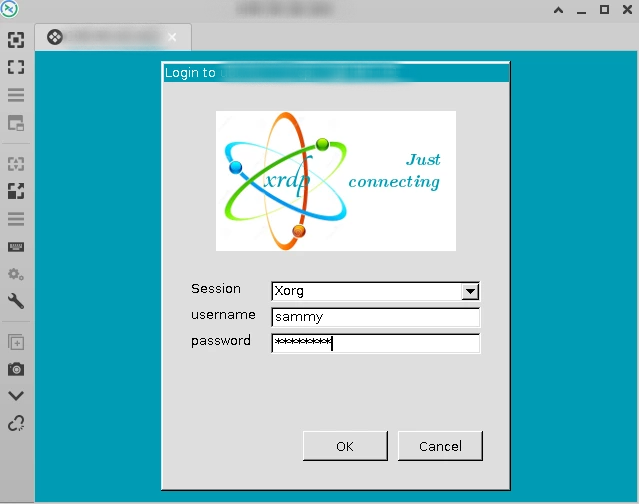
Choose xorg as the session type and enter your login credentials.
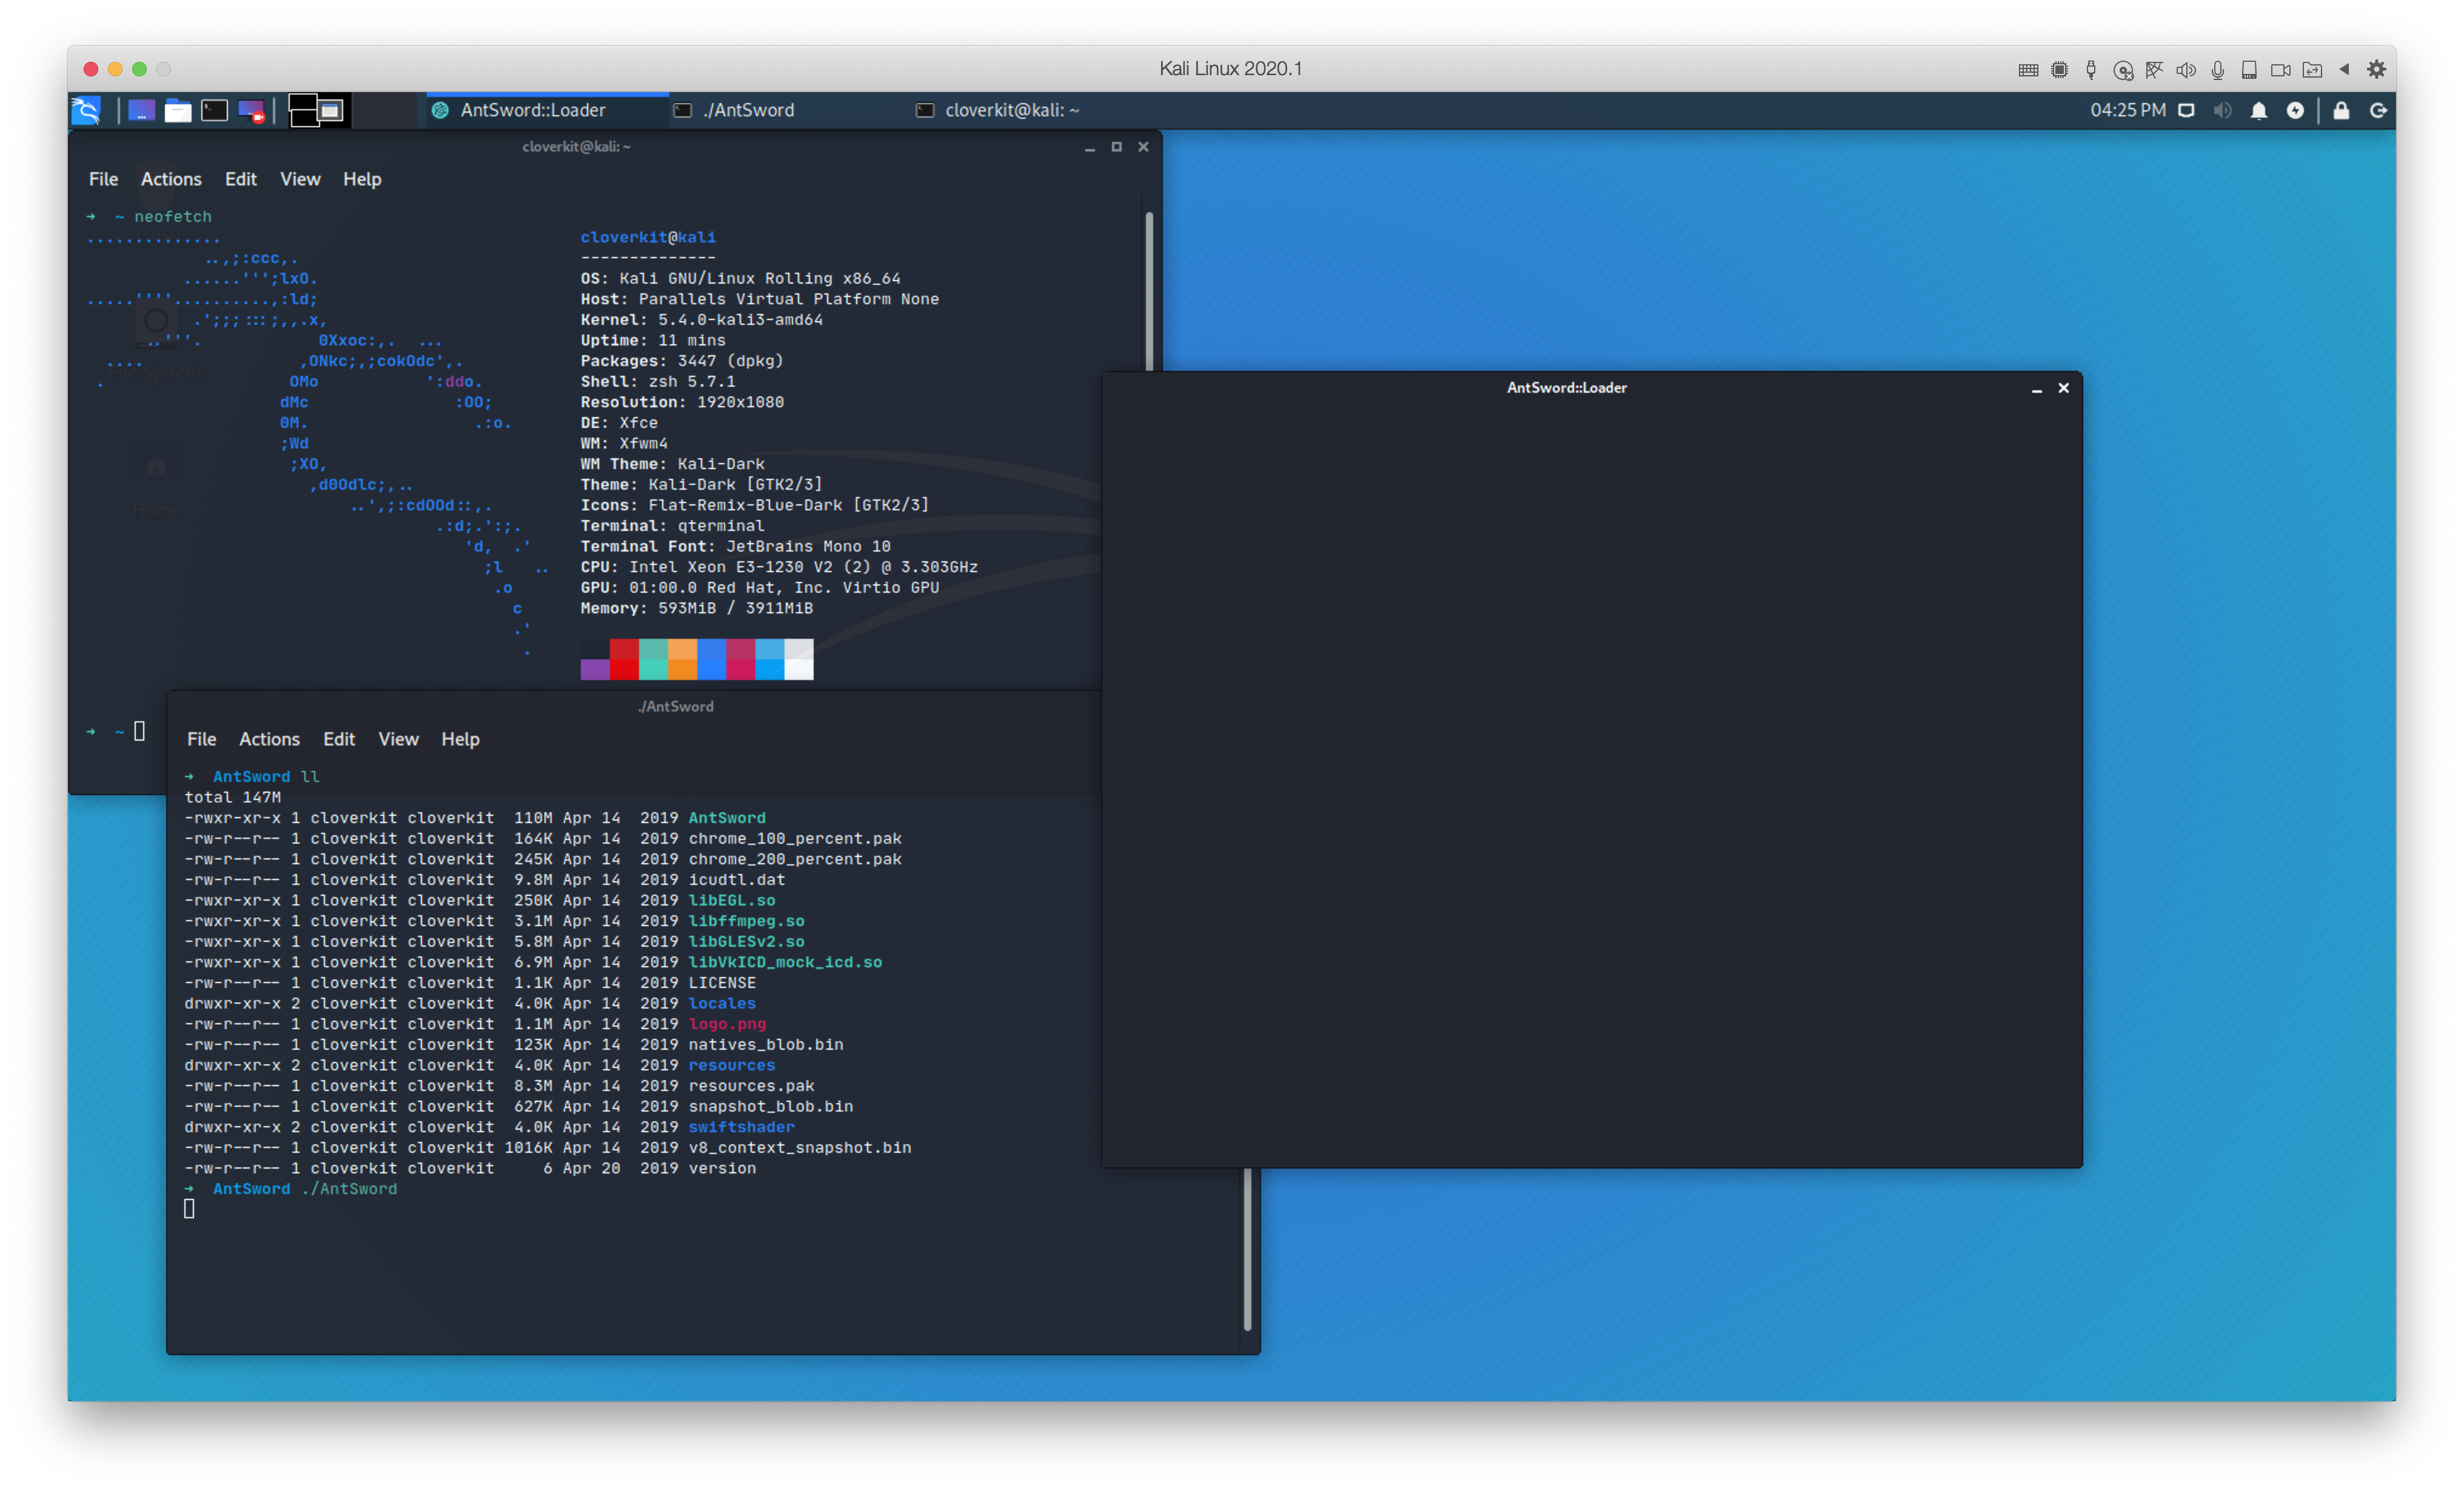
After waiting a few minutes, an empty blue screen may be displayed that indicates there is a configuration problem. Use the following steps to get around this issue and fix the xrdp connection.
This problem is caused by changes made in Ubuntu version 18.04 and the xorgxrdp package. These changes have broken the ability to successfully connect using xrdp. Fixing the empty blue screen issue requires that you install the correct version of xorgxrdp-hwe:
You can check the version you are running with this command:
Restart the xrdp service:
After the correct package is installed, try to connect to the Ubuntu system again using RDP. Execute the following command in the Windows CMD line:
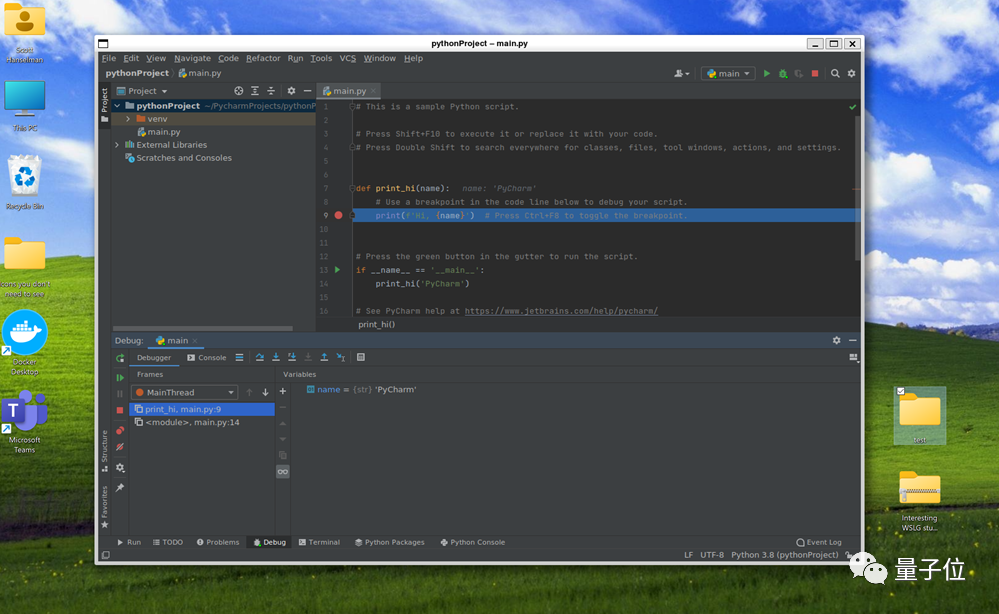
Then, choose xorg in the login window and enter your credentials to establish the connection.
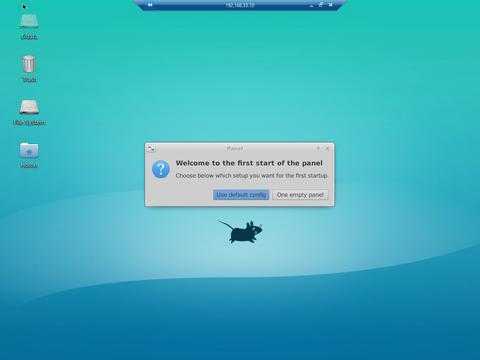
You should now be successfully connected to the Linux machine using the Windows Remote Desktop Protocol. Use the default configuration in the displayed dialog window.
You can modify the resolution by running the mstsc command from the Windows machine.
Manually enter the IP address of the Ubuntu system.
Select Show Options and choose the desired resolution from the Display tab.
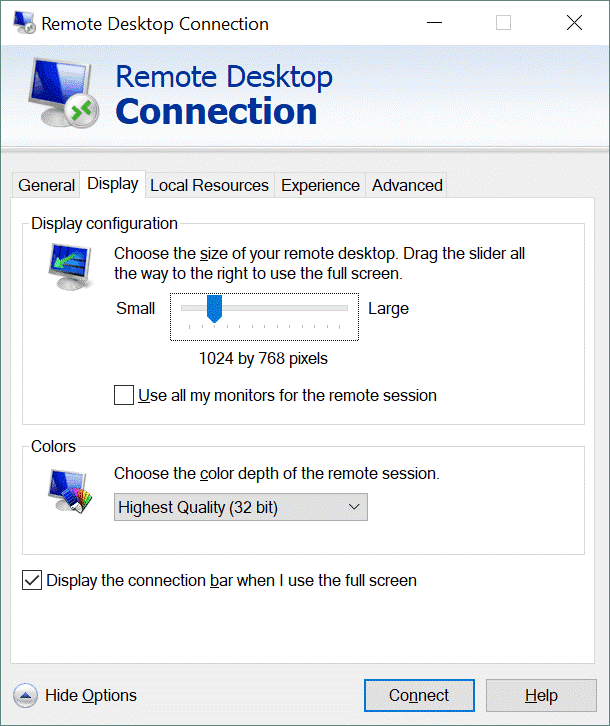
Now you can connect to your Ubuntu system from a Windows remote machine using RDP and adjust the screen resolution as needed. You have successfully established the RDP connection which brings us to the end of this demonstration.


В-четвертых, настроить брандмауэр
XRDP Daemon слушает порт на всех сетевых интерфейсахОтказ Если вы запустите брандмауэр на вашем сервере Ubuntu, вам нужно открыть порт XRDP.
Хотите разрешить серверы XRDP из указанного IP-адреса или IP-диапазона, например,, Вам нужно запустить следующую команду:
Если вы хотите разрешить доступ из любого места (из-за соображений безопасности, этот путь не поощряет), запустить:
Хотите увеличить безопасность, вы можете рассмотреть XRDP просто отслеживать localhost и создать туннель SSH и поставить локальную машинуШифрование потока между портом к одному и тому же порту удаленного сервера.
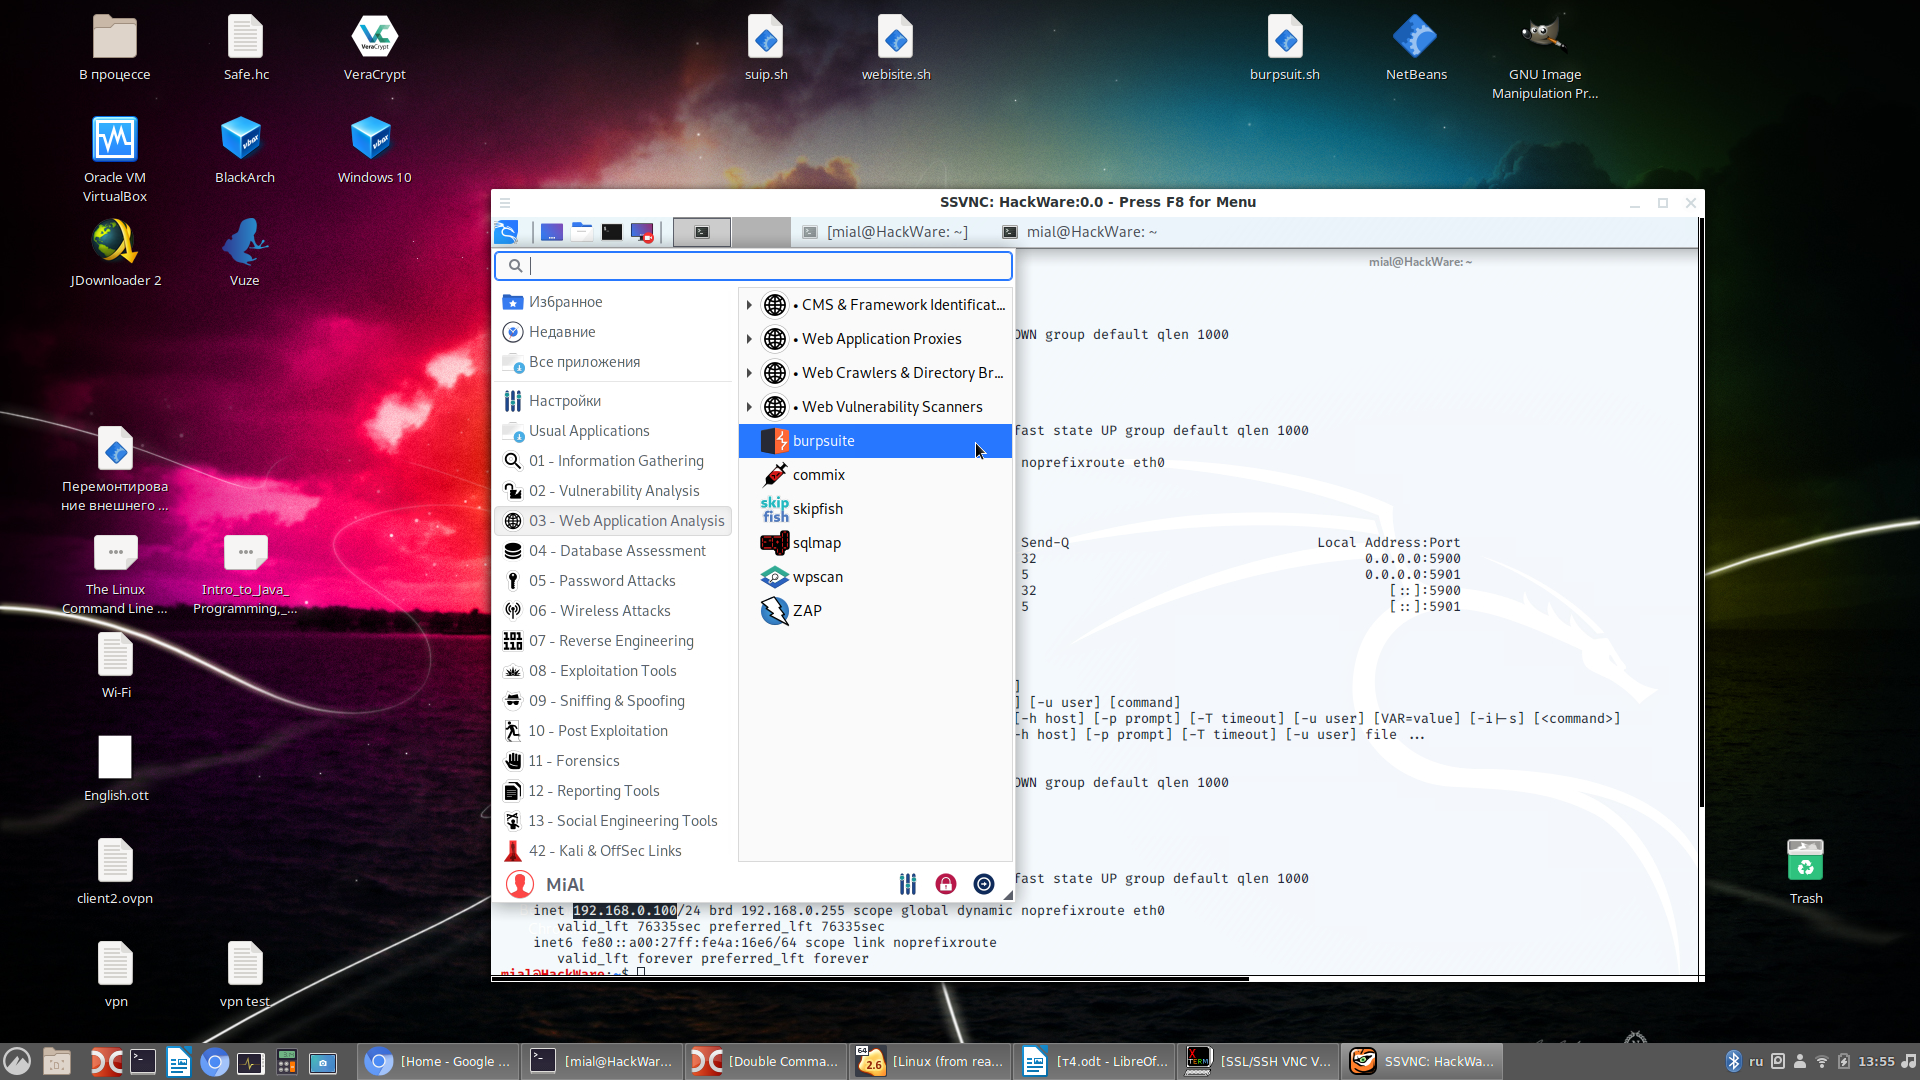
Установите Remmina в Linux
Remmina часто является приложением для удаленного рабочего стола по умолчанию во многих дистрибутивах Linux из-за количества поддерживаемых протоколов. С учетом сказанного, не во всех ОС она настроена по умолчанию, поэтому нам нужно обсудить, как настроить программу, прежде чем продолжить работу с руководством.
Чтобы установить приложение удаленного рабочего стола Remmina на ПК с Linux, запустите терминал и следуйте инструкциям, которые соответствуют используемой вами ОС.
Ubuntu
Вам нужно запустить Remmina на вашем ПК с Ubuntu? Найдите «Remmina» в центре программного обеспечения Ubuntu и нажмите «Установить». Или введите команду терминала ниже.
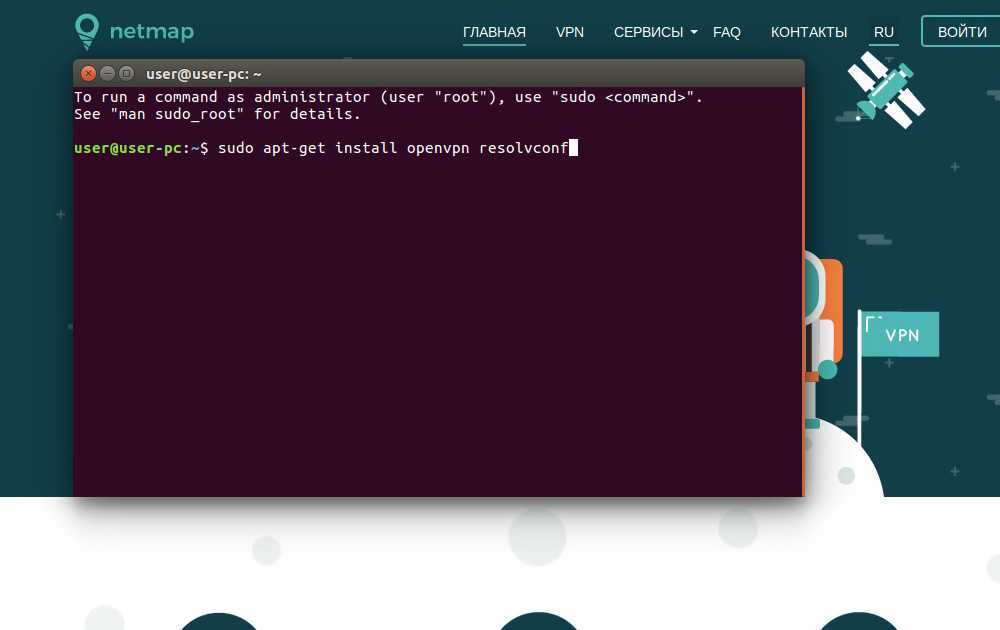
sudo apt install remmina
Debian
Приложение удаленного рабочего стола Remmina доступно в Debian и может быть установлено с Apt-get команда. Имейте в виду, что версия, доступная в источниках программного обеспечения Debian, скорее всего, устарела.
Примечание. Если вам нужна самая новая версия, следуйте нашему руководству о том, как получить новое программное обеспечение в Debian Linux.
sudo apt-get install remmina
Arch Linux
Remmina доступна в репозитории программного обеспечения «Сообщество» в Arch Linux. Если у вас не включен этот источник программного обеспечения, сделайте следующее.
Шаг 1: Открой свой pacman.conf файл в текстовом редакторе Nano.
sudo nano /etc/pacman.conf
Шаг 2: Прокрутите файл Pacman.conf и найдите «Сообщество». Удалите символ # перед ним. Не забудьте также удалить символ # из двух строк прямо под ним.
Шаг 3: Сохраните изменения с помощью Ctrl + O комбинация клавиш.
Шаг 4: Выйдите из Nano, нажав Ctrl + X и вернитесь в интерфейс командной строки терминала.
Шаг 5: Используя команду Pacman, повторно синхронизируйте свой компьютер с исходными кодами программного обеспечения Arch Linux и настройте «Сообщество».
sudo pacman -Syy
Шаг 6: Установите приложение удаленного рабочего стола Remmina с Pacman.
sudo pacman -S remmina
Fedora
Remmina легко доступна для пользователей Fedora Linux и относительно актуальна из-за того, как часто Fedora обновляет пакеты в своем репозитории программного обеспечения.
Чтобы установить программу на свой компьютер с Fedora, используйте DNF пакетный инструмент.
sudo dnf install remmina -y
OpenSUSE
Чтобы получить приложение подключения к удаленному рабочему столу Remmina на OpenSUSE, вы должны использовать Zypper команда.
Имейте в виду, что, поскольку существует несколько различных выпусков OpenSUSE, новинка Remmina может отличаться.
sudo zypper install remmina
Примечание: Если у вас должна быть последняя и самая лучшая версия приложения для удаленного рабочего стола Remmina, попробуйте вместо этого инструкции Flatpak или Snap.
Flatpak
Remmina доступна на Flathub в формате Flatpak. Чтобы установить его, вы должны сначала настроить среду выполнения Flatpak на своем ПК. Следуйте нашему руководству по этому вопросу, чтобы узнать больше.
После того, как вы запустили среду выполнения Flatpak, введите следующие команды, чтобы настроить Remmina.
flatpak remote-add --if-not-exists flathub https://flathub.org/repo/flathub.flatpakrepo

flatpak install flathub org.remmina.Remmina

flatpak run org.remmina.Remmina
Пакет Snap
Приложение Remmina поддерживает пакеты Snap.
Если вы хотите использовать Snap-версию Remmina, следуйте нашему руководству, чтобы узнать, как настроить Snap на своем ПК. Затем введите команду ниже, чтобы она заработала.
sudo snap install remmina
Step 1 — Installing a Desktop Environment on Ubuntu
In this step, you will install and configure a desktop environment on your Ubuntu server. By default, an Ubuntu server comes with a terminal environment only. A desktop environment will need to be installed to access a user interface.
From the available options for Ubuntu, you will install the Xfce desktop environment. Xfce offers a lightweight, user-friendly desktop environment for Linux-based systems.
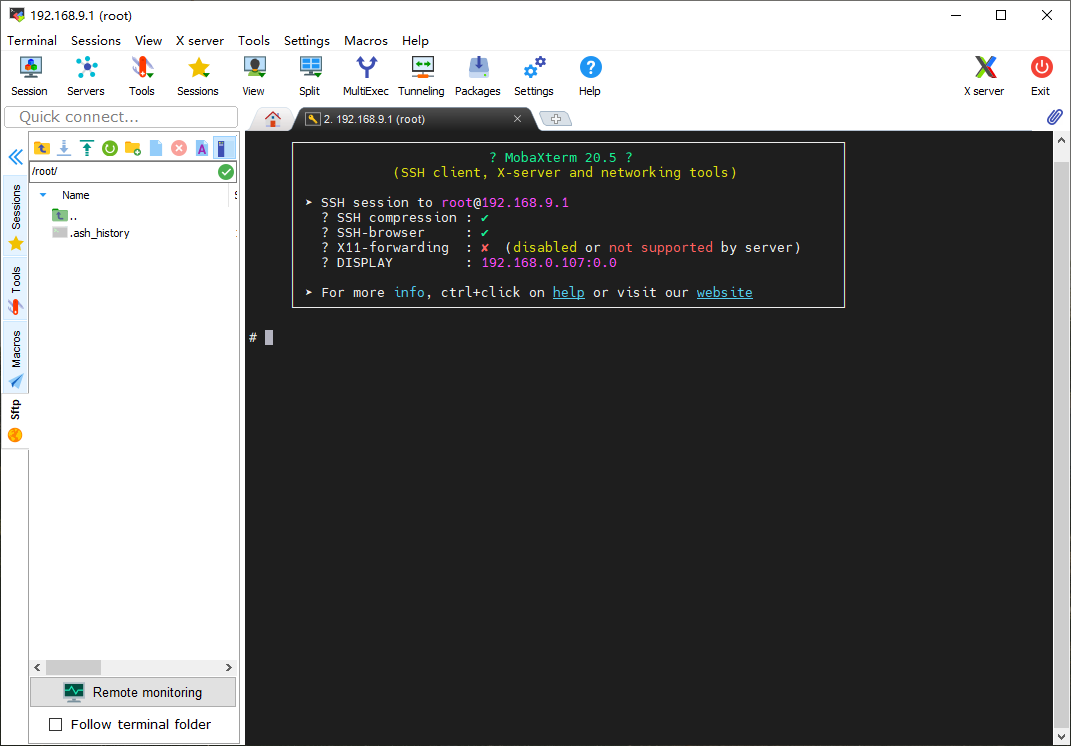
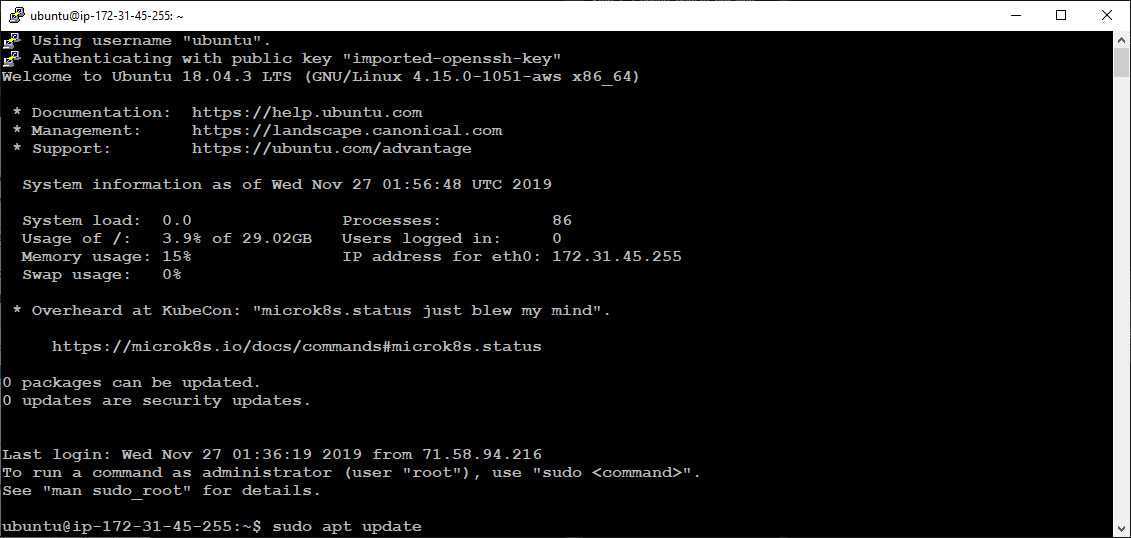
To begin, connect to your server using SSH and update the list of available packages using the following command:
Next, install the and packages on your server:
You will be prompted to choose a display manager, which is a program that manages graphical login mechanisms and user sessions. You can select any option from the list of available display managers, but this tutorial will use .
After installing the desktop environment, you will now install xrdp on your server.
Limitations
One session per user limitation
Only one session is allowed per user. This means that if a user is logged on locally on the Ubuntu machine, the user will not be able to perform a remote session (the xRDP connection will initiate but will end up immediately). If a user is logged on remotely on the system, it will not be able to login locally (if the user tries to login locally, the login screen will loop and the login screen will be presented again to the user)
Switch between standard and Custom install
This version of the script can be run multiple times on the same machine. However, because of this new behavior, you cannot perform a standard installation and then decide to perform the custom installation. Once you have selected your installation mode, you will have to stick to it. This is kind of checked by the script.
So, if you have performed a standard installation but afterwards you might want to use the custom installation option, the script will ignore the request. If you want to move from standard install mode to custom mode (or vice versa), the correct process is
- remove xrdp (using the xrdp-installer-1.2.sh -r option)
- perform a new installation using your selected installation mode (standard or custom install mode)
Final Notes
This is it for this post !
Please if you have time or want to help us in creating the best xrdp installer script, download the script and provide constructive feedback. If you find a bug or an issue with the script, let us know as well so we can try to fix it. We will probably post additional information about the script, Ubuntu 20.04 and xRDP in the coming weeks…
Stay tuned
Till next time
See ya
What is Linux xrdp?
Xrdp is an open source solution that enables remote access to Linux machines using the Windows remote desktop protocol (RDP). This remote access client for Linux is compatible with multiple remote access clients such as rdesktop, FreeRDP, and NeutrinoRDP.
Prerequisites for running xrdp include:
- • Installation of the xrdp and xorgxrdp packages;
- • Firewall configured to allow connections on TCP port 3389.
Xrdp provides access to remotely located Linux machines using any one of several RDP clients. The software establishes the connections via the Microsoft Remote Desktop Protocol (RDP). You can enable remote access through xrdp’s graphical interface with rdesktop, NeutrinoRDP, FreeRDP, or the Microsoft Remote Desktop Client.
In addition to its ability to provide a graphical remote session between a Linux and Windows remote machine, other features of xrdp include:
- • Drive redirections where you can mount local drives on a remote machine;
- • Clipboard transfer of files and text between machines;
- • Audio redirection;
- • Encrypted RDP transport with TLS.
Step 5 – Test your configuration
After the script has run and after the reboot/shutdown and start process, it’s time to test and see if you can indeed perform a smooth remote connection to your Ubuntu machine. Remember that a user can either be logged on locally or logged on remotely on the machine when working with xRDP solution. If the user, performing the remote connection, is logged into the system locally the remote connection will start but will be terminated immediately. This is the way it works nowadays.
So, ensure that the user performing the test is not locally logged on, start your favorite remote desktop client and perform your connection. Based on your options, you will be presented either with the green xrdp login screen or with the custom login screen (purple background). Simply enter your credentials and start testing your installation. If everything is ok, you will see a similar Desktop interface where Gnome Desktop is used and the Dock is visible.
Establishing a Ubuntu Remote Desktop Server with xrdp
A Linux system running Ubuntu can be configured to act as an RDP server and allow connection to a Windows machine from the remote Linux computer. This can be done using the standard Windows Remote Desktop client which, unfortunately, is not installed as part of most Linux distros. This means you need to install and configure the RDP server manually on the Linux host. Once installation is complete, you can graphically manage a remote Linux machine.
We are going to show you how to configure a Ubuntu 18.04.2 system for access by RDP using the xrdp Linux package.
Using xrdp, machines running operating systems other than Windows can be configured as an RDP server. Setting up a Linux remote desktop with xrdp requires that the X Window System is installed on your computer.
How to set up an xrdp server on a Ubuntu system
- Update the software repository tree with the following command:
- Install the xrdp software from the online repository:
- The next step involves installing the XFCE desktop environment. GNOME 3 is installed by default with Ubuntu 18, but xrdp will get better performance using the lightweight XFCE alternative. You can still use GNOME to log into the Ubuntu machine locally.
- Now it’s time to install XFCE:
- Create the .xsession file in the user’s home directory and write the xfce4-session string into that file. By doing this, you force the xrdp server to default to the XFCE graphical environment.
-
Set xrdp to start automatically on system reboot.
- Bounce the xrdp service to ensure the changes have taken effect.
- Clear the configuration that is stored in the startwm.sh shell script file that is used when starting xrdp:file that is needed to start xrdp: (You might want to create a copy of the files before clearing it. If so, use this command: )
- Use vim to edit the startwm.sh shell script configuration file:
- The following lines have to be included in the startwm.sh shell script file:
- Make sure one empty line is left at the end of the file.
- Save the startwm.sh configuration file after making the changes and quit by pressing Esc and typing: wq. Then, restart the xrdp service:
-
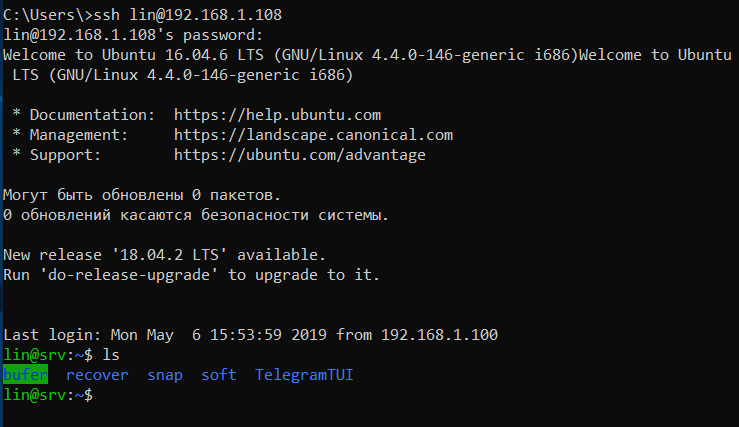
Identifying the IP address of the Linux machine:
or
Either of the above commands will return the machine’s IP address. In our example, the IP address is 192.168.101.208.
In Ubuntu, the firewall is disabled by default. If the firewall is active, you need to open TCP port 3389 to enable remote inbound connections.
You can specify the IP addresses or custom networks that can connect to the remote machine for additional security.
Note: When accessing a remote machine that is behind a NAT on a local network, you can configure port forwarding to allow connectivity from an external IP address. A VPN connection can be used instead of port forwarding to the remote router or firewall.
Как исправить черный экран XRDP в Ubuntu
Решение довольно простое. Откройте Ubuntu и отредактируйте /etc/xrdp/startwm.sh сценарий.
Добавьте эти строки непосредственно перед строками, которые тестируют и выполняют Xsession, как показано на скриншоте ниже.
Как исправить черный экран XRDP в Ubuntu
Далее требуется сохранить файл и выйдите. Не забудьте перезапуститm службу Xrdp.
Затем повторно подключитесь. После первоначальной аутентификации вам потребуется пройти повторную аутентификацию, как показано на рисунке.
Аутентификация пользователя XRDP
Введите свои учетные данные и нажмите кнопку «аутентификация«.После проделанного в перейдете на экран стола удаленной системы Ubuntu.
Удаленный Доступ К Рабочему Столу Ubuntu
Заключение
Ну вот и все, в этой статье вы узнали Как установить Xrdp на Ubuntu 20.04. Это совсем не сложно и это может сделать даже новичок Linux. Если у вас что-то не получилось или вы нашли ошибку, оставьте комментарий.