Содержание Playbook
initial_server_setup.yml—- hosts: all remote_user: root gather_facts: false vars: create_user: sammy copy_local_key: «{{ lookup(‘file’, lookup(‘env’,’HOME’) + ‘/.ssh/id_rsa.pub’) }}» sys_packages: tasks: — name: Make sure we have a ‘wheel’ group group: name: wheel state: present — name: Allow ‘wheel’ group to have passwordless sudo lineinfile: path: /etc/sudoers state: present regexp: ‘^%wheel’ line: ‘%wheel ALL=(ALL) NOPASSWD: ALL’ validate: ‘/usr/sbin/visudo -cf %s’ — name: Create a new regular user with sudo privileges user: name: «` create_user `» groups: wheel shell: /bin/bash — name: Set authorized key for remote user authorized_key: user: «` create_user `» state: present key: «` copy_local_key `» — name: Disable password authentication for root lineinfile: path: /etc/ssh/sshd_config state: present regexp: ‘^PermitRootLogin’ line: ‘PermitRootLogin prohibit-password’ — name: Update apt apt: update_cache=yes — name: Install required system packages apt: name=` sys_packages ` state=latest — name: UFW — Allow SSH connections ufw: rule: allow name: OpenSSH — name: UFW — Deny all other incoming traffic by default ufw: state: enabled policy: deny direction: incoming
Как Ansible работает?
Ansible работает путем настройки клиентских компьютеров, называемых хосты Ansible (Ansible hosts), с компьютера, на котором установлены и настроены компоненты Ansible, который называется узлом управления Ansible (Ansible control node).
Они взаимодействует по обычным каналам SSH для извлечения информации из удаленных систем, передачи команд и копирования файлов. Поэтому система Ansible не требует установки дополнительного программного обеспечения на клиентских компьютерах.
Это одна из вещей, благодаря которой Ansible упрощает администрирование серверов. Любой сервер, который имеет открытый порт SSH, может быть подвержен конфигурированию с помощью Ansible, независимо от того, в каком состоянии конфигурации он находится. Это означает, что любой компьютер, которым вы можете управлять через SSH, вы также можете администрировать через Ansible.
Ansible использует модульный подход, что позволяет легко расширить функциональные возможности основной системы для решения конкретных сценариев. Модули могут быть написаны на любом языке и общаться стандартным JSON.
Конфигурационные файлы в основном написаны в формате YAML. Ansible может взаимодействовать с хостами либо с помощью инструментов командной строки, либо с помощью сценариев конфигурации, известных как Playbook (плейбук).
Step 1 — Installing Ansible
To begin using Ansible as a means of managing your server infrastructure, you need to install the Ansible software on the machine that will serve as the Ansible control node.
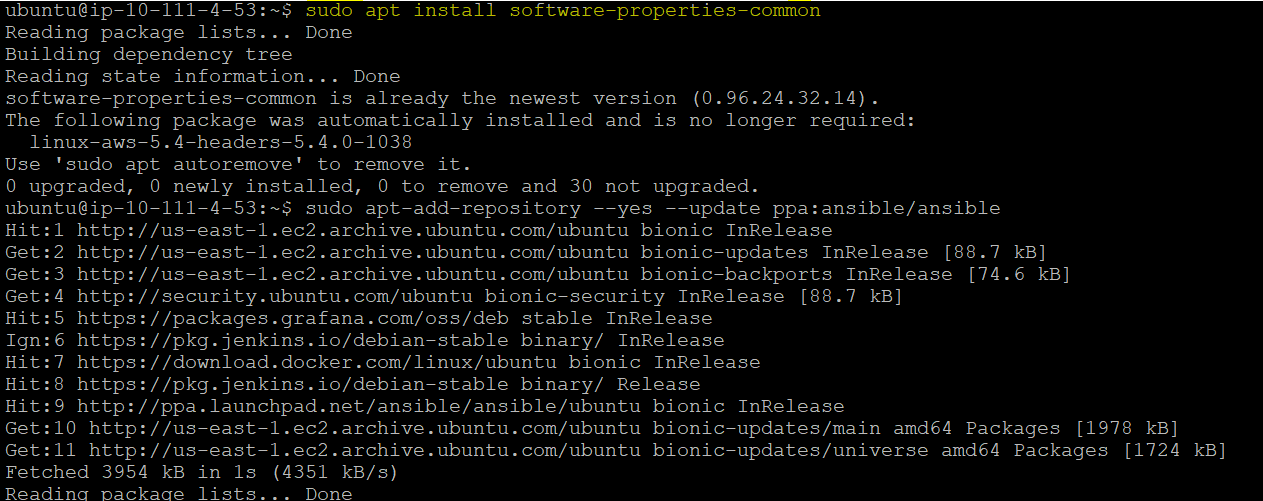
From your control node, run the following command to include the official project’s PPA (personal package archive) in your system’s list of sources:
Press when prompted to accept the PPA addition.
Next, refresh your system’s package index so that it is aware of the packages available in the newly included PPA:
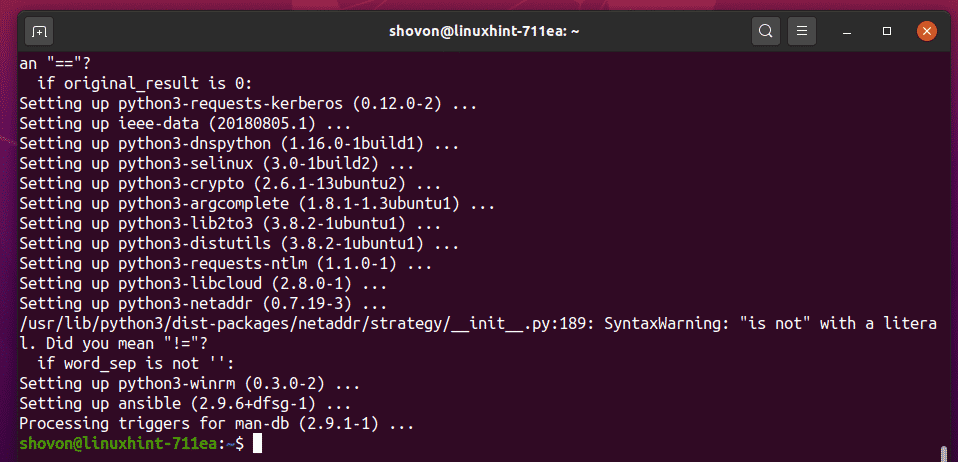
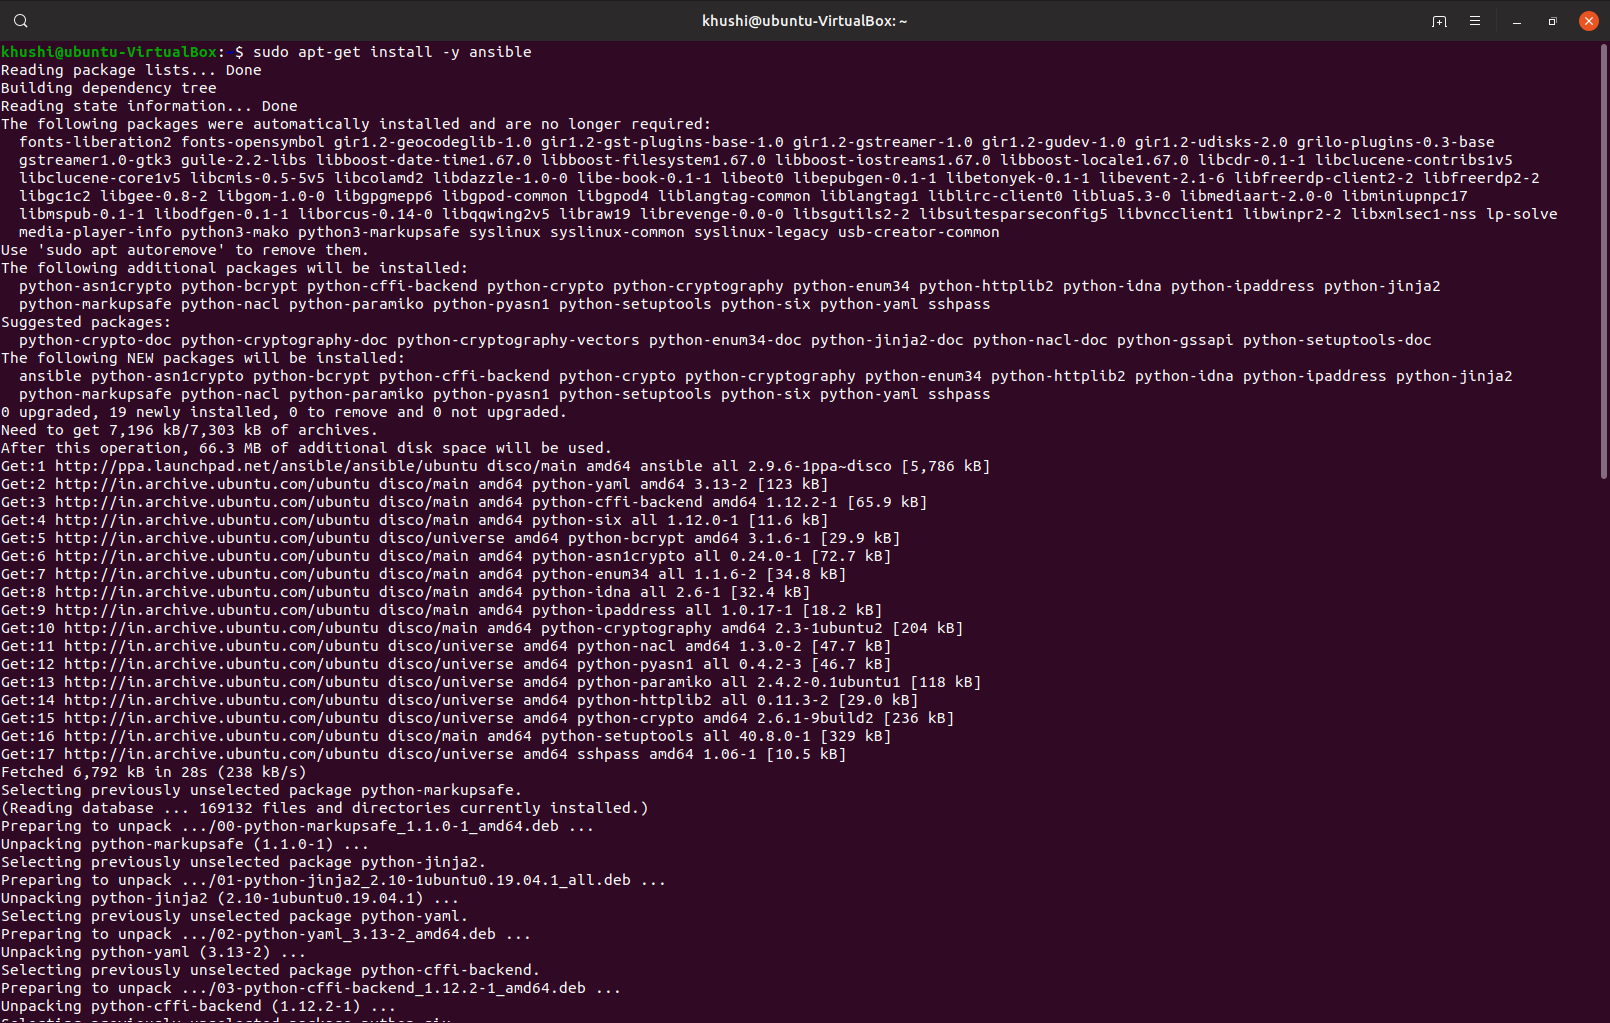
Following this update, you can install the Ansible software with:
Your Ansible control node now has all of the software required to administer your hosts. Next, we will go over how to add your hosts to the control node’s inventory file so that it can control them.
Начальная настройка и тестовый запуск Ansible
Разобьем наши действия на небольшие группы.
Настройка инвентарного файла
В данном файле хранится информация о хостах и/или группах хостов. Также в нем могет храниться переменные, определенные для конкретной группы хостов или конкретного компьютера.
Есть два варианта написания инвентарного файла — в формате yml или ini. Рассмотрим оба.
1. Файл формата ini.
Даннай формат используется по умолчанию. Откроем на редактирование файл с серверами, которыми хотим управлять:
vi /etc/ansible/hosts
и приведем его к следующему виду:
192.168.1.100
192.168.1.101
* в данном примере создана группа серверов test_servers, в которую добавлены два сервера с IP-адресами 192.168.1.100 и 192.168.1.101.
2. Файл формата yml.
Создадим отдельный каталог:
mkdir /etc/ansible/inventory
И создадим файл:
vi /etc/ansible/inventory/test_servers.yml
test_servers:
vars:
ansible_python_interpreter: /usr/bin/python3
hosts:
server01:
ansible_ssh_host: 192.168.1.100
ansible_ssh_port: 22
server02:
ansible_ssh_host: 192.168.1.101
ansible_ssh_port: 22
* в данном примере также создана группа серверов test_servers, в которую добавлены два сервера server01 и server02 с IP-адресами 192.168.1.100 и 192.168.1.101. Адреса не обязательно писать, если имя машины разрешается с помощью DNS
Также не обязательно указывать порты, если они стандартные (22).
** обратите внимание, что мы также добавили переменную ansible_python_interpreter с указанием пути для запуска python
Настройка ansible
Открываем конфигурационный файл ansible:
vi /etc/ansible/ansible.cfg
Снимаем комментарий с опции host_key_checking, приведя ее к виду:
host_key_checking = False
* данная настройка позволит нашему серверу управления автоматически принимать ssh fingerprint, избавляя нас от необходимости постоянно вводить yes, когда мы впервые конфигурируем новый сервер.
Также в секцию defaults добавим:
…
interpreter_python = auto_silent
* данная опция указывает, чтобы ansible автоматически искал python на целевом хосте без показа предупреждений.
Тестовый запуск
Теперь выполним проверку доступности добавленных серверов:
ansible -m ping test_servers -u root -kK
* данная команда проверит доступность по сети двух серверов из группы test_servers от учетной записи root.
Будет запрошен пароль от учетной записи (в нашем случае, root). После будет запрошен пароль суперпользователя на серверах.
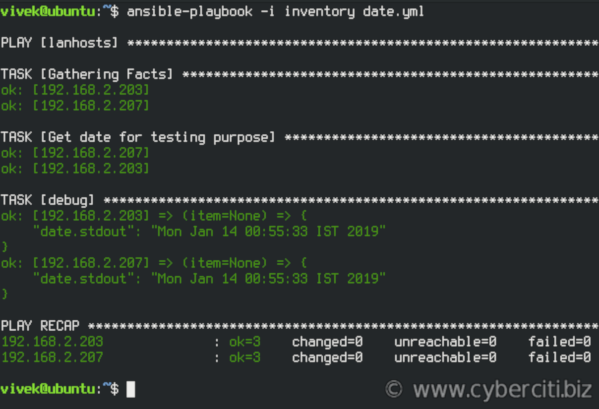
На экране должно появиться, примерно, следующее:
192.168.1.100 | SUCCESS => {
«ansible_facts»: {
«discovered_interpreter_python»: «/usr/bin/python3»
},
«changed»: false,
«ping»: «pong»
}
192.168.1.101 | SUCCESS => {
«ansible_facts»: {
«discovered_interpreter_python»: «/usr/bin/python»
},
«changed»: false,
«ping»: «pong»
}
Наш сервер управления готов к работе.
Step 5) Create ansible cfg and inventory file
It is always recommended to have separate ansible.cfg and inventory file for each project. For the demonstration purpose, I am using demo as the project name. So, create the project folder first by running mkdir command.
$ mkdir demo
Download sample ansble.cfg file to ~/demo folder using following wget command
$ cd demo
$ wget https://raw.githubusercontent.com/ansible/ansible/stable-2.9/examples/ansible.cfg
Edit the ~/demo/ansible.cfg file, set the following parameters,
$ vi ~/demo/ansible.cfg
Under the default sections
inventory      = /home/sysops/demo/inventory
remote_user = sysops
host_key_checking = False
Under the privilege_escalation section
become=True
become_method=sudo
become_user=root
become_ask_pass=False
Save and close the file. Now, let’s create the inventory file that we have defined in ~/demo/ansible.cfg file.

$ vi ~/demo/inventory

node2.example.com


node1.example.com
save and exit the file
Re-run ansible --version command to verify that new config file is set
$ cd demo/
$ ansible --version
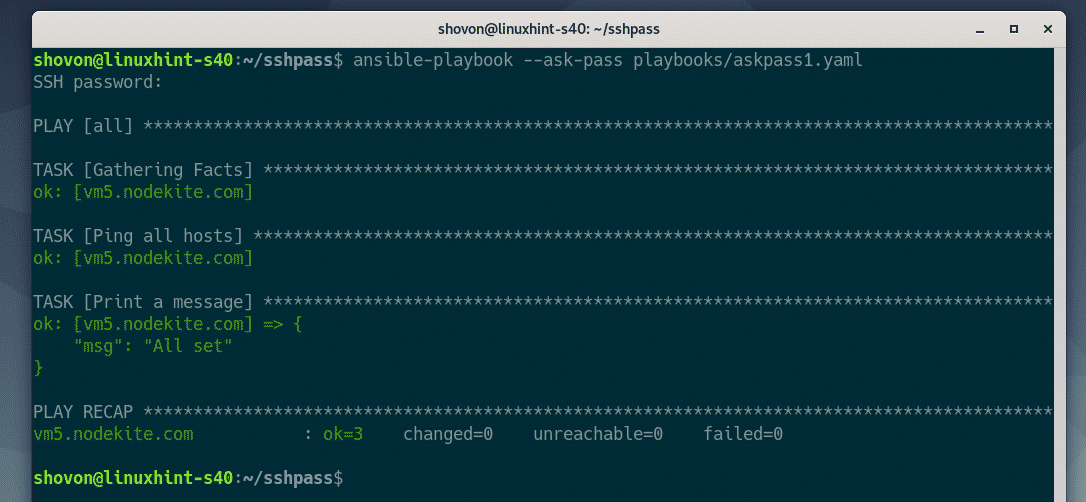
Great, ansible is now reading our project’s ansible configuration file. Let’s verify the managed nodes connectivity using ansible ad-hoc command,
$ ansible all -m ping
Note : Make sure run ansible command from demo folder.
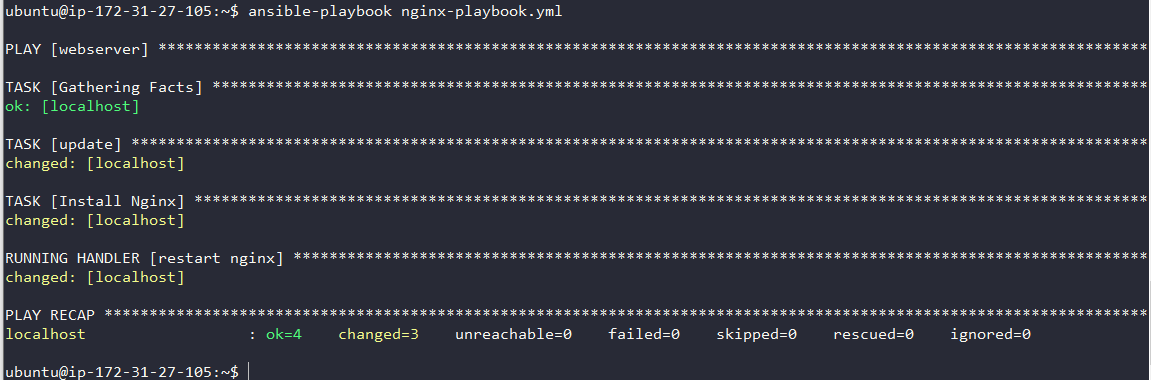
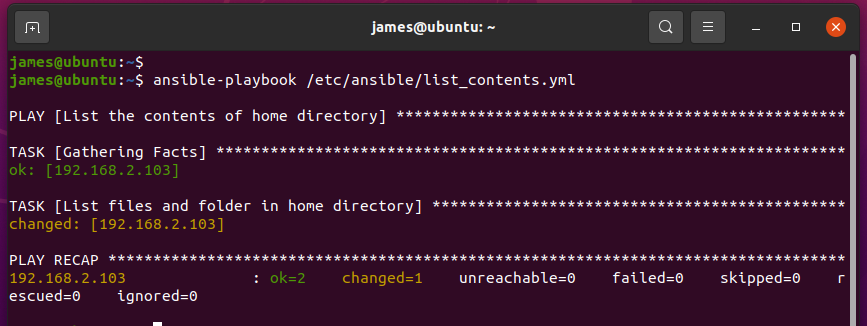
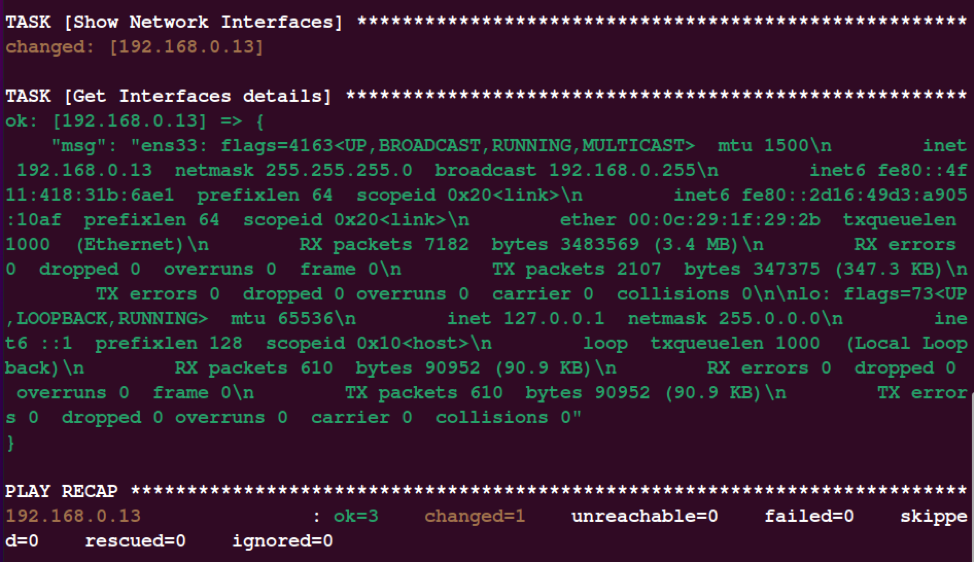
Output of command would look like below:
This output confirms that connectivity is in place from control node to managed hosts.
Step 6) Install and Setup Ansible AWX
We are going to clone the AWX installer from the Github repository. But let’s first install git, pip, and when (password generator)
$ sudo apt install -y python3-pip git pwgen
Next, install the docker-compose module that matches your version of docker-compose.
$ sudo pip3 install docker-compose==1.28.5
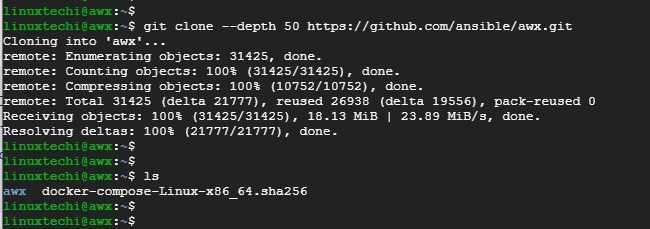
Then clone the AWX source from the Github repository as shown
$ git clone --depth 50 https://github.com/ansible/awx.git
Navigate to the installer directory.
$ cd aws/installer
Using the pwgen command, generate a secret key
Copy this key and save it somewhere. Next, open the inventory file that is in the same directory.
$ vi inventory
Uncomment the admin and password parameters and be sure to provide a strong admin password. This is the password that you will use to log in to AWX on the web login page.
admin_user=admin
admin_password=<Strong-Admin-password>
Additionally, update the secret key variable with the secret key generated earlier.
secret_key=7rnNkbkpqo5H1gaqB6hTXnCaKnXuOo
Step 2 — Adding Packages Installation Tasks to your Playbook
By default, tasks are executed synchronously by Ansible in order from top to bottom in your playbook. This means task ordering is important, and you can safely assume one task will finish executing before the next task begins.
All tasks in this playbook can stand alone and be re-used in your other playbooks.
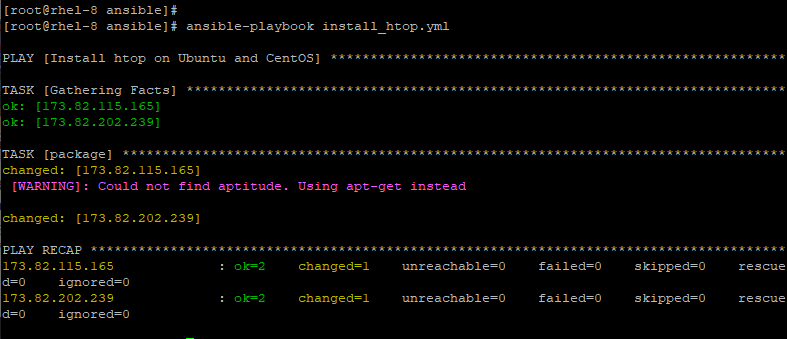
Add your first tasks of installing , a tool for interfacing with the Linux package manager, and installing the required system packages. Ansible will ensure these packages are always installed on your server:
playbook.yml
Here, you’re using the Ansible builtin module to direct Ansible to install your packages. Modules in Ansible are shortcuts to execute operations that you would otherwise have to run as raw bash commands. Ansible safely falls back onto for installing packages if is not available, but Ansible has historically preferred .
You can add or remove packages to your liking. This will ensure all packages are not only present, but on the latest version, and done after an update with is called.
Conclusion
Automating your infrastructure setup can not only save you time, but it also helps to ensure that your servers will follow a standard configuration that can be customized to your needs. With the distributed nature of modern applications and the need for consistency between different staging environments, automation like this has become a central component in many teams’ development processes.
In this guide, you demonstrated how to use Ansible to automate the process of installing and setting up Docker on a remote server. Because each individual typically has different needs when working with containers, we encourage you to check out the official Ansible documentation for more information and use cases of the Ansible module.
If you’d like to include other tasks in this playbook to further customize your initial server setup, please refer to our introductory Ansible guide Configuration Management 101: Writing Ansible Playbooks.
Step 3 — Testing Connection
After setting up the inventory file to include your servers, it’s time to check if Ansible is able to connect to these servers and run commands via SSH.
For this guide, we’ll be using the Ubuntu root account because that’s typically the only account available by default on newly created servers. If your Ansible hosts already have a regular sudo user created, you are encouraged to use that account instead.
You can use the argument to specify the remote system user. When not provided, Ansible will try to connect as your current system user on the control node.
From your local machine or Ansible control node, run:
This command will use Ansible’s built-in module to run a connectivity test on all nodes from your default inventory, connecting as root. The module will test:
- if hosts are accessible;
- if you have valid SSH credentials;
- if hosts are able to run Ansible modules using Python.
You should get output similar to this:
If this is the first time you’re connecting to these servers via SSH, you’ll be asked to confirm the authenticity of the hosts you’re connecting to via Ansible. When prompted, type and then hit to confirm.
Once you get a reply back from a host, it means you’re ready to run Ansible commands and playbooks on that server.
Note: If you are unable to get a successful response back from your servers, check our Ansible Cheat Sheet Guide for more information on how to run Ansible commands with different connection options.
Обновление сертификата
Так как большинство современных сервисов требуют для своей работы сертификат, рассмотрим пример централизованного их обновления.
Предположим, что у нас есть сертификат wildcard и необходимо его копировать на все серверы компании. Если серверов много, делать это вручную при очередном его обновлении неудобно.
И так, создаем новую роль:
ansible-galaxy init Update_Certs
Открываем на редактирование файл с заданиями:
vi Update_Certs/tasks/main.yml
—
— name: Register System Services
service_facts:
register: services_state
— name: Create Directories For Certs
file:
path: ‘/etc/ssl/dmoks’
state: directory
owner: root
group: root
mode: 0755
— name: Copy Cert File If Different
copy:
src: «` item `»
dest: /etc/ssl/dmosk
remote_src: no
mode: 0644
owner: root
group: root
with_fileglob:
— files/*
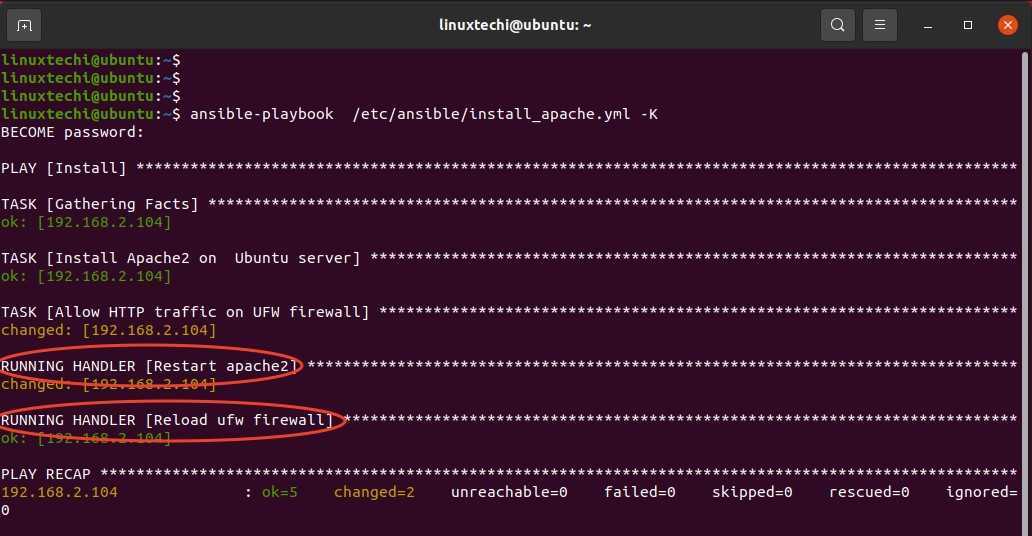
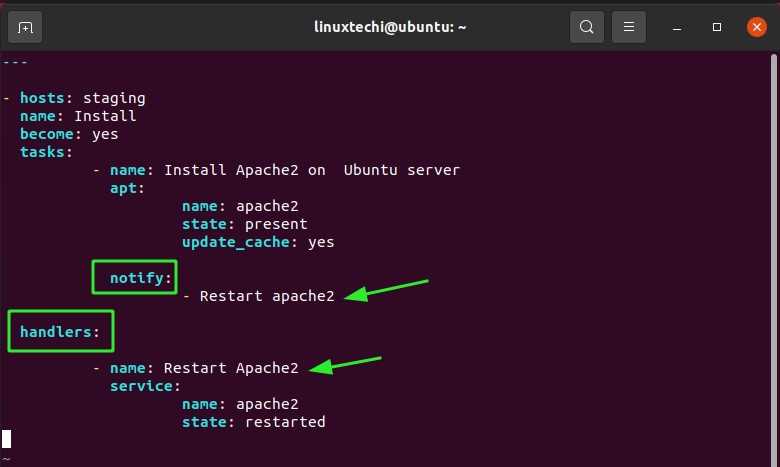
notify:
— reload httpd
— reload nginx
— reload apache2
* будут выполняться следующие задачи:
- Register System Services — получаем список всех служб, которые работают на целевом компьютере
- Create Directories For Certs — создаем каталог /etc/ssl/dmoks, в который будем копировать сертификаты
- Copy Cert File If Different — копируем сертификаты в целевой каталог. Если были изменения в любом из файлов, по очереди запускаем 3 задачи в handlers для перезагрузки сервисов. Здесь нам нужно самостоятельно перечислить все службы, которые вам нужно перезагружать.
Открываем на редактирование файл в каталоге handlers:
vi Update_Certs/handlers/main.yml
Добавим строки:
—
— name: reload httpd
systemd:
name: httpd
state: restarted
when:
services_state.ansible_facts.services.state == ‘running’
ignore_errors: yes
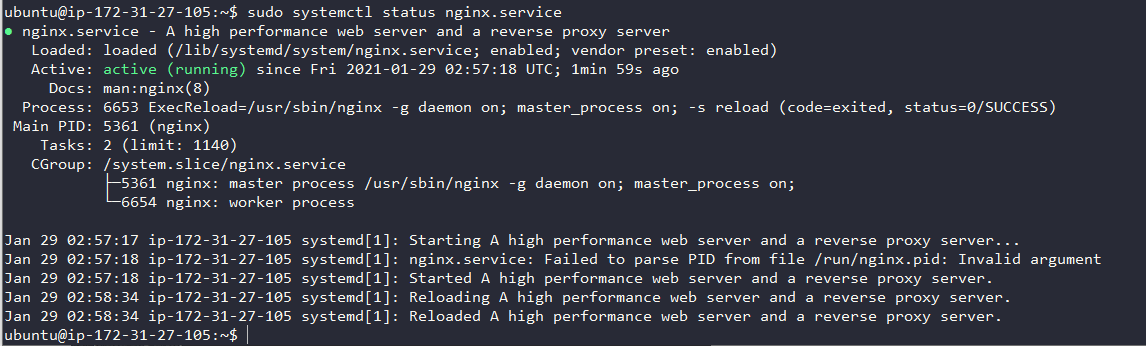
— name: reload nginx
systemd:
name: nginx
state: restarted
when:
services_state.ansible_facts.services.state == ‘running’
ignore_errors: yes
— name: reload apache2
systemd:
name: apache2
state: restarted
when:
services_state.ansible_facts.services.state == ‘running’
ignore_errors: yes
* в задачах, в случае изменения сертификатов, мы выполняем задания reload httpd, reload nginx и reload apache2. Все задания описаны в данном файле. В данном примере мы проверяем, что сервисы запущены и если это так, перезапускаем их. Нам необходимо перезапускать все службы, которые используют сертификаты (в противном случае, обновленные сертификаты не будут использоваться). При необходимости дописать службы, делаем это по аналогии.
В каталог Update_Certs/files/ помещаем наши сертификаты — все содержимое данного каталога будет копироваться на целевые компьютеры в каталог /etc/ssl/dmosk.
Создаем файл для плейбука:
vi start_role.yml
—
— hosts: test_servers
user: dmosk
become: true
become_method: su
become_user: root
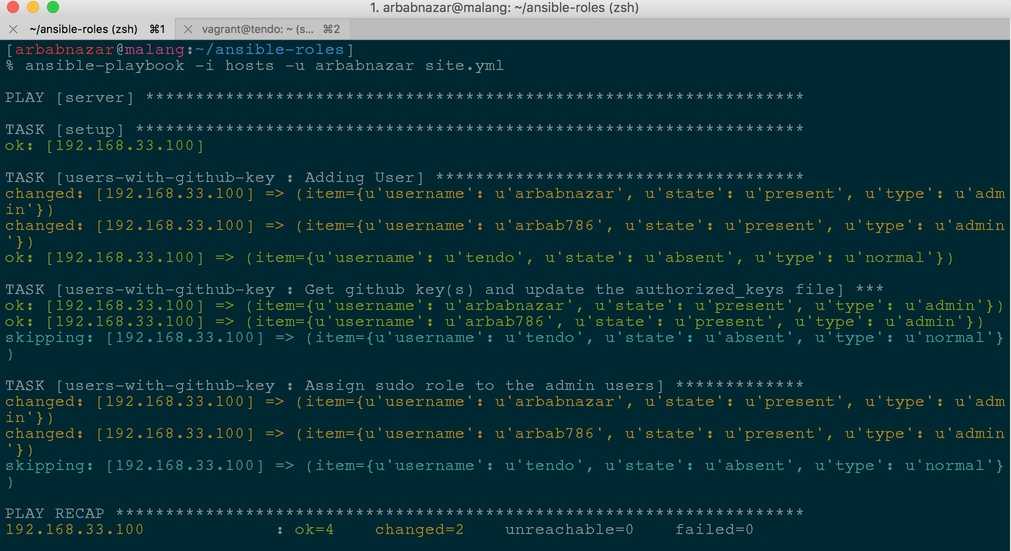
roles:
— Update_Certs
* в данном примере мы запускаем выполнение роли Update_Certs на серверы из группы test_servers.
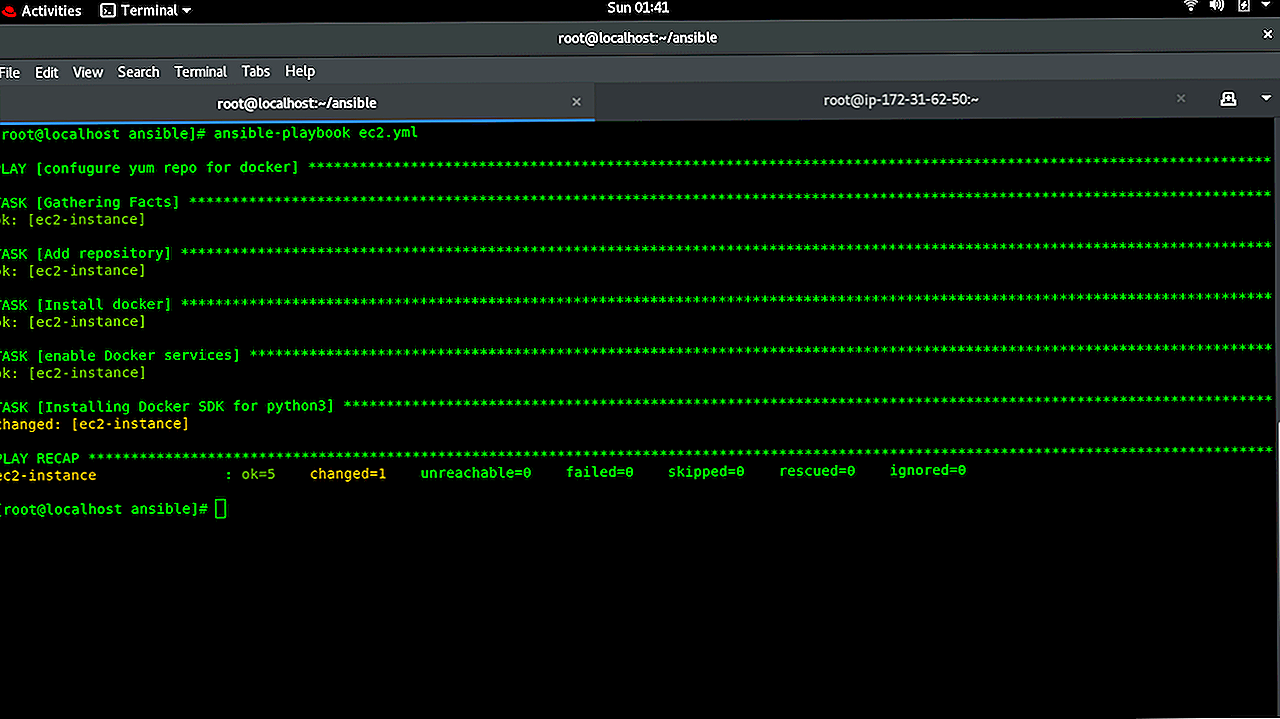
Запускаем созданный плейбук:
ansible-playbook start_role.yml -kK
Создание роли
Роли в Ansible используются для логического разделения плейбука. Они имеют строгий синтаксис и файловую структуру. Таким образом, конфигурация становится более упорядоченной и понятной для дальнейшей поддержки.


И так, для ролей должна быть четкая файловая структура — создаем каталоги:
mkdir -p /etc/ansible/roles/nginx/tasks
mkdir -p /etc/ansible/roles/epel/tasks
* в данном случае мы создали каталоги nginx, epel и tasks внутри каталога roles. В ansible это означает, что мы создали роли с названием nginx и epel, а файл main.yml, который мы поместим в каталоги tasks будет описывать задачи данных ролей.
Создаем файл с описанием задач для роли nginx:
vi /etc/ansible/roles/nginx/tasks/main.yml
—
— name: Install Nginx Web Server on RedHat Family
yum:
name=nginx
state=latest
when:
ansible_os_family == «RedHat»
notify:
— nginx systemd
— name: Install Nginx Web Server on Debian Family
apt:
name=nginx
state=latest
when:
ansible_os_family == «Debian»
notify:
— nginx systemd
* где
- — — начало файла YAML;
- name — название для роли (может быть любым);
- yum/apt — используемый модуль для установки приложения;
- yum/apt name — название пакета, которое мы устанавливаем;
- yum/apt state — состояние пакета, которое должно контролироваться ролью;
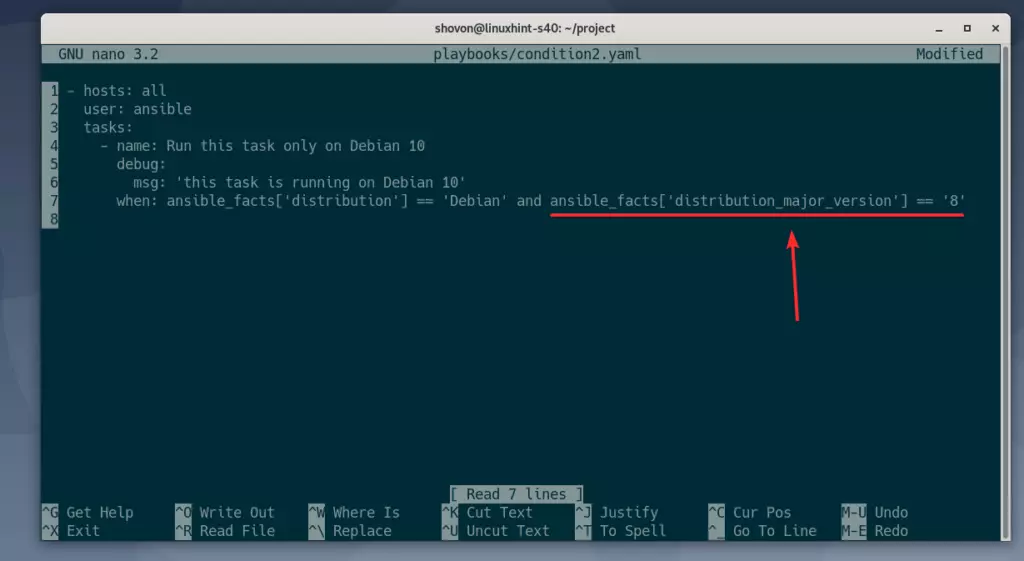
- when — условие, при котором данная роль будет выполняться;
- notify — обработчик, который будет вызван в случае успешного выполнения задачи. При необходимости, можно задать несколько обработчиков;
* В данном примере мы создали простую задачу для роли по развертыванию nginx. На системы RPM установка выполняется с помощью модуля yum, на deb — apt. Версия должна быть последней (latest); после установки пакета, необходимо разрешить автозапуск сервиса и запустить его.
* при установке пакетов также следует учитывать, что некоторые могут иметь разные названия в разных системах. Например, Apache в RMP-системах называется httpd, в deb — apache2.
Создаем файл с описанием задач для роли epel:
vi /etc/ansible/roles/epel/tasks/main.yml
—
— name: Install EPEL Repo
yum:
name=epel-release
state=present
Обратите внимание, что в плейбуке выше мы задействовали notify, но не задали handlers — в качестве примера, мы вынесем его в отдельный файл:
mkdir /etc/ansible/roles/nginx/handlers
vi /etc/ansible/roles/nginx/handlers/main.yml
—
— name: nginx systemd
systemd:
name: nginx
enabled: yes
state: started
* handlers — описание обработчика, который может быть вызван с помощью notify; systemd — модуль для управления юнитами systemd; systemd enabled — разрешает или запрещает сервис; systemd state — состояние, которое должно быть у сервиса. В данном примере мы указываем, что у демона nginx должно быть состояние started и разрешен автозапуск (enabled).
Step 1: Configure Ansible Control Node, Host, and SSH Key Pair
Before you install Ansible on Ubuntu, make sure you have a couple of things set up. The configuration requires an Ansible control node and one or more Ansible hosts.
Note: The Ansible control node gives you control over Ansible hosts. It can be a dedicated server or a local machine with Ubuntu 20.04 installed.
Configuring the Ansible Control Node
To set up the Ansible control node, log in as root user. Create another (non-root) user with administrative privileges, and then add an SSH key pair for the new user.
1. As root, add an administrator-level user for the control node. Use the command:
2. Define a strong account password and, optionally, answer a list of questions.
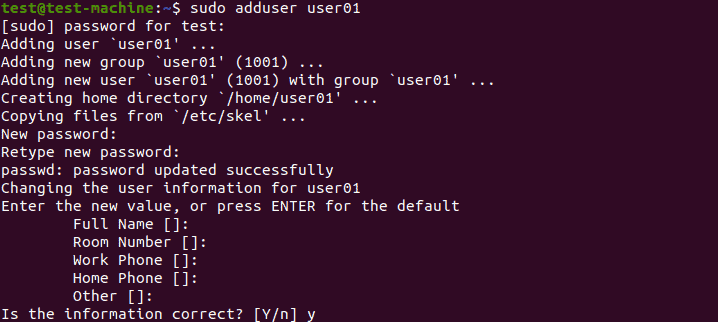
3. Press Enter to skip any of the fields you don’t want to fill out at the moment.4. The new account is ready. Now, assign administrative access to the account. The following command assigns superuser privileges, allowing the account to use the command:
With the command, the new user is now able to perform administrative tasks. Log into the new user account when you want to use the Ansible control node.
Setting up an SSH Key pair
1. Enter the following command in the Ansible control node terminal:
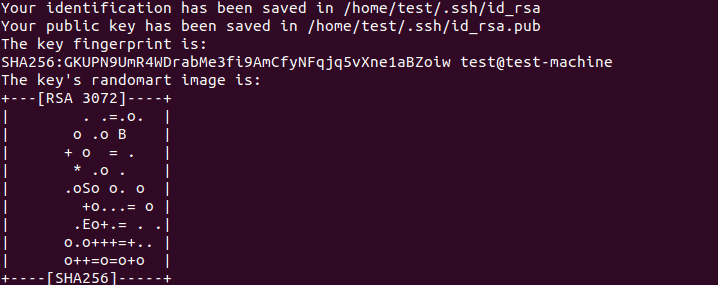
2. Hitting Enter shows the following output:

3. The system displays the output below if you already have an SSH key pair set up. Decide whether to overwrite the existing SSH key pair.
![]()
Note: Overwriting makes the previous SSH key pair unusable. Since this is an irreversible process, make sure you have no further need for the old keys before you confirm.
4. Finally, you are prompted to provide a passphrase. We highly recommend adding a strong passphrase to avoid any security issues in the future:
![]()
The output should be similar to the one below:
Configuring an Ansible Host
Ansible hosts are remote servers that are monitored and controlled by the Ansible control node. Each host needs to have the control node’s SSH key in the system user’s authorized keys directory.
1. The easiest method of setting up an SSH public key is to copy it using the command:
2. The first time you use this command, you may see the following message:

This kind of output is normal, and it appears when you connect to a new remote host for the first time.
3. To continue, simply enter and hit Enter.
The utility now searches for the public part of the key pair generated during the previous step.
4. Once it finds it, enter the remote host account’s password.

5. Confirm the password by hitting Enter. The utility uploads the public key to the remote host’s account, and shows the following output:

Note: For security purposes, the password won’t be displayed as you type it.
Prerequisites
In order to execute the automated setup provided by the playbook we’re discussing in this guide, you’ll need:
- One Ansible control node: an Ubuntu 18.04 machine with Ansible installed and configured to connect to your Ansible hosts using SSH keys. Make sure the control node has a regular user with sudo permissions and a firewall enabled, as explained in our Initial Server Setup guide. To set up Ansible, please follow our guide on How to Install and Configure Ansible on Ubuntu 18.04.
- One or more Ansible Hosts: one or more remote Ubuntu 18.04 servers previously set up following the guide on How to Use Ansible to Automate Initial Server Setup on Ubuntu 18.04.
Before proceeding, you first need to make sure your Ansible control node is able to connect and execute commands on your Ansible host(s). For a connection test, please check step 3 of .


Error Installing Ansible Tower
I ran into a weird error on the TASK step. The installer literally stalled out for around 10 minutes and finally failed.
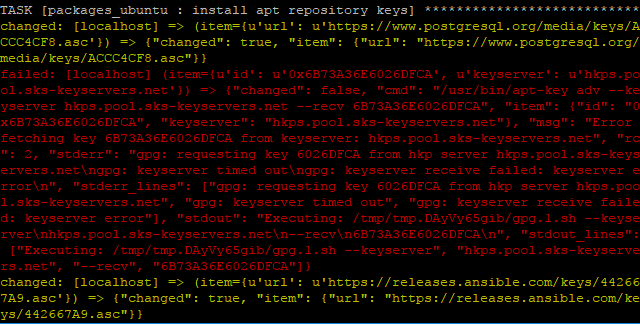 PGP error connecting to get keys when installing Ansible Tower
Working on a hunch, I pulled up my Splunk logs for the IP of the server and sure enough, I had blocks for the port it was using for GPG keys. The port was TCP port 11371.
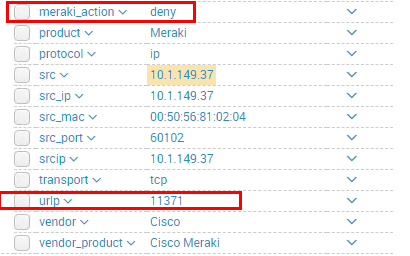 Blocked connections from Ansible Tower connecting to GPG server
After unblocking the port and rerunning the installer, I was able to see the Ansible Tower install complete successfully.
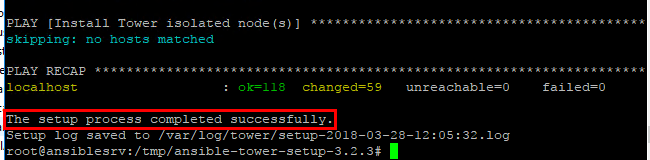 Ansible Tower installation completed successfully
You can now browse out to the Ansible Tower web management interface.
 Browse to the Ansible Tower web interface
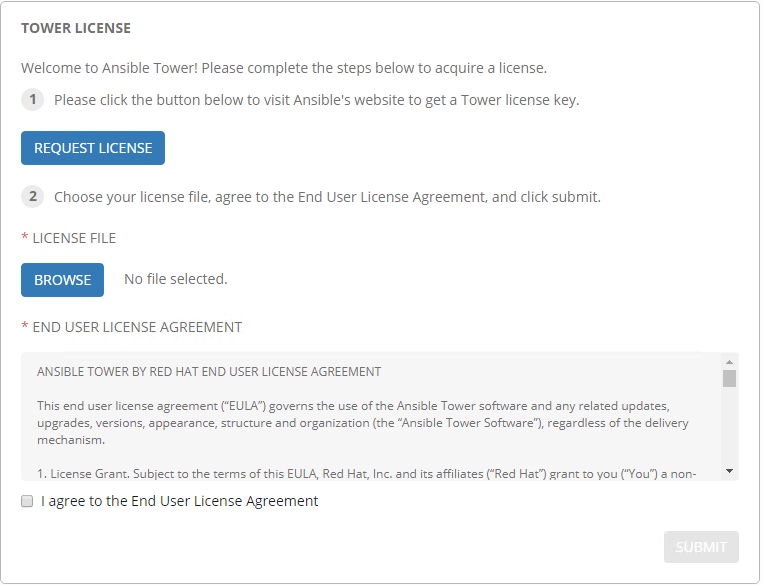 Install Ansible Tower License file
We are now ready to begin making use of Ansible Tower for setting up inventory, projects, jobs, etc.
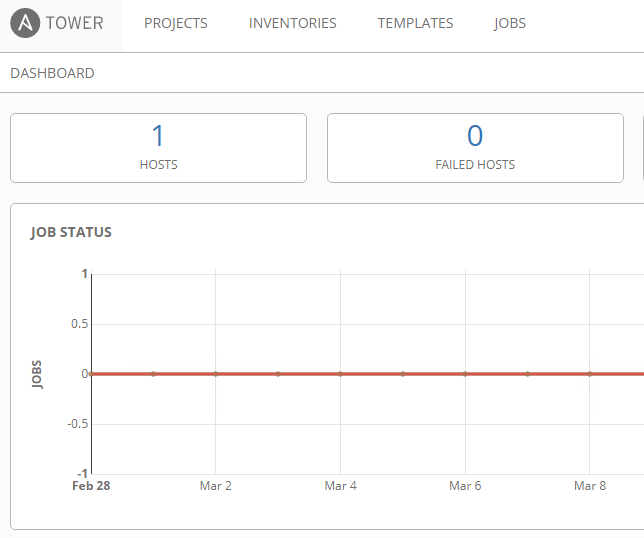 Ready to begin configuring and utilizing Ansible Tower
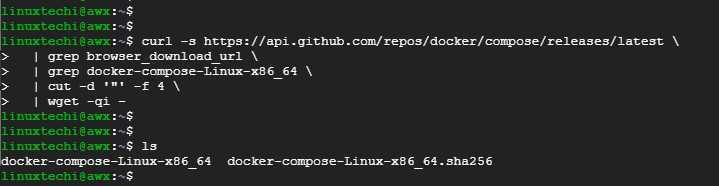
Step 3) Install docker-compose
Next in line, we are going to install docker-compose. So, download the latest docker-compose file as shown
$ curl -s https://api.github.com/repos/docker/compose/releases/latest | grep browser_download_url | grep docker-compose-Linux-x86_64 | cut -d '"' -f 4 | wget -qi -
Next, assign execute permissions to the docker-compose file as shown.
$ sudo chmod +x docker-compose-Linux-x86_64
Then move the docker-compose file to the /usr/local/bin path as shown.
$ sudo mv docker-compose-Linux-x86_64 /usr/local/bin/docker-compose
Finally, verify the version of docker-compose as shown.
$ docker-compose version
From the output, the docker-compose version is 1.28.5
Install and Configure Ansible Tower in Ubuntu Server

The file that you will download is called ansible-tower-setup-latest.tar.gz. I followed the following steps to get the file there, extracted, and configured for setup. Also, I am running a simple all in one configuration with one host that is running all the services including the DB, etc.
- Used WinSCP to copy the tar.gz file over to the /tmp folder of the Ubuntu server
- Extract the tar.gz file
- Edit the inventory file before running setup
- Run the setup.sh file to install Ansible Tower
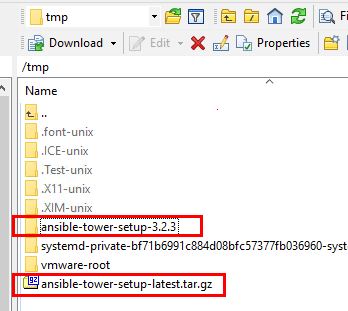 Extracting the tar.gz Ansible Tower setup package
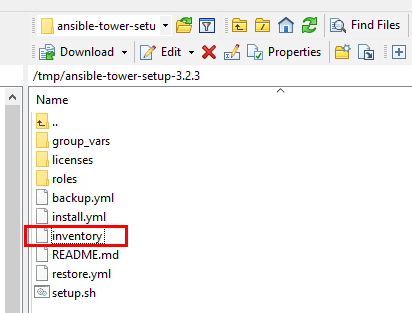 Edit the inventory file with passwords to run the setup.sh file
The inventory file that needs to be edited looks like the following. The password you want to configure needs to be dded in various locations.
- admin_password
- pg_password
- rabbitmq_password
localhost ansible_connection=local


admin_password=''

pg_host=''
pg_port=''

pg_database='awx'
pg_username='awx'
pg_password=''

rabbitmq_port=5672
rabbitmq_vhost=tower
rabbitmq_username=tower
rabbitmq_password=''
rabbitmq_cookie=cookiemonster

# Needs to be true for fqdns and ip addresses
rabbitmq_use_long_name=false

# Isolated Tower nodes automatically generate an RSA key for authentication;
# To disable this behavior, set this value to false
# isolated_key_generation=true
After editing the inventory file, you should be ready to run the setup.sh file.
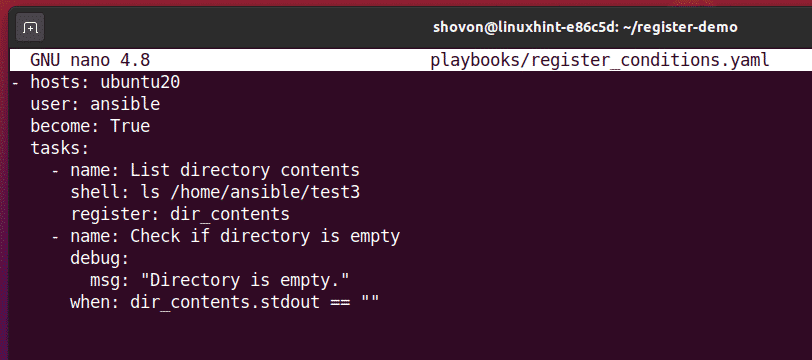
Step 2 — Setting Up the Inventory File
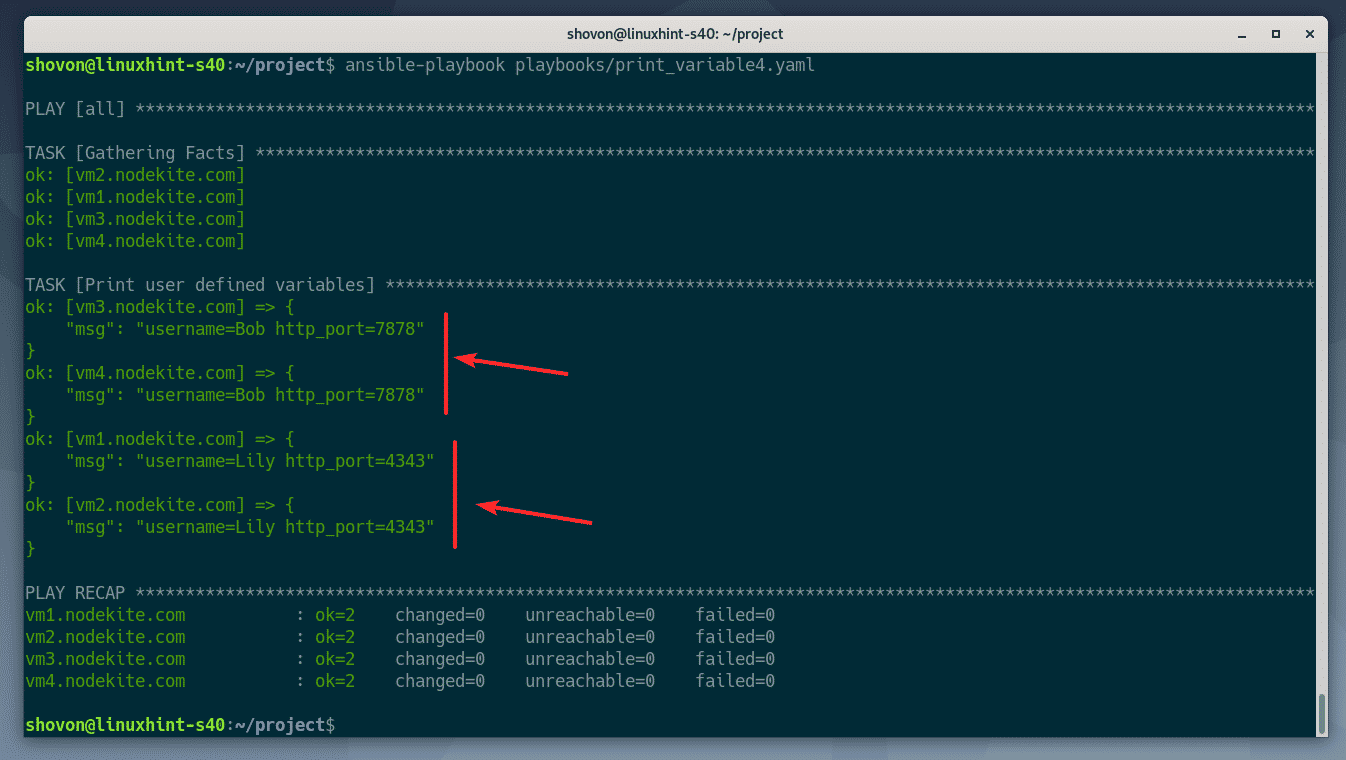
The inventory file contains information about the hosts you’ll manage with Ansible. You can include anywhere from one to several hundred servers in your inventory file, and hosts can be organized into groups and subgroups. The inventory file is also often used to set variables that will be valid only for specific hosts or groups, in order to be used within playbooks and templates. Some variables can also affect the way a playbook is run, like the variable that we’ll see in a moment.
To edit the contents of your default Ansible inventory, open the file using your text editor of choice, on your Ansible control node:
Note: Although Ansible typically creates a default inventory file at , you are free to create inventory files in any location that better suits your needs. In this case, you’ll need to provide the path to your custom inventory file with the parameter when running Ansible commands and playbooks. Using per-project inventory files is a good practice to minimize the risk of running a playbook on the wrong group of servers.
The default inventory file provided by the Ansible installation contains a number of examples that you can use as references for setting up your inventory. The following example defines a group named with three different servers in it, each identified by a custom alias: server1, server2, and server3. Be sure to replace the highlighted IPs with the IP addresses of your Ansible hosts.
/etc/ansible/hosts
The subgroup sets the host parameter that will be valid for all hosts included in this inventory. This parameter makes sure the remote server uses the Python 3 executable instead of (Python 2.7), which is not present on recent Ubuntu versions.
When you’re finished, save and close the file by pressing then and to confirm your changes.
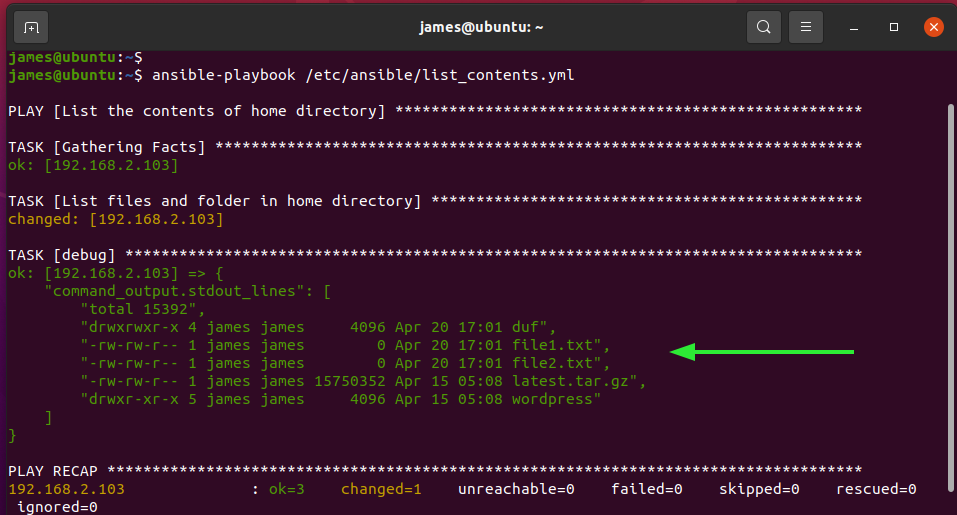
Whenever you want to check your inventory, you can run:
You’ll see output similar to this, but containing your own server infrastructure as defined in your inventory file:
Now that you’ve configured your inventory file, you have everything you need to test the connection to your Ansible hosts.