Share & collaborate on a file with many people
At any time, a Google Docs, Sheets, or Slides file can only be edited on up to 100 open tabs or devices. If there are more than 100 instances of the file open, only the owner and some users with editing permissions can edit the file.
To share and collaborate on a file with a very wide audience:
Publish the file
- If you need many people to view a file at once, publish it and create a link to share to viewers. You can give edit access to people who need to edit or comment on the file. Learn how to publish a file.
- Depending on your account’s settings, publishing a file makes it visible to everyone on the web, everyone in your organization, or a group of people in your organization. Be careful when publishing private or sensitive info.
- To remove a file from the web, you must stop publishing it. .
- To stop sharing a file with collaborators, learn how to change sharing permissions.
Create a Google Site
- Create a Google Site to share information with many people. You can embed documents, spreadsheets, and presentations on the site, which can be viewed by a large amount of users. Learn how to embed documents on a site.
- If you anticipate high traffic to your site, first publish your document in Google Docs, Sheets or Slides, then embed the published URL into Google Sites. Learn how to publish a file.
Collect feedback with Google Forms
If you need to gather a lot of information, create a Google Form. Responses will be recorded in a Google Sheet. Give edit access only to people who need to work with the responses. To let more than 100 people view the responses, publish the spreadsheet to the web and create a link to share with viewers. Learn how to publish a file.
Fix problems with documents shared with many people
If your document is shared with many people and it’s crashing or not updating quickly, try these troubleshooting tips:
- Instead of allowing people to comment on a document or spreadsheet, create a Google Form to collect feedback. Learn how to create a Google Form.
- If you’re making a copy of a document, don’t include resolved comments and suggestions. .
- Delete older information or move data into a new document.
- Ask viewers to close the document when they aren’t using it.
- Include only the most important information in a published document. Shorter documents load faster.
- Reduce the amount of people with edit access to a document.
- If collecting information from multiple documents, create a new, view-only document to share with a large number of people.
Совместная работа над файлом с большим числом пользователей
Файл в Google Документах, Таблицах или Презентациях можно одновременно открыть для редактирования на сотне вкладок или устройств, но не более. Если это ограничение будет превышено, то работать с файлом смогут только его владелец и некоторые пользователи с разрешением на редактирование.
Чтобы привлечь к работе широкую аудиторию, можно выполнить описанные ниже действия.
Опубликуйте файл
- Чтобы одновременно просматривать файл могли несколько пользователей, опубликуйте его и создайте ссылку для доступа к нему. Вы можете предоставить права на редактирование пользователям, которым нужно изменять или комментировать контент. Подробнее о том, как опубликовать документ, таблицу, презентацию или форму Google…
- Настройки аккаунта определяют, кому будет виден опубликованный файл: всем в интернете, всем в вашей организации или только некоторым пользователям. Следите за тем, чтобы случайно не раскрыть личную или конфиденциальную информацию.
- Чтобы удалить файл из интернета, .
- Если вы хотите отменить доступ к файлу для соавторов, прочитайте о том, как изменить настройки совместного доступа.
Создайте сайт на платформе Google
- Создав сайт на платформе Google, вы сможете размещать на его страницах документы, таблицы и презентации. Этот вариант удобен, если вам нужно просто предоставить информацию большому количеству пользователей. Подробнее о том, как добавлять на сайт документы…
- Если вы опасаетесь, что ваш сайт может привлечь слишком большой трафик, советуем сначала опубликовать файл в Google Документах, Таблицах или Презентациях, а потом добавить его URL на свою страницу в Google Сайтах. Подробнее о процедуре публикации…
Limit how a file is shared
When you share a file with someone, you can choose their access level:
- Viewer: People can view, but can’t change or share the file with others.
- Commenter: People can make comments and suggestions, but can’t change or share the file with others.
- Editor: People can make changes, accept or reject suggestions, and share the file with others.
Change the general access for your file
You can allow broad access to your file. These options depend on if your Google Account is through work, school, or Gmail.
- Public: Anyone can search on Google and get access to your file, without signing in to their Google Account.
- Anyone with the link: Anyone who has the link can use your file, without signing in to their Google Account.
Restricted: Only people with access can open the file.
Related articles
- Make Google Docs, Sheets, Slides & Forms public
- Stop or change how a file is shared
- Transfer file ownership
- Share folders in Google Drive
- Find files shared with you
Step 2: Choose who to share with & how they can use your file
Share with specific people
Important: If you use a Google Account through work or school, you might not be able to share files outside of your organization.
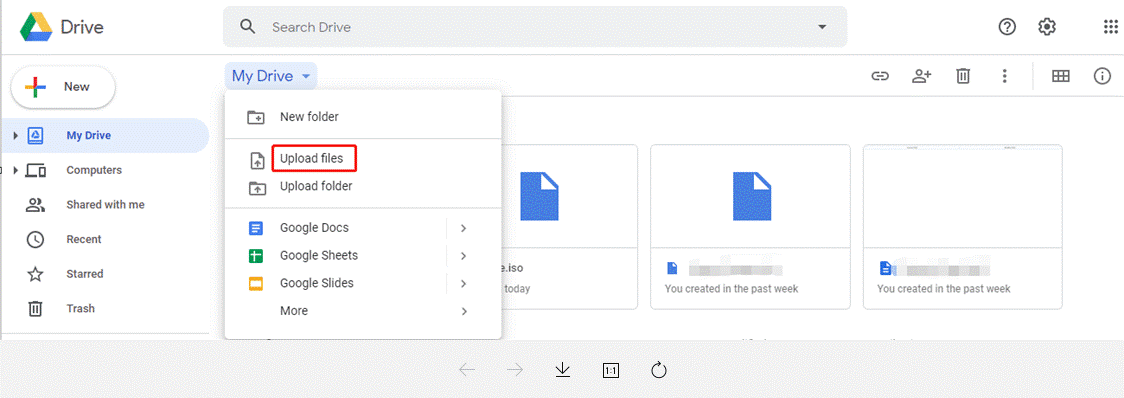
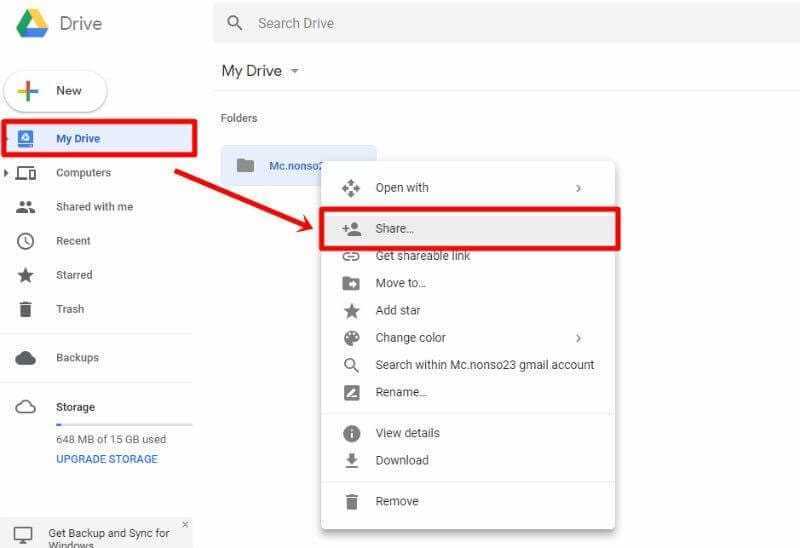
- On your computer, go to Google Drive.
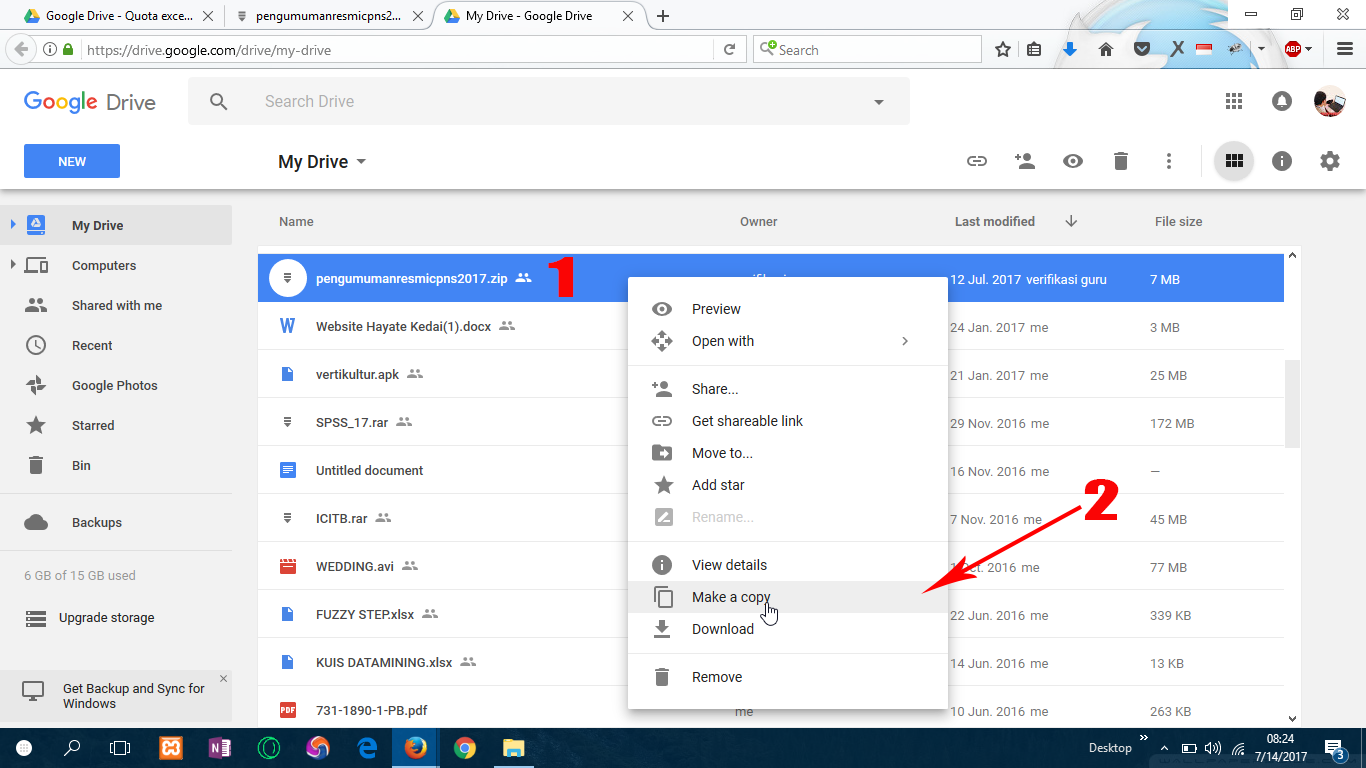
- Select the file you want to share Share .
- Enter the email address you want to share with. If you use a work or school account
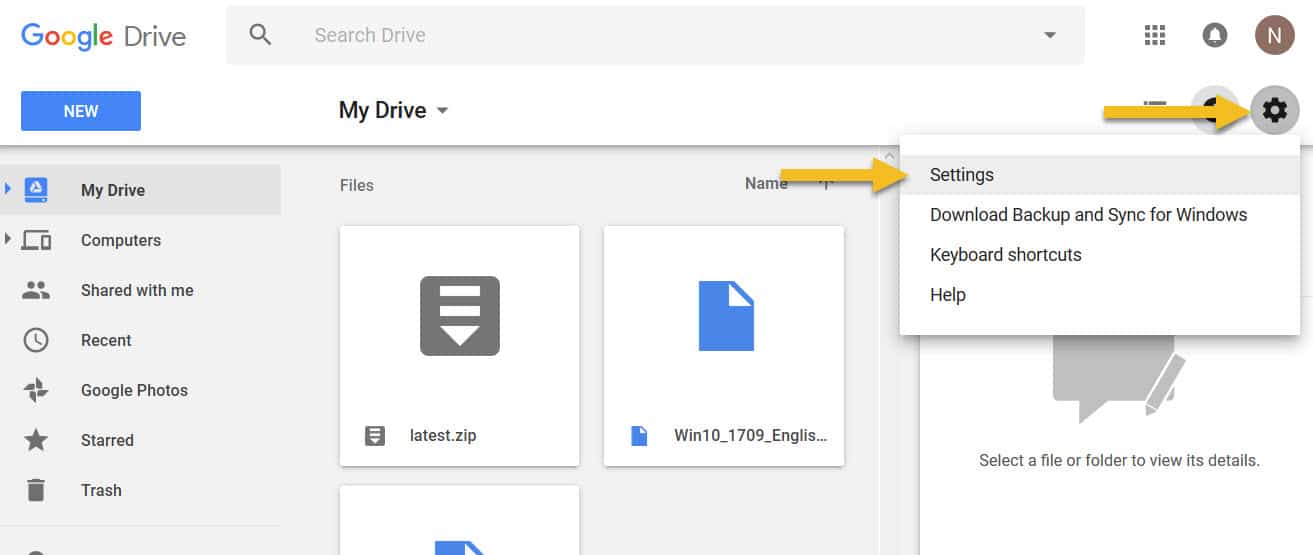
Tip: To turn off suggested recipients, go to your Drive Settings . Uncheck «Show suggested recipients in the sharing dialog.»
, you can share with suggested recipients.
- Decide how people can use your file. Select one:
- Viewer
- Commenter
- Editor
- If you use an eligible work or school account, click Add expiration to .
- When you share your file, each email address gets an email:
- Optional: Add a message to your notification email.
- If you don’t want to notify people, uncheck the box.
- Click Send or Share.
Share with a group of specific people
Share with a Google Group
You can share files with Google Groups instead of specific people. When you:
- Add a member to a group: That person gains permission to access the files and folders the group has.
- Remove a member from a group: That person loses permission to access the files and folders that the group has.
To share a file with your Google Group:
- Create a Google Group.
- Add members to your group.
- Share the file with your group.
Tip: Before a file appears in the “Shared with me” folder, you must open that file from an invitation or a link.
Share with a Chat space
To share files with a Chat space, you can add the file you want to share to that Chat space.
To add a Drive file to a Chat space:
Option 1:
- On your computer, .
- Select the Chat space you want to share the file with.
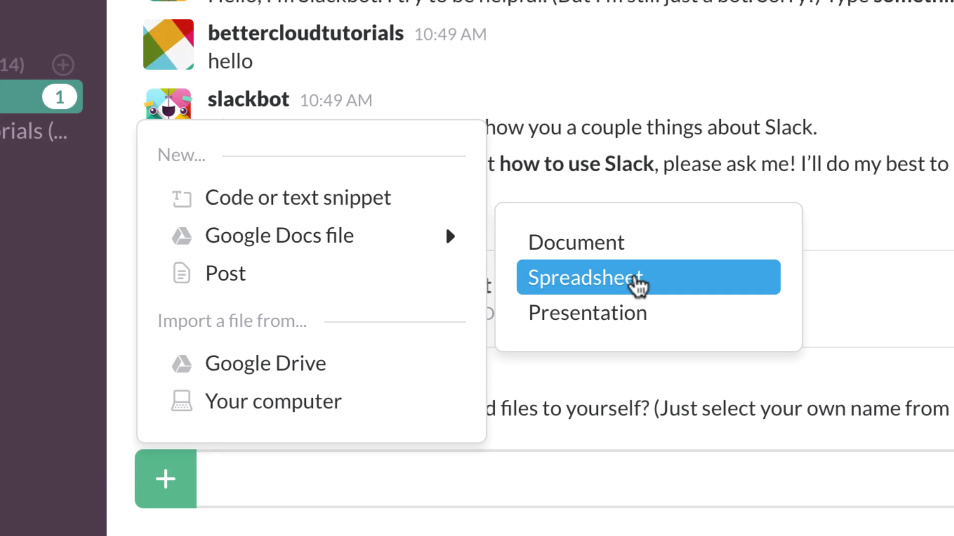
- At the bottom left, click Integration menu Drive .
- Select the file you want to share with a Chat space.
- Click Insert.
Option 2:
- On your computer, go to Google Drive.
- Right-click on the file you want to share with a Chat space.
- Click Get link Copy link Done.
- Go to Google Chat.
- Select the Chat space you want to share the file with.
- In the message field, paste the link you copied.
Tips:
- When you send a file to a Chat space, a prompt to grant access appears.
- When people leave a Chat space, they lose access to the files in that Chat space if they don’t have sharing access:
- As an individual
- As a member of another group
- To grant file access, you must have edit access on the file you want to share.
Add an expiration date
The expiration date feature is only available for eligible work or school accounts.
You’re currently not signed in.
Allow general access to the file
You can choose if your file should be available to anyone or restricted to only the people with access. If you allow access to anyone with the link, your folder won’t restrict who can access it.
- Select the file you want to share.
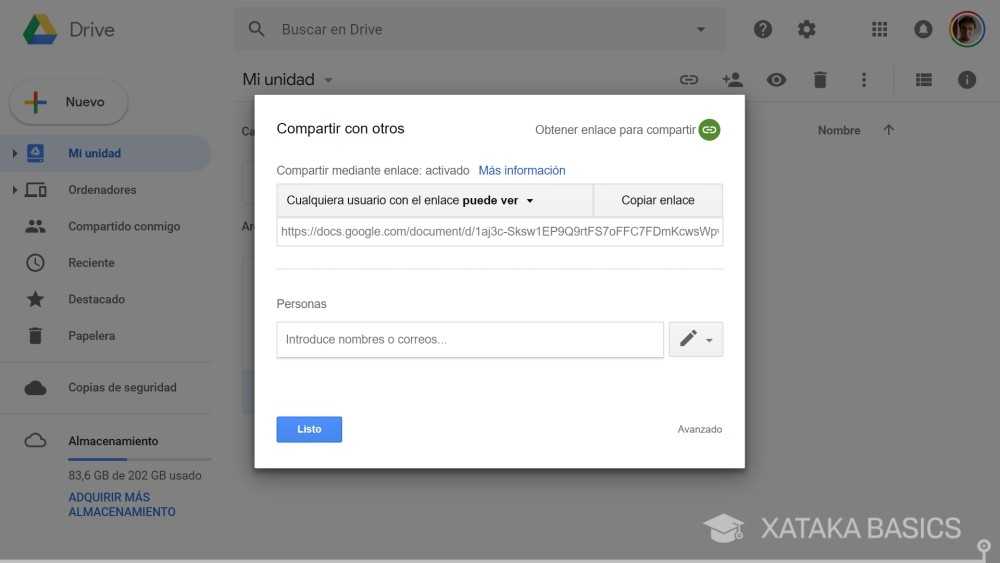
- Click Share or Share .
- Under “General access”, click the Down arrow .
- Choose who can access the file.
- To decide what role people will have with your file, select Viewer, Commenter, or Editor
Learn more about how others view, comment, or edit files.
.
- Click Done.
Share a file publicly
- Select the file you want to share.
- Click Share or Share .
- Under “General access” click the Down arrow .
- Choose Anyone with the link.
- To decide what role people will have, select Viewer, Commenter, or Editor.
- Click Copy link.
- Click Done.
- Paste the link in an email or any place you want to share it.
People who aren’t signed in to a Google Account show up as anonymous animals in your file. Learn more about anonymous animals.
Step 2: Choose who to share with & how they can use your file
Share with specific people
Important: If you use a Google Account through work or school, you might not be able to share files outside of your organization.
- On your computer, go to Google Drive.
- Select the file you want to share Share .
- Enter the email address you want to share with. If you use a work or school account
Tip: To turn off suggested recipients, go to your Drive Settings . Uncheck «Show suggested recipients in the sharing dialog.»
, you can share with suggested recipients.
- Decide how people can use your file. Select one:
- Viewer
- Commenter
- Editor
- If you use an eligible work or school account, click Add expiration to .
- When you share your file, each email address gets an email:
- Optional: Add a message to your notification email.
- If you don’t want to notify people, uncheck the box.
- Click Send or Share.
Share with a group of specific people
Share with a Google Group
You can share files with Google Groups instead of specific people. When you:
- Add a member to a group: That person gains permission to access the files and folders the group has.
- Remove a member from a group: That person loses permission to access the files and folders that the group has.
To share a file with your Google Group:
- Create a Google Group.
- Add members to your group.
- Share the file with your group.
Tip: Before a file appears in the “Shared with me” folder, you must open that file from an invitation or a link.
Share with a Chat space
To share files with a Chat space, you can add the file you want to share to that Chat space.
To add a Drive file to a Chat space:
Option 1:
- On your computer, .
- Select the Chat space you want to share the file with.
- At the bottom left, click Integration menu Drive .
- Select the file you want to share with a Chat space.
- Click Insert.
Option 2:
- On your computer, go to Google Drive.
- Right-click on the file you want to share with a Chat space.
- Click Get link Copy link Done.
- Go to Google Chat.
- Select the Chat space you want to share the file with.
- In the message field, paste the link you copied.
Tips:
- When you send a file to a Chat space, a prompt to grant access appears.
- When people leave a Chat space, they lose access to the files in that Chat space if they don’t have sharing access:
- As an individual
- As a member of another group
- To grant file access, you must have edit access on the file you want to share.
Add an expiration date
The expiration date feature is only available for eligible work or school accounts.
You’re currently not signed in.
Allow general access to the file
You can choose if your file should be available to anyone or restricted to only the people with access. If you allow access to anyone with the link, your folder won’t restrict who can access it.
- Select the file you want to share.
- Click Share or Share .
- Under “General access”, click the Down arrow .
- Choose who can access the file.
- To decide what role people will have with your file, select Viewer, Commenter, or Editor
Learn more about how others view, comment, or edit files.
.
- Click Done.
Share a file publicly
- Select the file you want to share.
- Click Share or Share .
- Under “General access” click the Down arrow .
- Choose Anyone with the link.
- To decide what role people will have, select Viewer, Commenter, or Editor.
- Click Copy link.
- Click Done.
- Paste the link in an email or any place you want to share it.
People who aren’t signed in to a Google Account show up as anonymous animals in your file. Learn more about anonymous animals.
Limit how a file is shared
When you share a file with someone, you can choose their access level:
- Viewer: People can view, but can’t change or share the file with others.
- Commenter: People can make comments and suggestions, but can’t change or share the file with others.
- Editor: People can make changes, accept or reject suggestions, and share the file with others.
Change the general access for your file
You can allow broad access to your file. These options depend on if your Google Account is through work, school, or Gmail.
- Public: Anyone can search on Google and get access to your file, without signing in to their Google Account.
- Anyone with the link: Anyone who has the link can use your file, without signing in to their Google Account.
Restricted: Only people with access can open the file.
Related articles
- Make Google Docs, Sheets, Slides & Forms public
- Stop or change how a file is shared
- Transfer file ownership
- Share folders in Google Drive
- Find files shared with you
Как предоставлять посетителям доступ к файлам
Когда в вашей организации будет включена функция гостевого доступа, вы сможете делиться документами с пользователями, у которых нет аккаунта Google. Посетители могут просматривать, изменять и комментировать ваши документы в течение 7 дней после подтверждения своего адреса электронной почты. Если им потребуется больше времени, они могут воспользоваться ссылкой из исходного письма с приглашением и повторно подтвердить свою личность. За информацией о том, с какими аккаунтами вы можете делиться файлами, обратитесь к администратору.
Внимание! Если вы работаете с аккаунтом Google Workspace Business Starter или Frontline, то можете делиться файлами с пользователями, у которых нет аккаунта Google, до пяти раз в месяц. В каждом таком случае будет регистрироваться передача одного документа одному посетителю
- Войдите в рабочий или учебный аккаунт на компьютере.
- Откройте Google Диск, Документы, Таблицы или Презентации.
- Выберите нужный файл.
- Нажмите на значок «Открыть доступ» .
- В диалоговом окне «Предоставьте доступ пользователям и группам» введите адреса электронной почты и нажмите Ввод.
- Чтобы указать уровень доступа к файлу, в меню справа выберите Читатель, Комментатор или Редактор.
- Нажмите Отправить.
Типы файлов, которыми можно делиться с доменами, не относящимися к Google
- Файлы Google Документов, Таблиц, Презентаций, Сайтов, Картинок, PDF и Office
- Папки и подпапки на общем диске
Удаление пользователя домена, не относящегося к Google
Отменить доступ посетителя можно в любое время.
- Войдите в рабочий или учебный аккаунт на компьютере.
- Откройте Google Диск, Документы, Таблицы или Презентации.
- Нажмите на файл, доступ к которому предоставлен посетителю.
- В правом верхнем углу экрана нажмите Настройки доступа Расширенные.
- Найдите пользователя и рядом с его именем нажмите Удалить.
- Нажмите Сохранить изменения Готово.
Step 2: Choose who to share with & how they can use your file
Share with specific people
Important: If you use a Google Account through work or school, you might not be able to share files outside of your organization.
- On your computer, go to Google Drive.
- Select the file you want to share Share .
- Enter the email address you want to share with. If you use a work or school account
Tip: To turn off suggested recipients, go to your Drive Settings . Uncheck «Show suggested recipients in the sharing dialog.»
, you can share with suggested recipients.
- Decide how people can use your file. Select one:
- Viewer
- Commenter
- Editor
- If you use an eligible work or school account, click Add expiration to .
- When you share your file, each email address gets an email:
- Optional: Add a message to your notification email.
- If you don’t want to notify people, uncheck the box.
- Click Send or Share.
Share with a group of specific people
Share with a Google Group
You can share files with Google Groups instead of specific people. When you:
- Add a member to a group: That person gains permission to access the files and folders the group has.
- Remove a member from a group: That person loses permission to access the files and folders that the group has.
To share a file with your Google Group:
- Create a Google Group.
- Add members to your group.
- Share the file with your group.
Tip: Before a file appears in the “Shared with me” folder, you must open that file from an invitation or a link.
Share with a Chat space
To share files with a Chat space, you can add the file you want to share to that Chat space.
To add a Drive file to a Chat space:
Option 1:
- On your computer, .
- Select the Chat space you want to share the file with.
- At the bottom left, click Integration menu Drive .
- Select the file you want to share with a Chat space.
- Click Insert.
Option 2:
- On your computer, go to Google Drive.
- Right-click on the file you want to share with a Chat space.
- Click Get link Copy link Done.
- Go to Google Chat.
- Select the Chat space you want to share the file with.
- In the message field, paste the link you copied.
Tips:
- When you send a file to a Chat space, a prompt to grant access appears.
- When people leave a Chat space, they lose access to the files in that Chat space if they don’t have sharing access:
- As an individual
- As a member of another group
- To grant file access, you must have edit access on the file you want to share.
Add an expiration date
The expiration date feature is only available for eligible work or school accounts.
You’re currently not signed in.
Allow general access to the file
You can choose if your file should be available to anyone or restricted to only the people with access. If you allow access to anyone with the link, your folder won’t restrict who can access it.
- Select the file you want to share.
- Click Share or Share .
- Under “General access”, click the Down arrow .
- Choose who can access the file.
- To decide what role people will have with your file, select Viewer, Commenter, or Editor
Learn more about how others view, comment, or edit files.
.
- Click Done.
Share a file publicly
- Select the file you want to share.
- Click Share or Share .
- Under “General access” click the Down arrow .
- Choose Anyone with the link.
- To decide what role people will have, select Viewer, Commenter, or Editor.
- Click Copy link.
- Click Done.
- Paste the link in an email or any place you want to share it.
People who aren’t signed in to a Google Account show up as anonymous animals in your file. Learn more about anonymous animals.
Как управлять доступом к файлам
Как запретить скачивание, печать или копирование файлов
Пользователи, которым разрешено редактировать документ, могут:
- предоставлять доступ другим пользователям;
- добавлять и удалять пользователей;
- изменять разрешения на доступ к файлу;
- копировать, распечатывать и скачивать файлы.
Примечание. Этот параметр нельзя применить ко всей папке, но вы можете настроить его для отдельных файлов в ней.
Чтобы запретить читателям и комментаторам печатать, копировать и скачивать файлы, выполните следующие действия:
- Найдите нужный файл или папку на Google Диске, в Документах, Таблицах или Презентациях.
- Выберите файлы.
- Выберите Настроить доступ или нажмите на значок «Открыть доступ» .
- Нажмите на значок настроек в верхней части страницы.
- Снимите флажок Разрешить читателям и комментаторам документа скачивать, распечатывать и копировать его.
Примечание. Вы можете запрещать пользователям копировать, скачивать и распечатывать файлы, а также делиться ими на Google Диске, в Документах, Таблицах и Презентациях, но у вас нет возможности контролировать другие способы предоставления доступа к контенту.
Как запретить другим пользователям изменять настройки доступа к файлам
Изменять настройки доступа к файлу могут его владелец и пользователи с правом на редактирование. Чтобы запретить другим пользователям изменять настройки доступа к файлу, выполните следующие действия:
- Откройте файл на Google Диске, в Документах, Таблицах или Презентациях.
- Выберите Настроить доступ или нажмите на значок «Открыть доступ» .
- Нажмите на значок настроек в верхней части страницы.
- Снимите флажок Пользователи с правом на редактирование смогут изменять разрешения и параметры доступа.
Примечание. Запрет на предоставление доступа к папке не распространяется на хранящиеся в ней файлы. Чтобы пользователи не могли управлять доступом к таким файлам, измените настройки для каждого из них.
Как предоставить временный доступ
Откройте файл на Google Диске, в Документах, Таблицах или Презентациях.
Нажмите Настройки доступа Если доступ к файлу этому пользователю ещё не предоставлялся, добавьте адрес электронной почты пользователя и нажмите Отправить или Открыть доступ. В правом верхнем углу документа снова нажмите Настройки доступа. выберите пользователя, которому хотите предоставить временный доступ.
Рядом с именем пользователя нажмите на стрелку вниз Предоставить временный доступ.
В поле «Доступ будет закрыт» выберите дату
Обратите внимание, что от начальной до конечной даты действия доступа должно пройти не более года.
Нажмите Сохранить.
Step 2: Choose who to share with & how they can use your file
Share with specific people
Important: If you use a Google Account through work or school, you might not be able to share files outside of your organization.
- On your Android device, open the Google Drive app.
- Select the file you want to share Share .
- Enter the email address or Google Group you want to share with.
- Decide how people can use your file. Select one:
- Viewer
- Commenter
- Editor
- If you use an eligible work or school account, tap on the user’s role to .
- When you share your folder, each email address gets an email.
- Optional: Add a message to your notification email.
- If you don’t want to notify people, tap More Don’t notify people.
- Tap Send.
Add an expiration date
The expiration date feature is only available for eligible work or school accounts.
You’re currently not signed in.
Allow general access to the fileAllow general access to the file
You can decide if your file is available generally or restricted to only the people with access. When you allow access to anyone with the link, anyone can open your file.
- Open the file you want to edit.
- Tap Manage access.
- Under “General access,» tap Change.
- Choose who can access the file.
- To decide what role people will have with your file, select an option.
- Select whether or not people can find the file in search results.
- Tap Back.
Share a file or folder publicly
- Select the file you want to share.
- Tap Share or Share .
- Under “General access,” tap Change.
- Select Anyone with the link.
- To decide what role people will have with your file, select an option.
- Tap Copy link.
- Tap Back.
- Paste the link in an email or any place you want to share it.
People who aren’t signed in to a Google Account show up as anonymous animals in your file. Learn more about anonymous animals.