What Is It?
Node Version Manager is exactly what its name says:
While it doesn’t sound complicated, what NVM can do is awesome. It makes it possible to:
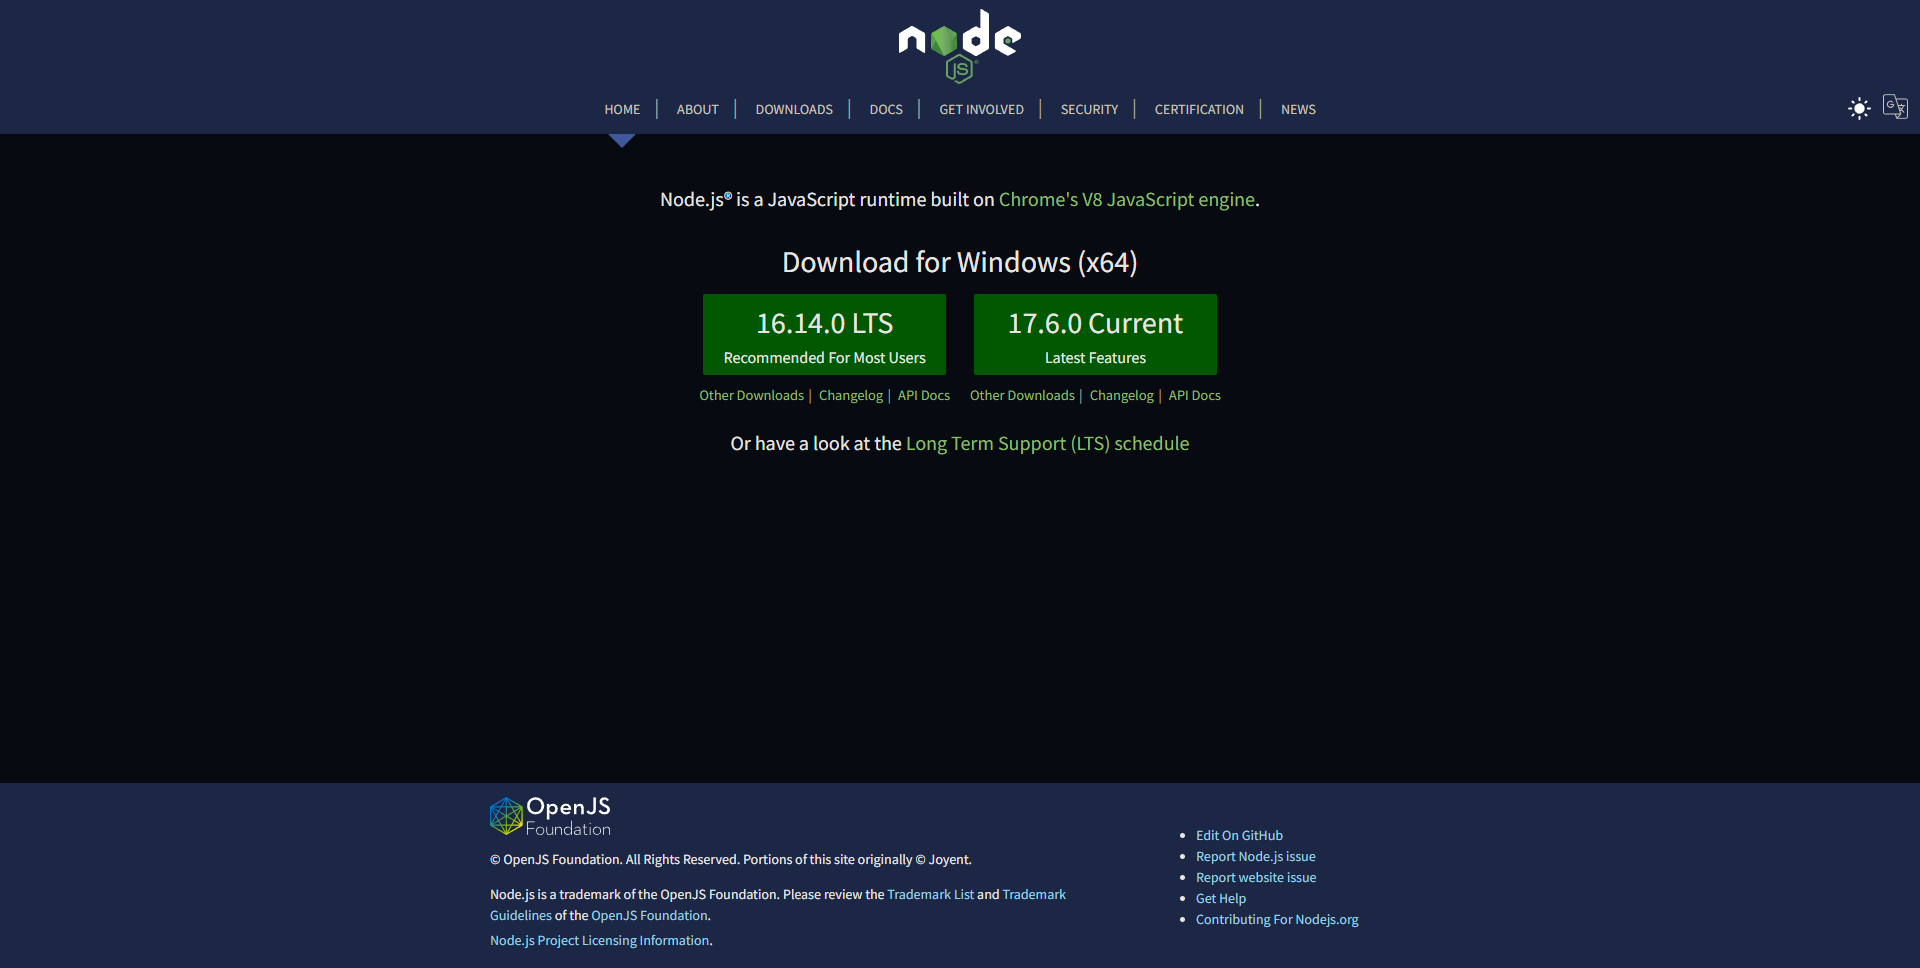
- Access every long term support (LTS) version of Node.js from to the latest version today, which happens to be , as I write this,
- Download any one of those remote LTS versions of Node locally with a simple command,
- Set up aliases to switch between different downloaded versions of Node with ease,
- Default to automatically use whichever version of Node.js is specified if a file is present in a repo,
- And it works with multiple types of shells: Sh, Bash, Zsh, Dash, Ksh, (not Fish though).
As long as you’re fairly comfortable with the command line, you can use NVM.
Setting Up NVM
NVM is relatively easy to set up too — after hearing about its benefits, I was able to use the to set it up on my computer in short order.
Installation
Install script
To install or update nvm, you can use the install script using cURL:
or Wget:
The script clones the nvm repository to and adds the source line to your profile (, , , or ).
You can customize the install source, directory, profile, and version using the , , , and variables.
Eg: for a global install.
NB. The installer can use , , or to download , whatever is available.
Note: On OS X, if you get after running the install script, one of the following might be the reason:-
- your system may not have a [] where the command is set up. Simply create one with and run the install script again
- you might need to restart your terminal instance. Try opening a new tab/window in your terminal and retry.
If the above doesn’t fix the problem, open your and add the following line of code:
For more information about this issue and possible workarounds, please refer here
Verify installation
To verify that nvm has been installed, do:
which should output ‘nvm’ if the installation was successful. Please note that will not work, since is a sourced shell function, not an executable binary.
Important Notes
If you’re running a system without prepackaged binary available, which means you’re going to install nodejs or io.js from its source code, you need to make sure your system has a C++ compiler. For OS X, Xcode will work, for Debian/Ubuntu based GNU/Linux, the and packages work.
Note: does not support Windows (see #284). Two alternatives exist, which are neither supported nor developed by us:
- nvm-windows
- nodist
Note: does not support Fish either (see #303). Alternatives exist, which are neither supported nor developed by us:
- bass allows you to use utilities written for Bash in fish shell
- fast-nvm-fish only works with version numbers (not aliases) but doesn’t significantly slow your shell startup
- plugin-nvm plugin for Oh My Fish, which makes nvm and its completions available in fish shell
- fnm — fisherman-based version manager for fish
Note: We still have some problems with FreeBSD, because there is no official pre-built binary for FreeBSD, and building from source may need patches; see the issue ticket:
- nodejs on FreeBSD may need to be patched
- nodejs/node#3716
Note: On OS X, if you do not have Xcode installed and you do not wish to download the ~4.3GB file, you can install the . You can check out this blog post on how to just that:
How to Install Command Line Tools in OS X Mavericks & Yosemite (Without Xcode)
Note: On OS X, if you have/had a “system” node installed and want to install modules globally, keep in mind that:
- When using nvm you do not need to globally install a module with , so instead of doing , do instead
- If you have an file, make sure it does not contain any settings (which is not compatible with nvm)
- You can (but should not?) keep your previous “system” node install, but nvm will only be available to your user account (the one used to install nvm). This might cause version mismatches, as other users will be using VS your user account using
Homebrew installation is not supported. If you have issues with homebrew-installed , please it, and install it using the instructions below, before filing an issue.
Note: If you’re using you can easily install as a zsh plugin. Install and run to upgrade.
Note: Git versions before v1.7 may face a problem of cloning nvm source from GitHub via https protocol, and there is also different behavior of git before v1.6, so the minimum required git version is v1.7.0 and we recommend v1.7.9.5 as it’s the default version of the widely used Ubuntu 12.04 LTS. If you are interested in the problem we mentioned here, please refer to GitHub’s HTTPS cloning errors article.
Git install
If you have installed (requires git v1.7+):
- clone this repo in the root of your user profile
- check out the latest version with
- activate nvm by sourcing it from your shell
Now add these lines to your , , or file to have it automatically sourced upon login:
(you may have to add to more than one of the above files)
Manual Install
For a fully manual install, create a folder somewhere in your filesystem with the file inside it. I put mine in and added the following to the file.
Now add these lines to your , , or file to have it automatically sourced upon login:
(you may have to add to more than one of the above files)
Manual upgrade
For manual upgrade with (requires git v1.7+):
- change to the
- pull down the latest changes
- check out the latest version
- activate the new version
Установка Visual Studio Code
Для разработки с помощью Node.js в Windows рекомендуем установить Visual Studio Code, а также пакет расширений Node.js. Установите их все или выберите наиболее полезные для вас.
Чтобы установить пакет расширений Node.js, сделайте следующее:
- Откройте в VS Code окно Расширения (нажав клавиши CTRL+SHIFT+X).
- В поле поиска в верхней части окна расширений введите: Node Extension Pack (Пакет расширений Node) (или имя любого расширения, которое необходимо найти).
- Выберите пункт Установить. После установки расширение появится в папке «Включено» в окне Расширения. Вы можете отключить, удалить или настроить параметры, выбрав значок шестеренки рядом с описанием вашего нового расширения.
К дополнительным рекомендуемым расширениям относятся следующие:
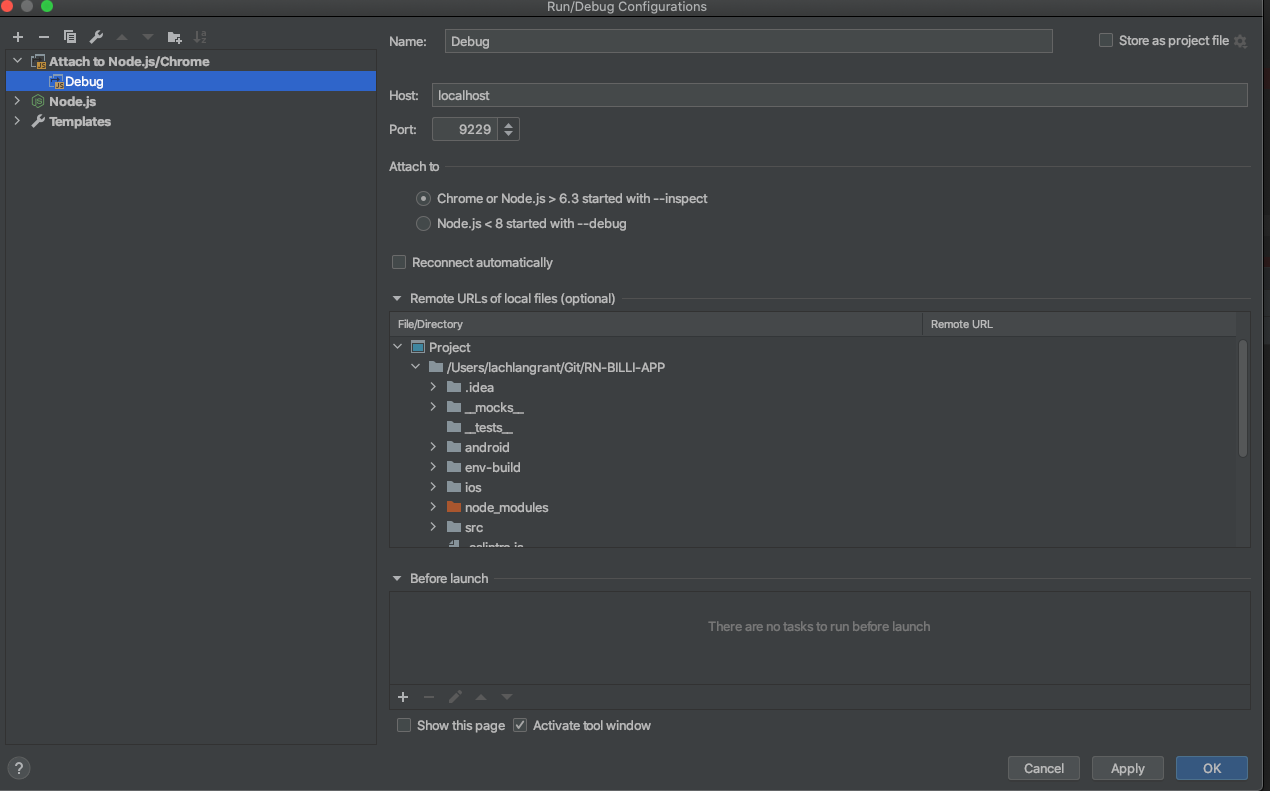
- Отладчик для Chrome — после завершения разработки на стороне сервера с помощью Node.js вам нужно будет выполнить разработку и тестирование на стороне клиента. Это расширение интегрирует редактор VS Code со службой отладки браузера Chrome, что увеличивает эффективность выполнения операций.
- Раскладки клавиатуры других редакторов — эти расширения позволят использовать необходимую раскладку при переходе в другой текстовый редактор (например, Atom, Sublime, Vim, eMacs, Notepad++ и т. п.).
- Расширение синхронизации параметров — позволяет синхронизировать параметры VS Code в разных установках, используя GitHub. Если вы работаете на разных компьютерах, это обеспечит согласованность среды между ними.
Альтернативные редакторы кода
Если вы предпочитаете использовать редактор кода или интегрированную среду разработки, отличные от Visual Studio Code, для среды разработки Node.js также подходят следующие варианты:
- Sublime Text
- Atom
- Brackets
- Notepad++
Problems
-
If you try to install a node version and the installation fails, be sure to run to delete cached node downloads, or you might get an error like the following:
curl: (33) HTTP server doesn’t seem to support byte ranges. Cannot resume.
-
Where’s my ? Check out #43
-
After the v0.8.6 release of node, nvm tries to install from binary packages. But in some systems, the official binary packages don’t work due to incompatibility of shared libs. In such cases, use option to force install from source:
nvm install -s 0.8.6
If setting the default alias does not establish the node version in new shells (i.e. nvm current yields system), ensure that the system’s node PATH is set before the nvm.sh source line in your shell profile (see #658)
What is NVM?
Node Version Manager (NVM), as the name implies, is a tool for managing Node versions on your device.
Different projects on your device may be using different versions of Node. Using only one version (the one installed by ) for these different projects may not give you accurate execution results.
For example, if you use a Node version of 10.0.0 for a project that uses 12.0.0, you may get some errors. And if you update the Node version to 12.0.0 with npm, and you use it for a project that uses 10.0.0, you may not get the expected experience.
In fact, you would most likely get a warning that says:
Instead of using npm to install and uninstall Node versions for your different projects, you can use nvm, which helps you effectively manage your node versions for each project.
NVM allows you to install different versions of Node, and switch between these versions depending on the project that you’re working on via the command line.
In the next sections, I’ll show you how to install NVM on your Windows, Linux, or Mac device.
Before proceeding, I also recommend that you uninstall Node.js if you have it installed already so that you do not have any conflicts with Node.js and nvm.
Установка Node.js на виртуальный выделенный сервер
Процесс установки достаточно сложен. Войдите на сервер и запустите команду:
На экране появятся некоторые данные, после чего nvm будет установлен. По завершении установки появится строка:
То есть, нужно закрыть и снова открыть терминал, чтобы получить доступ к NVM. На самом деле, не обязательно выходить из терминала, достаточно убедиться, что изменения, внесенные менеджером nvm в путь, уже отражаются, потому просто наберите:
Кроме того, выполните команду, предложенную в выводе скрипта. Теперь введите:
На данном этапе может возникнуть ошибка: -bash: nvm: command not found; возможно, это происходит потому, что git не установлен.
В таком случае нужно установить git и перезапустить скрипт:
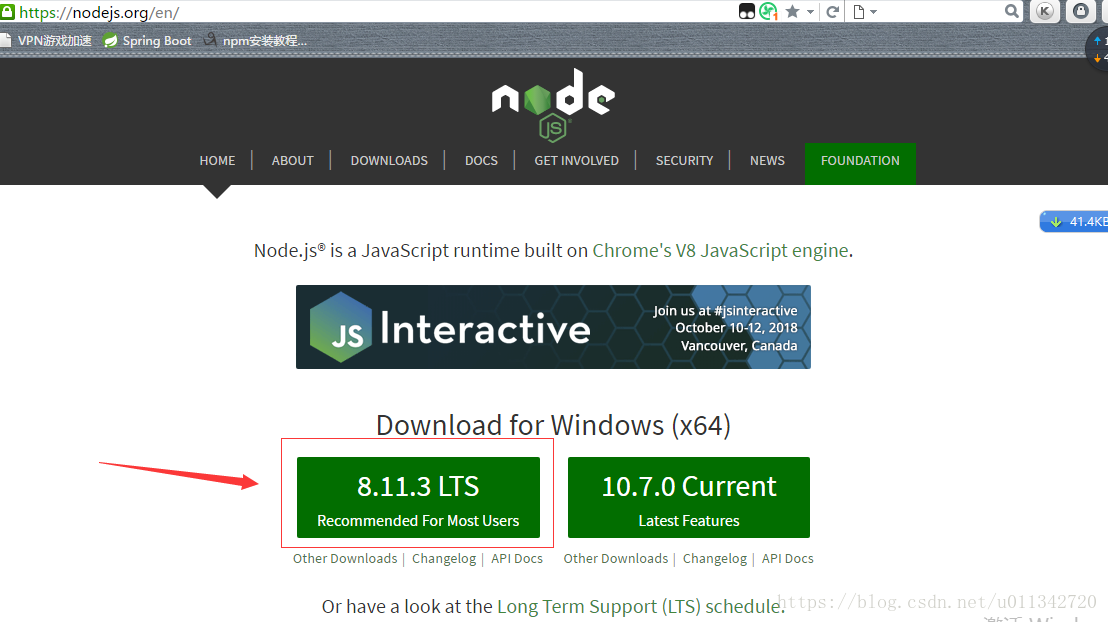
Появится список всех доступных версий Node.js. Чтобы узнать последнюю стабильную версию, посетите сайт Node.js – стабильная версия указана в центре страницы.
Чтобы, например, установить версию 0.10.13 (последнюю стабильную версию на момент написания статьи), введите:

Теперь наберите:
Появится версия текущая версия node (в данном случае v0.10.13).
Если, например, приложение требует более старой версии и работает только с node v0.8.16, нужно ввести:
Данная команда установит версию v0.8.16 и переключится на нее.
Чтобы переключиться назад на версию v0.10.13, используйте команду use:
Как видите, NVM – легкий и удобный способ переключиться с одной версии на другую. Однако, есть один нюанс. Если ввести:
появится интересный результат. NVM устанавливает Node.js в домашний каталог пользователя. Это очень удобно для разработки. Но при запуске приложение Node можно обнаружить, что последняя версия Node.js, только что установленная через NVM, повредила производство приложения Node и оно перестало работать. Лучше установить одну копию Node.js глобально; это позволит другим пользователям использовать NVM для переключения между версиями разработки.
Дл этого запустите следующую команду (введите пароль пользователя):
Вышеприведенная команда кажется сложной, но она только копирует через nvm активную версию Node.js в каталог /usr/local/ (каталог, предназначенный в linux для глобальных установок пользователя) и устанавливает привилегии на нее таким образом, что все пользователи могут получить к ней доступ.
При необходимости сделать глобальной другую версию Node.js просто снова выполните команду nvm use vXX.XX.XX; указанная версия станет общесистемной. После этого снова запустите предыдущую команду, чтобы скопировать версию в системный каталог.
Чтобы убедиться, что все работает должным образом, перейдите на учетную запись root и выполните команду which, чтобы убедиться, что node установлен в /usr/local/bin:
Должно появиться:
Готово! Программная платформа Node.js установлена и готова к работе!
GitLinuxNode Version ManagerNode.jsNVMVPS
Install Windows Terminal (optional)
Windows Terminal is an improved command line shell that allows you to run multiple tabs so that you can quickly switch between Linux command lines, Windows Command Prompt, PowerShell, Azure CLI, or whatever you prefer to use. You can also create custom key bindings (shortcut keys for opening or closing tabs, copy+paste, etc.), use the search feature, customize your terminal with themes (color schemes, font styles and sizes, background image/blur/transparency), and more. Learn more in the Windows Terminal docs.
Install Windows Terminal using the Microsoft Store: By installing via the store, updates are handled automatically.
Установка WSL 2
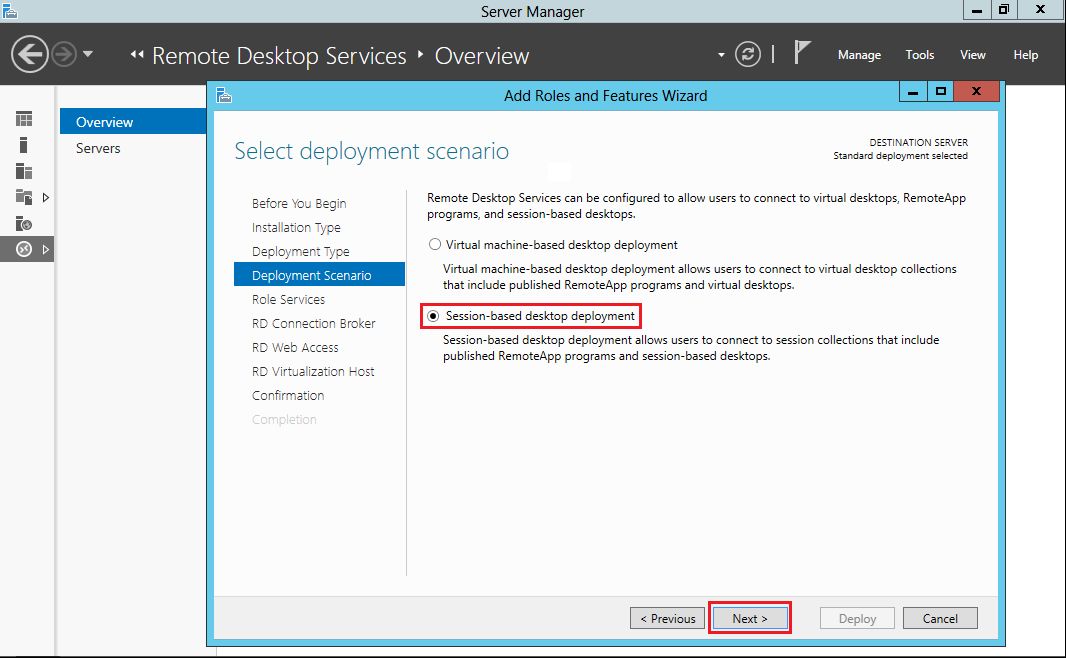
WSL 2 — это самая свежая версия для ОС Windows. Мы рекомендуем использовать для профессиональных рабочих процессов разработки Node.js именно ее. Чтобы включить и установить WSL 2, выполните инструкции из документации по установке WSL. Эти инструкции включают возможность выбора дистрибутива Linux (например, Ubuntu).
Установив WSL 2 и дистрибутив Linux, откройте дистрибутив Linux (его можно найти в меню «Пуск» в Windows) и проверьте версию и кодовое имя с помощью команды .
Мы рекомендуем не просто регулярно обновлять дистрибутив Linux, а сделать это сразу после установки. Так вы убедитесь в том, что у вас есть последние версии пакетов. Windows не обрабатывает это обновление автоматически. Чтобы обновить дистрибутив, используйте команду .
macOS Troubleshooting
nvm node version not found in vim shell
If you set node version to a version other than your system node version and open vim and run you should see if you see your system version . You need to run:
sudo chmod ugo-x /usr/libexec/path_helper
More on this issue in .
nvm is not compatible with the npm config «prefix» option
Some solutions for this issue can be found here
There is one more edge case causing this issue, and that’s a mismatch between the path and the user’s home directory’s actual name.
You have to make sure that the user directory name in and the user directory name you’d see from running are capitalized the same way (See this issue).
Homebrew makes zsh directories unsecure
zsh compinit: insecure directories, run compaudit for list.
Ignore insecure directories and continue  or abort compinit ? y
Homebrew causes insecure directories like and . This is not an problem — it is a homebrew problem. Refer here for some solutions related to the issue.
Macs with M1 chip
Experimental support for the M1 architecture was added in node.js v15.3 and full support was added in v16.0.
Because of this, if you try to install older versions of node as usual, you will probably experience either compilation errors when installing node or out-of-memory errors while running your code.
So, if you want to run a version prior to v16.0 on an M1 Mac, it may be best to compile node targeting the Intel architecture so that Rosetta 2 can translate the processor instructions to ARM-based Apple Silicon instructions.
Here’s what you will need to do:
-
Install Rosetta, if you haven’t already done so
$ softwareupdate --install-rosetta
You might wonder, «how will my M1 Mac know to use Rosetta for a version of node compiled for an Intel chip?».
If an executable contains only Intel instructions, macOS will automatically use Rosetta to translate the instructions. -
Open a shell that’s running using Rosetta
$ arch -x86_64 zsh
Note: This same thing can also be accomplished by finding the Terminal or iTerm App in Finder, right clicking, selecting «Get Info», and then checking the box labeled «Open using Rosetta».
Note: This terminal session is now running in .
If is not the shell you typically use, may not be ‘d automatically like it probably is for your usual shell through your dotfiles.
If that’s the case, make sure to source .$ source "${NVM_DIR}/nvm.sh" -
Install whatever older version of node you are interested in. Let’s use 12.22.1 as an example.
This will fetch the node source code and compile it, which will take several minutes.$ nvm install v12.22.1 --shared-zlib
Note: You’re probably curious why is included.
There’s a bug in recent versions of Apple’s system compiler.
If one of these broken versions is installed on your system, the above step will likely still succeed even if you didn’t include the flag.
However, later, when you attempt to something using your old version of node.js, you will see errors.
If you want to avoid the possible hassle of dealing with this, include that flag.
For more details, see this issue and -
Exit back to your native shell.
$ exit
$ arch
arm64
Note: If you selected the box labeled «Open using Rosetta» rather than running the CLI command in the second step, you will see here.
Unless you have another reason to have that box selected, you can deselect it now. -
Check to make sure the architecture is correct. is the abbreviation for , which is what you want to see.
$ node -p process.arch
x64
Now you should be able to use node as usual.
How to Install NVM on Linux and Mac
Since Linux and Mac have some similarities (they are both UNIX-based OSes), you can install nvm on them in similar ways.
1. Run the nvm installer
In your terminal, run the nvm installer like this:
You can use or depending on the command available on your device.
These commands will clone the nvm repository to a directory on your device.
2. Update your profile configuration
The installation process from step 1 should also automatically add the nvm configuration to your profile. If you’re using zsh, that would be . If you’re using bash, that would be …or some other profile.
If it doesn’t automatically add nvm configuration, you can add it yourself to your profile file:
This command above loads nvm for use.
3. Reload the shell configuration
With your profile configuration updated, now you will reload the configuration for your terminal to use:
With this command executed, nvm is ready for you to use. You can confirm that nvm is installed correctly by running:
This should show the version of nvm installed.
Docker For Development Environment
To make the development and testing work easier, we have a Dockerfile for development usage, which is based on Ubuntu 18.04 base image, prepared with essential and useful tools for development, to build the docker image of the environment, run the docker command at the root of repository:
$ docker build -t nvm-dev .
This will package your current nvm repository with our pre-defined development environment into a docker image named , once it’s built with success, validate your image via :
$ docker images

REPOSITORY         TAG                 IMAGE ID            CREATED             SIZE
nvm-dev            latest              9ca4c57a97d8        7 days ago          650 MB
If you got no error message, now you can easily involve in:
$ docker run -h nvm-dev -it nvm-dev

nvm@nvm-dev:~/.nvm$
Please note that it’ll take about 8 minutes to build the image and the image size would be about 650MB, so it’s not suitable for production usage.
For more information and documentation about docker, please refer to its official website:
Alternative version managers
While nvm is currently the most popular version manager for node, there are a few alternatives to consider:
- is a long-standing alternative that accomplishes the same thing with slightly different commands and is installed via rather than a bash script.
- is a newer version manager, claiming to be much faster than . (It also uses Azure Pipelines.)
- is a new version manager from the LinkedIn team that claims improved speed and cross-platform support.
- is a single CLI for multiple languages, like ike gvm, nvm, rbenv & pyenv (and more) all in one.
- nvs (Node Version Switcher) is a cross-platform alternative with the ability to integrate with VS Code.
установка
Давайте возьмем первую крышку для операционных систем Windows, MacOS и Linux.
Окна
Во-первых, нам нужно сделать некоторые приготовления:
- Node.js Удаление любой существующей версии
- Удалить любой существующий каталог установки Node.js (например, )
- Удалить существующее место установки NPM (например, )
После этого загрузить и запуститьПоследний стабильный установщик Вы должны быть хорошими!
MacOS / Linux.
С Windows удалите узел и установите NPM в MacOS и Linux не являются обязательными. Если это то, что вы хотите сделать, есть много хороших ресурсов в Интернете. Например, как в узле удаления следующееМакасLinux. 。 Вот как вы можетеУдалить любую предыдущую установку NPM Ты можешь иметь.
Вы можете установить NVM с помощью керлинга или установки WGET. В вашем терминале запустите следующую команду:
вместе скудрявый :
или жеВот :
Обратите внимание, что номер версии Будет иметь свою ценность с разработкой проектаЧтобы найти последнюю версию. Это будет клонировать репозиторий NVMИ внести необходимые изменения в ваш файл конфигурации Bash, чтобыМожет быть из любого места в терминале
Это будет клонировать репозиторий NVMИ внести необходимые изменения в ваш файл конфигурации Bash, чтобыМожет быть из любого места в терминале.
Вот и все! Обновить (или перезапуск) клеммы и NVM могут использоваться в любое время.
Альтернативные диспетчеры версий
Несмотря на то что nvm в настоящее время является самым популярным менеджером версий для Node, есть несколько альтернативных вариантов:
- — это давняя альтернатива , которая выполняет те же процессы с помощью немного отличающихся команд и устанавливается с помощью , а не скрипта bash.
- —это более новый диспетчер версий, заявленный как более быстрый, чем . (Он также использует конвейеры Azure.)
- — это новый диспетчер версий, созданный командой LinkedIn. Заявлено, что он отличается увеличенной скоростью и межплатформенной поддержкой.
- — это единый интерфейс командной строки для нескольких языков, объединяющий в себе gvm, nvm, rbenv & pyenv (и много других).
- nvs (Node Version Switcher) — это кроссплатформенный вариант с возможностью интеграции с VS Code.
Commands
List Node.js (and io.js) versions available
(fetches their lists from respective sites).
will list all 4.*.* versions available.
install
Install latest of specified Node.js versions.
One can select platform ( or )
or default will be used.
If specified version is installed,
it will be ,
so it is safe to run
to ensure the latest version in installed.
To force reinstallation, add
to the end of command,
eg will reinstall
latest version unconditionally.
use
Switch to latest of installed versions
(filters apply).
Eg means switch to latest of all,
while to latest of iojs.
Run to temporarily make node.exe
unavailable,
you can switch back at any moment later.
remove
Remove oldest of installed versions
considering command line filter.
For security reasons,
must occur at the end of
this command,
or else it will refuse to proceed.
Eg, ( is alias for )
will remove one (minimal) version.
will remove all iojs versions.
Actual removing of files
can take much time,
so it is performed in background.
Don’t logoff or turn off your computer
a minute or two after this command finished.
openssl
Node.js versions 0.*.* contains binary.
can download it and install
into its PATH.
Like command,
platform can be specified.
Other filters (version number for instance)
are meaningless hence ignored.
abbrev
Helps to find comman abbreviation(s).
Eg, run to see all commands,
starting with and their alternatives.
Plain shows all abbreviations.
upgrade
Upgrades itself and/or Node.js
(current or LTS).
Self upgrade is .
For upgrading Node.js specify or
and (optionally) platform
( or ).
These arguments will be
passed to regular
command.
bye
Fully uninstall itself along with
all Node.js versions.
Like command,
requires to proceed
and take some (more) time
for actual files removal
(may be 10 minutes or so).
Building SFX package
To build SFX package
(containing itself
and some Node.js versions),
full repository is needed.
It works only on Windows so far.
Command to build package is ,
where is regular filtering
expression (just like command).
If no filter set,
active installed version will be packed,
unless was issued.
In latter case, latest of installed
will go into SFX.
When filter is specified,
all versions, matching it
will be packed into SFX,
allowing many (or none)
Node.js versions available
after installation.
So, say
to add all versions installed.
You can add some global npm packages
to SFX package, by simple installing them
() into Node.js to package.
License
nvm is released under the MIT license.
Copyright (C) 2010-2017 Tim Caswell and Jordan Harband
Permission is hereby granted, free of charge, to any person obtaining a copy of this software and associated documentation files (the “Software”), to deal in the Software without restriction, including without limitation the rights to use, copy, modify, merge, publish, distribute, sublicense, and/or sell copies of the Software, and to permit persons to whom the Software is furnished to do so, subject to the following conditions:
The above copyright notice and this permission notice shall be included in all copies or substantial portions of the Software.
THE SOFTWARE IS PROVIDED “AS IS”, WITHOUT WARRANTY OF ANY KIND, EXPRESS OR IMPLIED, INCLUDING BUT NOT LIMITED TO THE WARRANTIES OF MERCHANTABILITY, FITNESS FOR A PARTICULAR PURPOSE AND NONINFRINGEMENT. IN NO EVENT SHALL THE AUTHORS OR COPYRIGHT HOLDERS BE LIABLE FOR ANY CLAIM, DAMAGES OR OTHER LIABILITY, WHETHER IN AN ACTION OF CONTRACT, TORT OR OTHERWISE, ARISING FROM, OUT OF OR IN CONNECTION WITH THE SOFTWARE OR THE USE OR OTHER DEALINGS IN THE SOFTWARE.
Install nvm-windows, node.js, and npm
Besides choosing whether to install on Windows or WSL, there are additional choices to make when installing Node.js. We recommend using a version manager as versions change very quickly. You will likely need to switch between multiple Node.js versions based on the needs of different projects you’re working on. Node Version Manager, more commonly called nvm, is the most popular way to install multiple versions of Node.js, but is only available for Mac/Linux and not supported on Windows. Instead, we recommend installing nvm-windows and then using it to install Node.js and Node Package Manager (npm). There are to consider as well covered in the next section.
Important
It is always recommended to remove any existing installations of Node.js or npm from your operating system before installing a version manager as the different types of installation can lead to strange and confusing conflicts. This includes deleting any existing nodejs installation directories (e.g., «C:\Program Files\nodejs») that might remain. NVM’s generated symlink will not overwrite an existing (even empty) installation directory. For help with removing previous installations, see How to completely remove node.js from Windows.)
Warning
NVM is designed to be installed per-user, and invoked per-shell. It is not designed for shared developer boxes or build servers with multiple build agents. NVM works by using a symbolic link. Using nvm in shared scenarios creates a problem because that link points to a user’s app data folder — so if user x runs , the link will point node for the entire box to their app data folder. If user y runs node or npm, they will be directed to run files under x’s user account and in the case of , they will be modifying x’s files, which by default is not allowed. So nvm is only prescribed for one developer box. This goes for build servers too. If two build agents are on the same vm/box, they can compete and cause odd behavior in the builds.
-
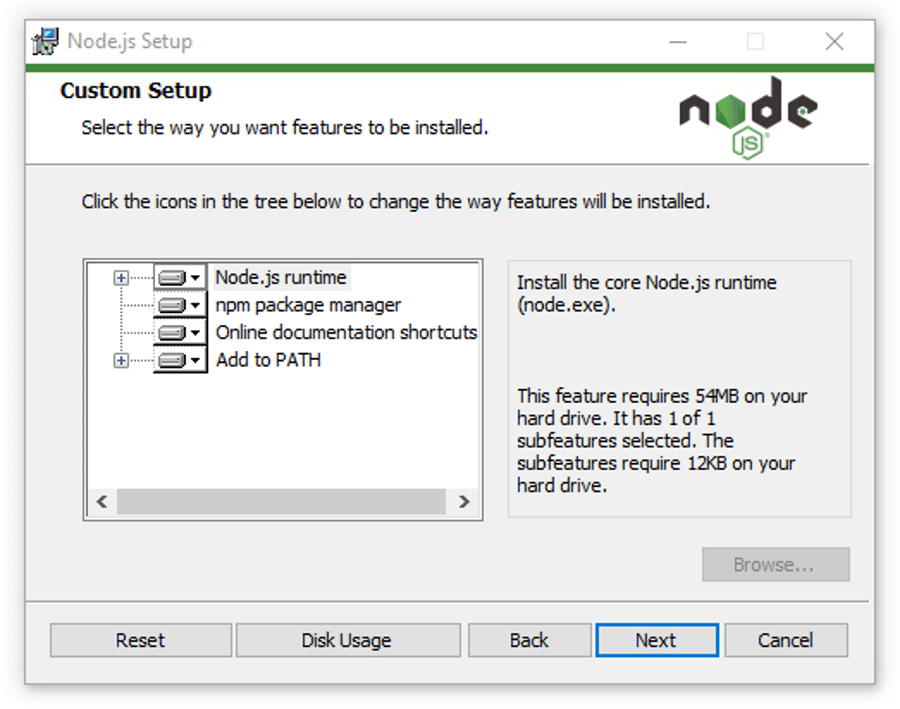
Follow the install instructions on the . We recommend using the installer, but if you have a more advanced understanding of your needs, you may want to consider the manual installation. The installer will point you to the releases page for the most recent version.
-
Download the nvm-setup.zip file for the most recent release.
-
Once downloaded, open the zip file, then open the nvm-setup.exe file.
-
The Setup-NVM-for-Windows installation wizard will walk you through the setup steps, including choosing the directory where both nvm-windows and Node.js will be installed.
-
Once the installation is complete. Open PowerShell (recommend opening with elevated Admin permissions) and try using windows-nvm to list which versions of Node are currently installed (should be none at this point):
-
Install the current release of Node.js (for testing the newest feature improvements, but more likely to have issues than the LTS version):
-
Install the latest stable LTS release of Node.js (recommended) by first looking up what the current LTS version number is with: , then installing the LTS version number with: (replacing with the number, ie: ).
-
List what versions of Node are installed: …now you should see the two versions that you just installed listed.
-
After installing the Node.js version numbers you need, select the version that you would like to use by entering: (replacing with the number, ie: ).
Warning
Access Denied Issue in nvm-windows version 1.1.9, switching node version requires elevated Powershell (run as administrator). It is recommended to use version 1.1.7 to avoid this issue.

-
To change the version of Node.js you would like to use for a project, create a new project directory , and enter the directory , then enter replacing with the version number you’d like to use (ie v10.16.3`).
-
Verify which version of npm is installed with: , this version number will automatically change to whichever npm version is associated with your current version of Node.js.
Alternative version managers
While windows-nvm is currently the most popular version manager for node, there are alternatives to consider:
-
nvs (Node Version Switcher) is a cross-platform alternative with the ability to integrate with VS Code.
-
is a new version manager from the LinkedIn team that claims improved speed and cross-platform support.
To install Volta as your version manager (rather than windows-nvm), go to the Windows Installation section of their Getting Started guide, then download and run their Windows installer, following the setup instructions.
Important
You must ensure that is enabled on your Windows machine before installing Volta.
To learn more about using Volta to install multiple versions of Node.js on Windows, see the .
Установка nvm, Node.js и npm
Наряду с возможностью выбора системы для разработки (Windows или WSL) при установке Node.js доступны и другие возможности. Мы рекомендуем использовать диспетчер версий, так как версии меняются достаточно быстро. Вероятно, вам нужно будет переключаться между несколькими версиями Node.js в зависимости требований разных проектов, над которыми вы работаете. Диспетчер версий Node Version Manager, чаще называемый nvm, является наиболее популярным средством установки нескольких версий Node.js. Мы выполним описанные ниже шаги, чтобы установить nvm, а затем используем его для установки Node.js и диспетчера пакетов Node Package Manager (npm). Существуют также , которые описаны в следующем разделе.
Важно!
Рекомендуем всегда удалять любые имеющиеся установки Node.js или npm из операционной системы перед установкой диспетчера версий, так как эти установки могут создавать необычные и запутанные конфликты. Например, версия Node, которую можно установить с помощью команды в Ubuntu, уже устарела. Справку по удалению предыдущих установок см. на странице об удалении Node.js из Ubuntu.
-
Откройте командную строку Ubuntu (или другой дистрибутив).
-
Установите cURL (инструмент, используемый для скачивания содержимого из Интернета в командной строке), выполнив команду .
-
Установите nvm с помощью команды .
Примечание
Установка новой версии nvm с помощью cURL заменит старую версию, оставив без изменений версию Node, для установки которой вы использовали nvm. Дополнительные сведения см. на странице проекта GitHub с последними сведениями о выпуске NVM.
-
Чтобы проверить установку, введите . Команда должна вернуть nvm. В случае возврата command not found (команда не найдена) или отсутствия ответа закройте терминал, откройте его снова и повторите попытку. Дополнительные сведения см. в репозитории nvm на сайте GitHub.
-
Вызовите список установленных на данный момент версий Node с помощью команды . На этом этапе список должен быть пуст.
-
Установите текущие и стабильные (LTS) версии Node.js. На следующем шаге вы узнаете, как переключаться между активными версиями Node.js с помощью команды .
- Установите текущий стабильный выпуск (LTS) для Node.js (рекомендуется для приложений в рабочей среде) с помощью команды .
- Установите текущий выпуск Node.js (в нем вы сможете протестировать последние функции и улучшения Node.js, но вероятность возникновения проблем при этом будет велика) с помощью команды .
-
Вызовите список установленных версий Node, выполнив команду . Теперь в нем должны отображаться две недавно установленные версии.
-
Проверьте установку Node.js и текущую версию по умолчанию с помощью команды . Затем проверьте наличие npm, выполнив команду (вы также можете использовать или , чтобы получить путь, используемый для версий по умолчанию).
-
Чтобы изменить версию Node.js на ту, которую вы хотите использовать для проекта, создайте каталог проекта с помощью команды и укажите каталог, выполнив команду . Затем введите , чтобы переключиться на текущую версию, или , чтобы переключиться на версию LTS. Вы также можете использовать определенный номер для любых установленных дополнительных версий, например . (Чтобы просмотреть все доступные версии Node.js, используйте команду .)
Если вы используете nvm для установки Node.js и npm, не следует выполнять команду SUDO для установки новых пакетов.