
VMware Converter – When to use and not use?
VMware Converter is a robust tool for performing standalone conversions from physical hardware to virtual machines or from virtual machines to virtual machines. However, there are typical use cases and those that are non-typical for use with VMware Converter. Let’s highlight some of these.
Typical use cases:
Non-typical use cases or ones that will not work
The following are limitations between Windows and Linux hosts.
| Source Operating System | Limitations |
| Windows | When you convert UEFI sources, Converter Standalone does not copy any UEFI variables to the destination. |
| Synchronization is supported only for volume-based cloning at the block level. | |
| Linux | Only volume-based cloning at the file level is supported. |
| Only managed destinations are supported. | |
| Converting multiboot virtual machines is only supported if GRUB is installed as the boot loader. LILO is not supported. | |
| Converter Standalone copies only the current UEFI boot entry option to the destination when you convert UEFI sources. | |
| Simultaneous cloning of multiple disks and volumes is supported only when converting a virtual Linux source. | |
| Installing VMware Tools on Linux guest operating systems is not supported. | |
VMware Converter: Synchronize changes when performing P2V or V2V Conversion
VMware Converter allows to synchronize changes between the source computer and the target virtual machine located on the ESXi host. This feature allows you to virtualize a physical server with a large amount of data on physical disks in several stages with minimal downtime.
We are going to convert the physical server to a VM in two steps. At the first stage, the Converter copies data from the source computer to the target VM, while the source server is running and the data on it can be changed by users. In the second (final) stage, the synchronization of changes that have occurred since the initial data copying is performed.
The change synchronization feature allows you to reduce the downtime of the application/service during P2V/V2V conversion since the end application only needs to be turned off while the final changes are being transferred.
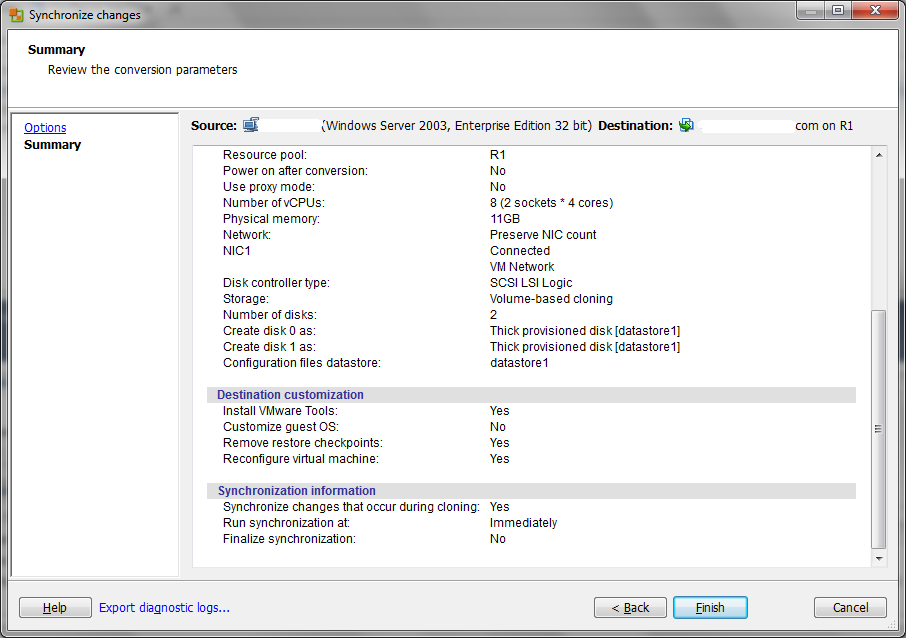
- Check the Synchronize change option in the Advanced section. Select when the next sync will be performed. Be sure to uncheck (!!!) the Perform final synchronization item;
- On the Post-Conversion tab, select the actions to be performed after the final synchronization. We want to automatically turn on the created VM (Power on destination machine), turn off the source server (Power off source machine), install VMTools, etc;
- It remains to start the initial phase of P2V conversion and wait for it to finish.
Note. In this case, the conversion of the physical file server with 700 GB of data took about 15 hours. - After the initial conversion is completed, you can manually perform the final synchronization. To do it, select your task in VMware Converter and then click Synchronize in the context menu;
Note: VMware Converter installs a special “bitmap driver” (bmdrvr service), which tracks changes in the source system since the last synchronization. - In the wizard window, select the synchronization to be run immediately, and run the final synchronization after it is over. To prevent users from modifying files on the source server during the final synchronization, you can temporarily stop the main service in the VM (for example, a file server or an application server);
- The final synchronization took about an hour, during which the changes on the source machine were replicated to the VM. After that, the old server was automatically shut down, and the new VM turned on;
- You only have to perform the final configuration of the VM (remove hidden network interfaces, remove old device drivers, configure new network adapters, and assign IP addresses, and the virtual machine is ready to go.
During the synchronization of changes, the vSphere server will create some snapshots on the target machine, which allow to roll back to any stage of synchronization if necessary (in this case the logic of VMware Converter will be broken).
Part 1: Why do you need to go with P2V?
Firstly, users need to know that P2V stands for ‘Physical to Virtual.’ This kind of conversion duplicates the applications, data, and operating system from a current physical server to a virtual server.
Here, virtualization dramatically enables users to reduce their server room necessities by segmenting the legacy hardware. A virtual machine makes a sys admin’s work easier and is hardware agnostic. It makes disaster recovery and backups more reliable and easier.
If you encounter any hardware catastrophe, you get the virtual machine running on different hardware pieces with negligible or zero downtime.
On the other hand, fewer data center space, lesser power consumption, and less hardware for repairing and maintaining – all these things reduce costs dramatically. So, it is time you should go with VMware P2V conversion!
Searching for a next solution and choosing the best one!
After hours of failed attempts of searching through FAQ and manuals, I have finally found some options to reanimate a VM, but they turned out to be quite tiresome. For instance, its either reconfiguring VM manually or outside software (to work with a VM where the loader was incorrectly written). However, none of these options fitted since what I wanted was finding a utility that could take care of the conversion process on itself. Nevertheless, what I did find were two software products with marvelous reviews, namely VMware vCenter Converter and StarWind V2V Converter.
VMware vCenter Converter
Basically, it’s just another vendor that created a software product tailored specifically for its own hypervisor and its own virtual environment.
Still, always check for the list of supported OSs (in this case – quite a lot)
Converter Standalone 6.2.x supports the following guest operating systems:
- Windows Vista SP2 (32-bit and 64-bit)
- Windows Server 2008 SP2 (32-bit and 64-bit)
- Windows 7 (32-bit and 64-bit)
- Windows Server 2008 R2 (64-bit)
- Windows 8 (32-bit and 64-bit)
- Windows Server 2012 (64-bit)
- Windows 8.1 (32-bit and 64-bit)
- Windows Server 2012 R2 (64-bit)
- Windows 10 (32-bit and 64-bit)
- Windows Server 2016 (64-bit)
- CentOS 6.x (32-bit and 64-bit)
- CentOS 7.0, 7.1, 7.2, 7.3, 7.4, 7.5 (64-bit)
- Red Hat Enterprise Linux 4.x (32-bit and 64-bit)
- Red Hat Enterprise Linux 5.x (32-bit and 64-bit)
- Red Hat Enterprise Linux 6.x (32-bit and 64-bit)
- Red Hat Enterprise Linux 7.0, 7.1, 7.2, 7.3, 7.4, 7.5 (64-bit)
- SUSE Linux Enterprise Server 10.x (32-bit and 64-bit)
- SUSE Linux Enterprise Server 11.x (32-bit and 64-bit)
- Ubuntu 12.04 LTS (32-bit and 64-bit)
- Ubuntu 14.04 LTS (32-bit and 64-bit)
- Ubuntu 16.04 LTS (32-bit and 64-bit)
Also, it wouldn’t hurt to check for the list of VM conversion variations.
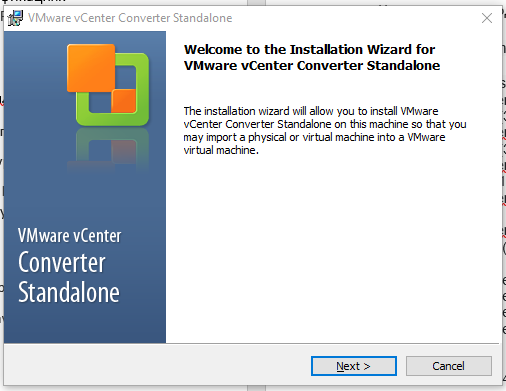
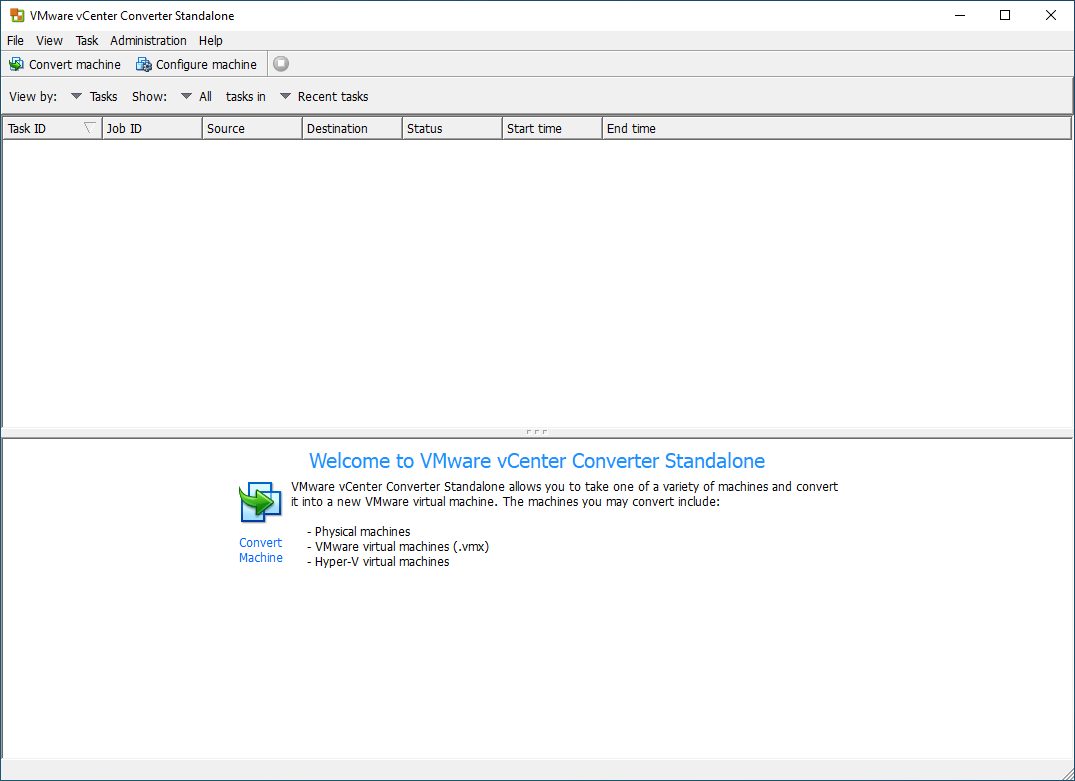
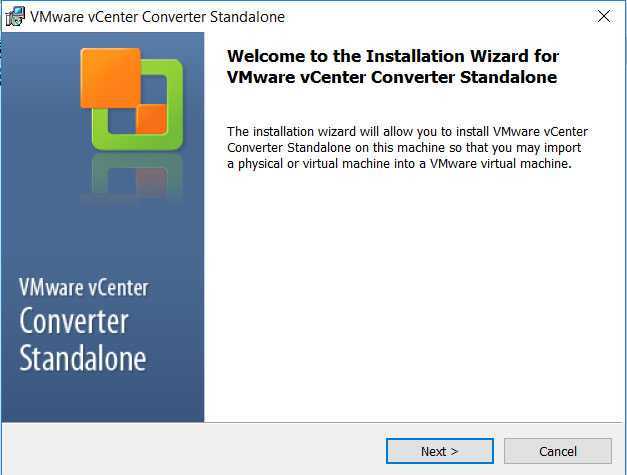
Now, let’s install VMware vCenter Converter. Start it up, and it’s time to get into details of how this converter exactly works. The rest is quite simple. Find convert machine, press on it, and follow the steps of conversion wizard. However, you should take into consideration that the only available conversion format is VDMK, and conversion goes only to the virtual environment built on ESX/ESXi. Select your server, start the conversion process, wait a little bit, and voila – everything is done! Start your newly converted VM on the ESXi host. Everything is working just fine. The conversion is successful. However, you will always need something more, and no wonder that I wanted my solution to be universal. Spoiler alert – I have found it!
How to Install Microsoft Virtual Machine Converter
Do not install MVMC on the computer(s) to be converted. You can install the application directly on the Hyper-V host that will contain the created virtual machine or on an independent system that reads from the source physical machine and writes to the target host. For the rest of this article, I will refer to such an independent system as the broker. During the instructions portion, I will only talk about the broker; if you install MVMC on the target Hyper-V host, then that is the system that I am referring to for you.
If you use a broker, it can be running any version of Windows Server 2008 R2 or onward. The documentation also mentions Windows 8 and later, although desktop operating systems are not explicitly listed on the supported line.
Whichever operating system you choose, you must also have its current .Net environment (3.5 for 2008/R2 or 4.5 for 2012/R2). If you intend to use the PowerShell module, version 3.0 of PowerShell must be installed. This is only of concern for 2008/R2. Enter $PSVersionTable at any PowerShell prompt to see the installed version. If you are below version 3.0, use the same steps listed above for downloading MVMC, but search for Windows Management Framework instead. Version 3 is required, but any later version supported by your broker’s operating system will suffice.
The BITS Compact Server feature must also be enabled:
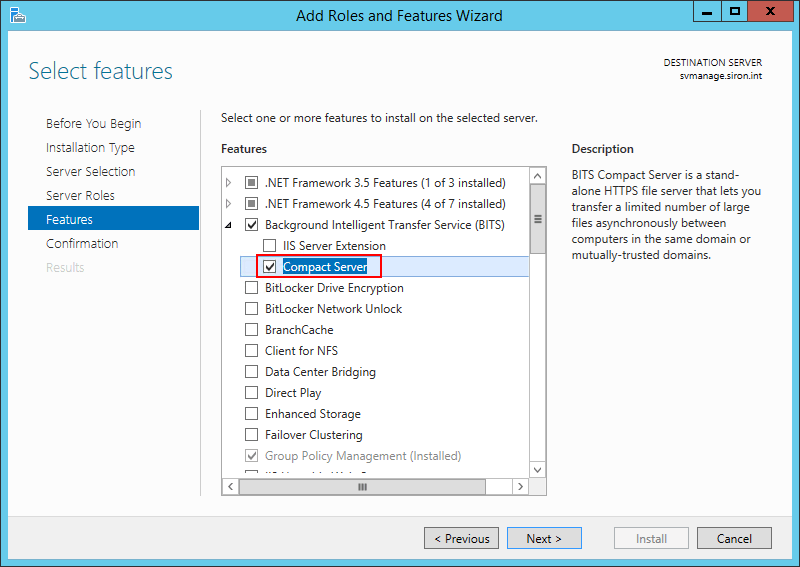
BITS
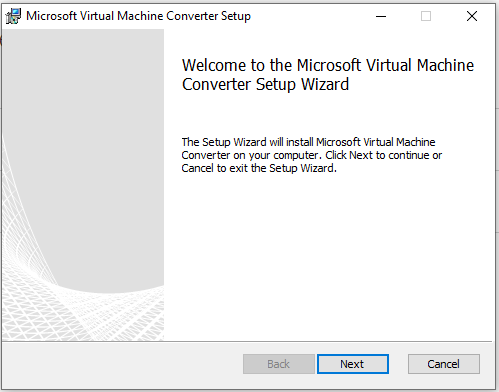
Installing MVMC is very straightforward. On the broker system, execute mvmc_setup.msi. As you step through the wizard, the only page with any real choice is the Destination Folder. Once installed, it will have its own entry for Microsoft Virtual Machine Converter on the Start menu/screen.
Готовим заранее сам ESXi.
Тут есть варианты – ведь ESXi может и с флешки работать, и с PXE загрузиться. Можно конечно установить вместе со всеми работами, но зачем нам тратить 3 минуты?
Поскольку у меня был доступ к серверу с таким же SCSI-контроллером, я установил ESXi на 2 диска в RAID1 и предварительно настроил его. Контроллер, кстати, древний LSI, который может работать только с одним логическим томом. Но так как на целевом сервере никакого рейда не было (может когда-то не разобрались как его настроить?), то проблем с этим не должно быть. Подготовил VM для сервера. Если у вас хосты с разными процессорами, то обязательно настройте CPUID mask, чтобы потом не пришлось останавливать сервер для vmotion ;-). Также, очень рекомендую сразу установить vpxa (агент для vCenter) – вдруг потом памяти не хватит. Включаем доступ по SSH.
Testing and negative results
Now, let’s start with Microsoft solution – Microsoft Virtual Machine Converter. I suppose we can all agree that if Microsoft software developers don’t know the details of the necessary specifications, file types, and inner structure of a product, nobody does. Thus, if everything is ok, the conversion process should be as smooth as they come.
Download and start it up.
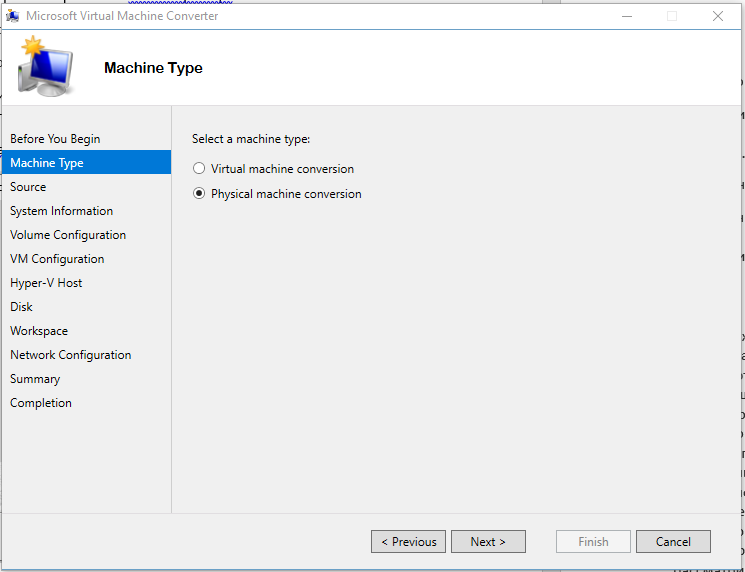
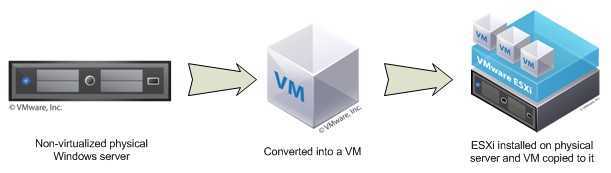
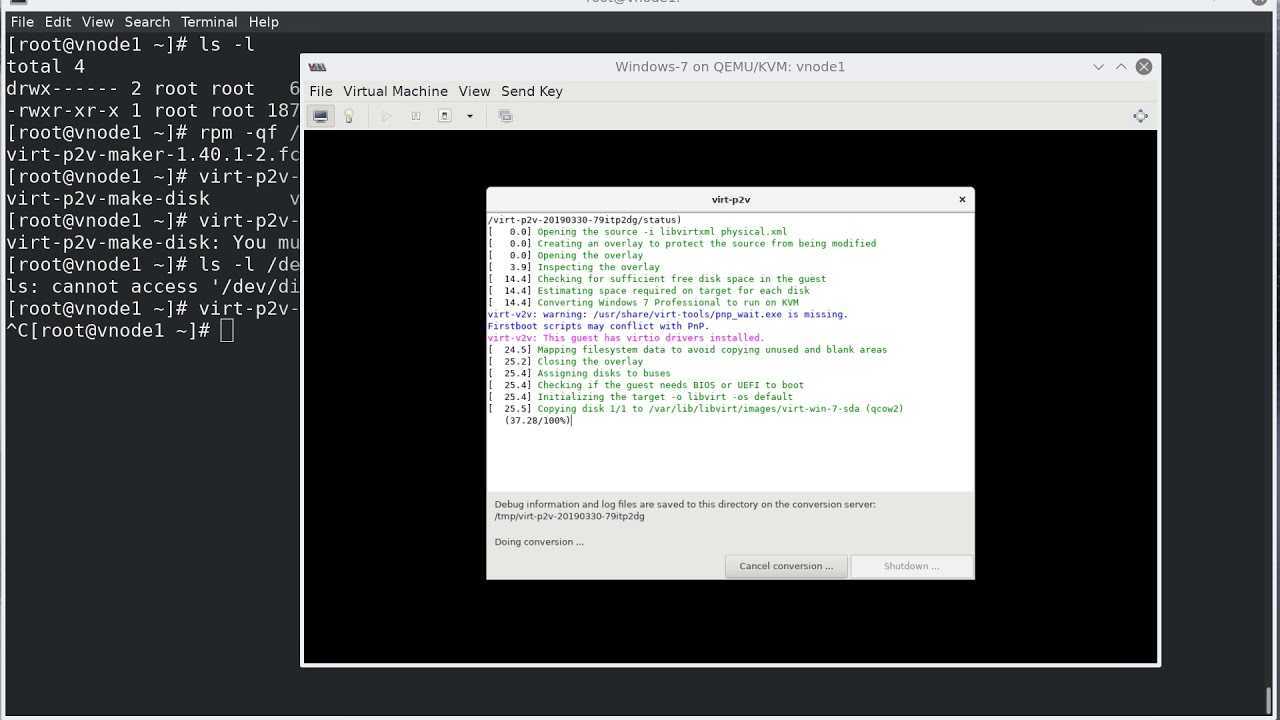
The next step is a conversion of a physical server to a VM (P2V) on Windows Server 2016 R2 with UEFI.
In 2 hours, start the VM with the connected VHD disk.

Then this message pops up: Details: There are blocking issues for the physical-to-virtual conversion: There is no BCD boot device found in the source machine, noticing that the conversion of an EFI boot machine is currently not supported.
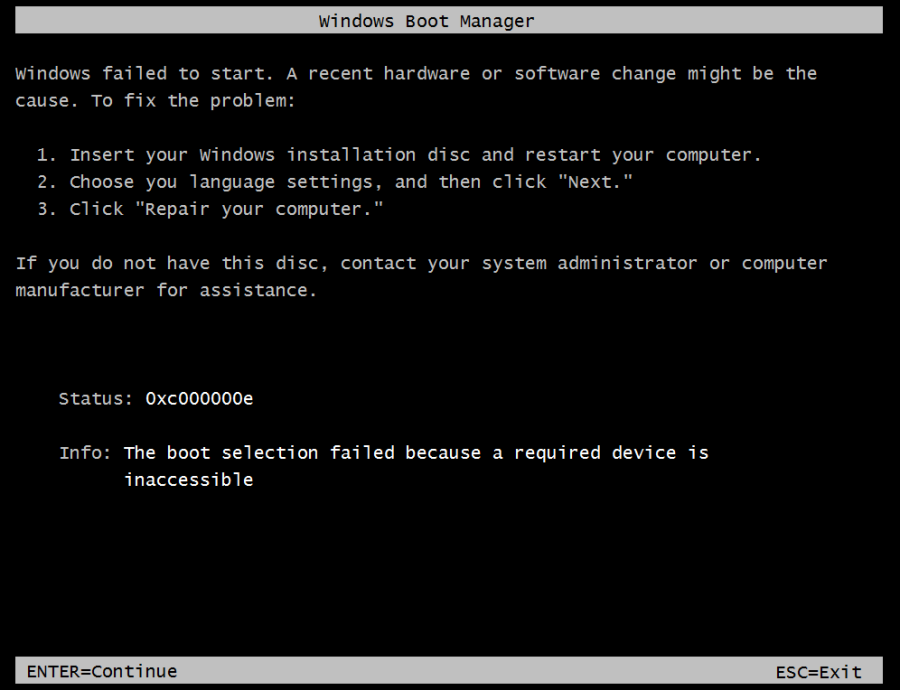
As a result, all I have is black screen now.
Well, I guess now is the time to read the instruction! It says there that EFI is currently not supported. As for the specifications, the only supported servers are supposed to be Windows Server 2012 R2, Windows Server 2008 R2 SP1, or Windows Server 2012. The official support of all MVMC versions (1.0, 2.0, 3.0, 3.1) has been stopped at 03.07.2017.

Алгоритм миграции P2V в Vmware
- Для того, чтобы вы могли преобразовать ваш сервер в виртуальную машину Vmware, вам нужно поставить VMware vCenter Converter Standalone 5.5 описано подробно тут.
- Далее подготовить ESXI хост, куда вы будите виртуализовывать физический сервер
- Запустить конвертер и пройти все этапы мастера преобразования
Запускаем VMware vCenter Converter Standalone 5.5, либо уже есть версия поновее 6.2.
Если выскочит ошибка A File I/O error occurred while accessing, то посмотрите из-за чего она происходит
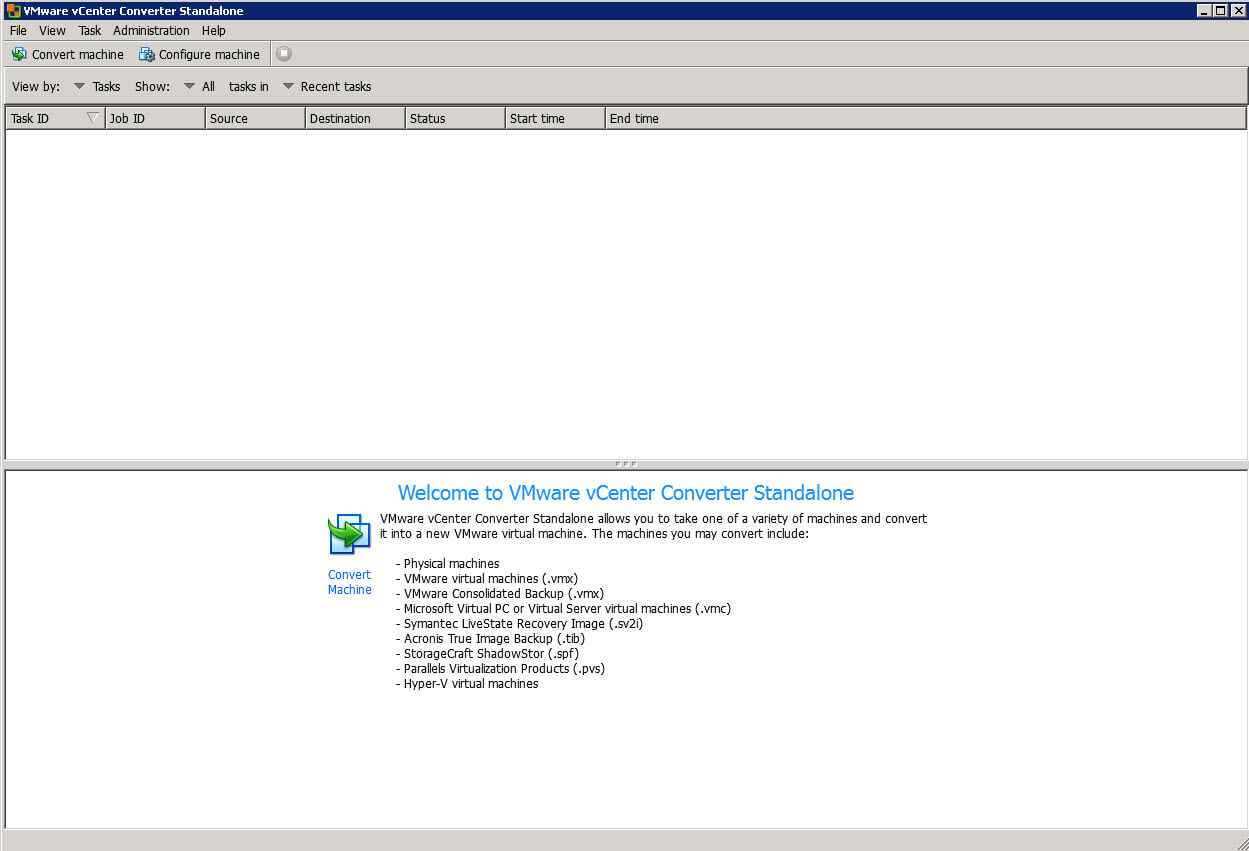
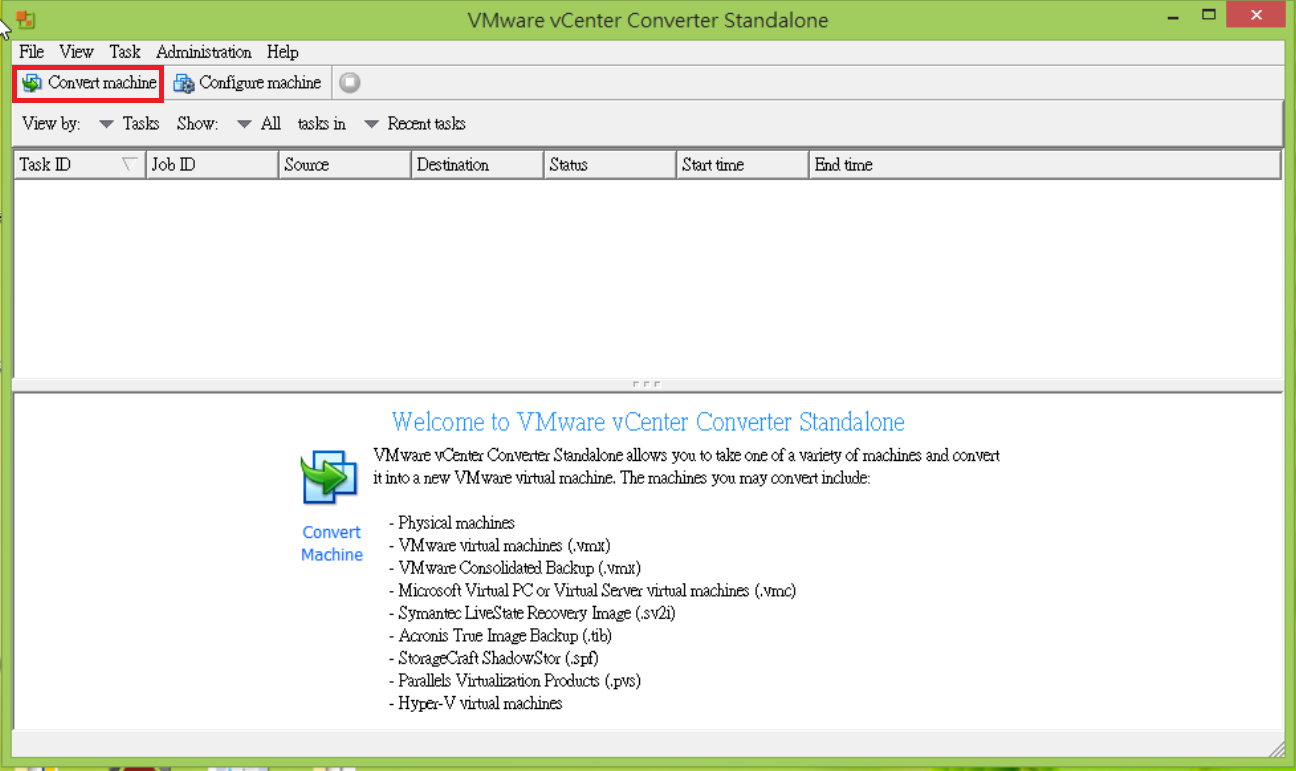
Как виртуализовать физический сервер с помощью VMware vCenter Converter Standalone 5.x.x-01
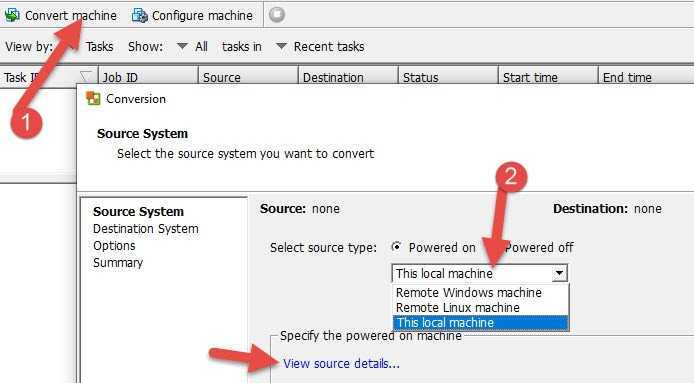
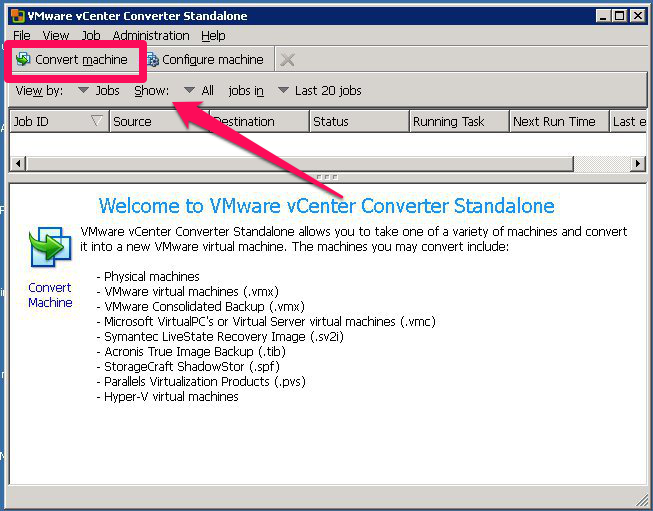
Выбираем Convert machine
Как виртуализовать физический сервер с помощью VMware vCenter Converter Standalone 5.x.x-02
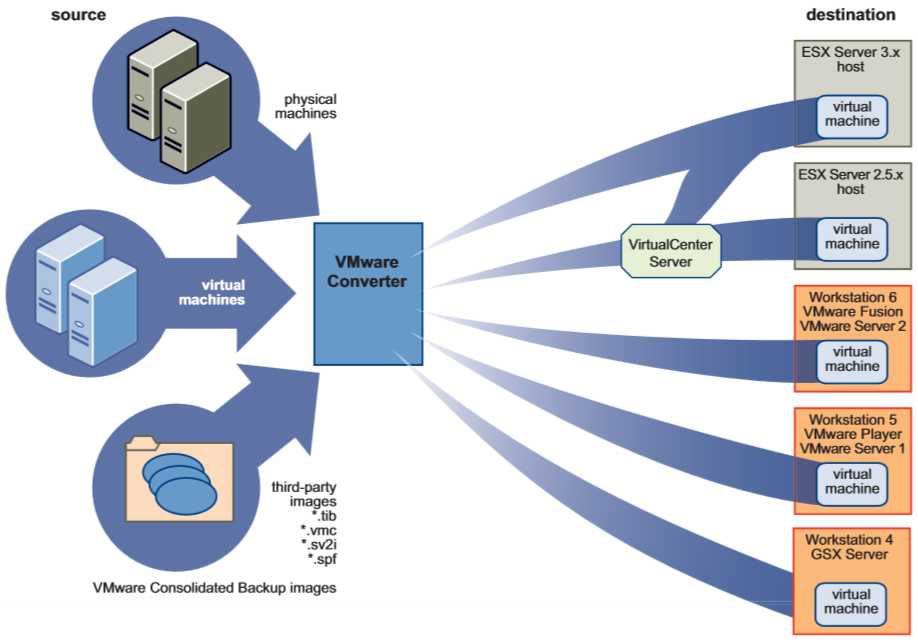
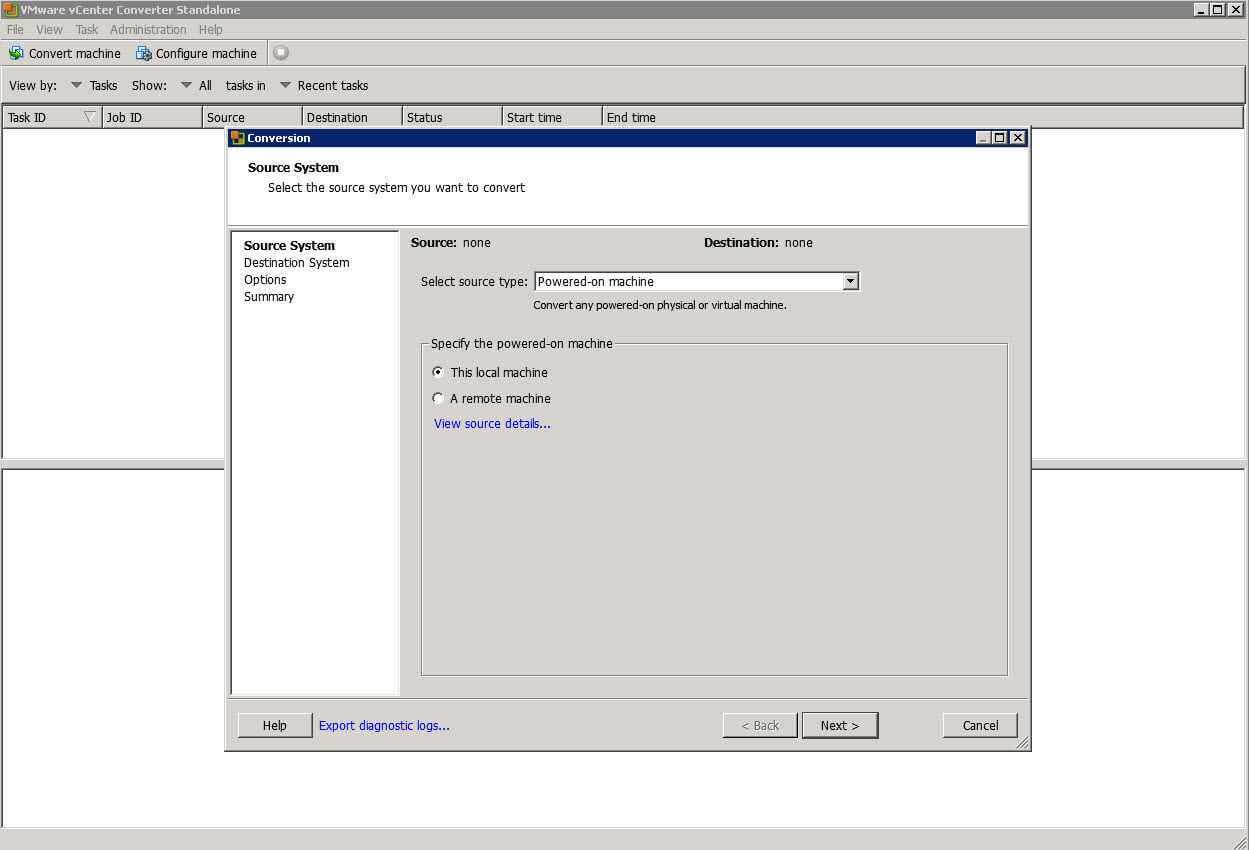
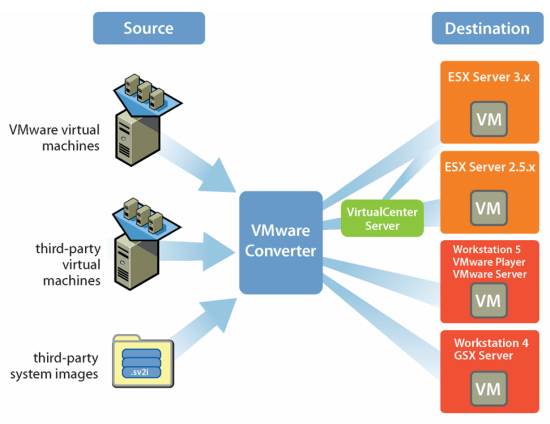
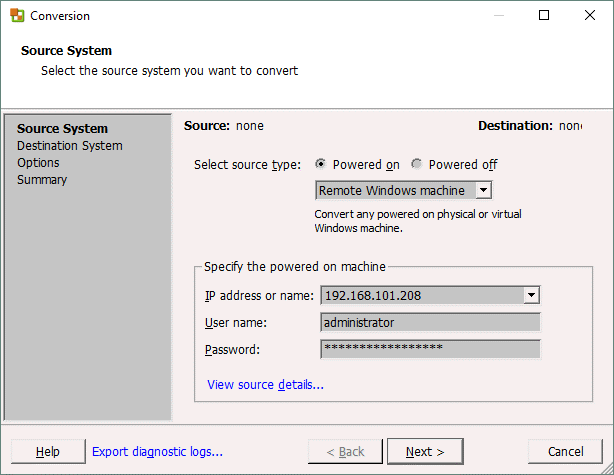
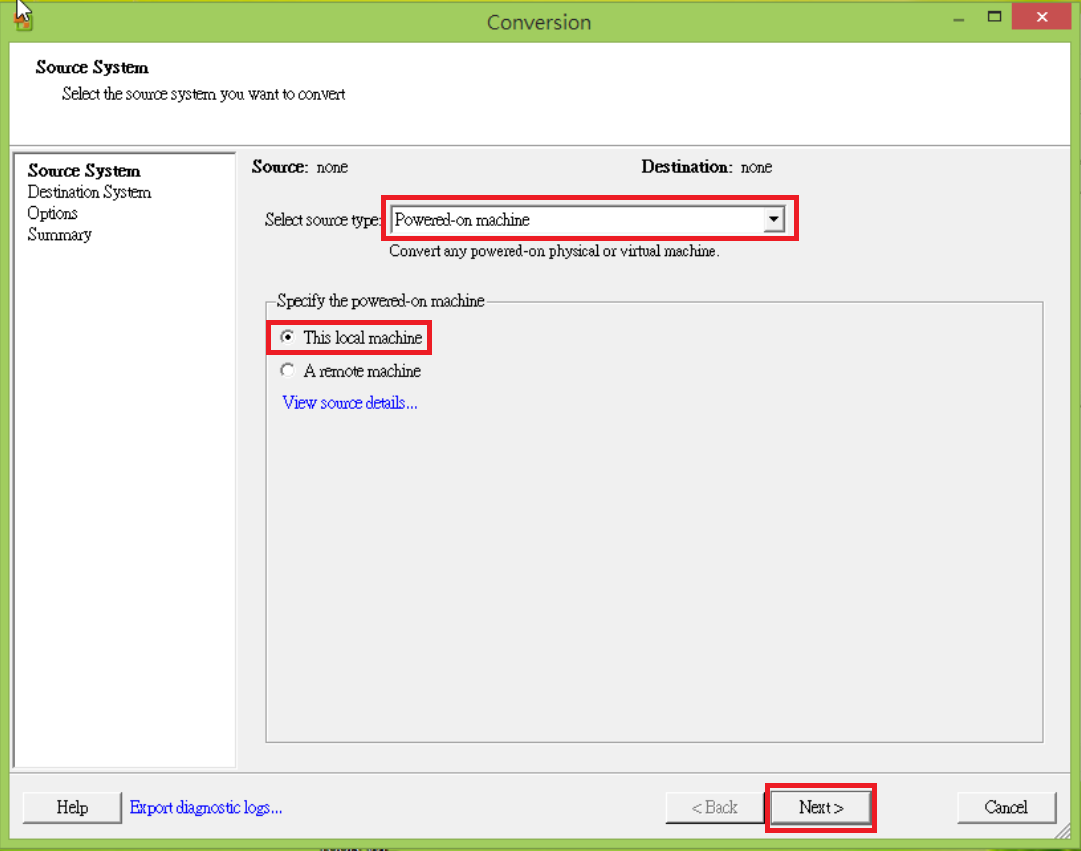
- Powered-on machine, работающий компьютер или сервер. Это основной метод работы VMware converter, «без прерывания работы». Сервер может быть физическим или виртуальным. Находиться в локальной сети или быть локальным (та машина, на которую установлен конвертер). Операционная система Windows или Linux, не Unix. Для Linux сильно ограниченный список операционных систем.
- VMware Infrastructure virtual machine, в случае, если нужно виртуальную машину со старой платформы(Virtual Center 2.5, ESX(i) 2-4.1), перевести на новую, пятую. Основное изменение в 5-ой версии VMware vSphere это новая версия виртуального оборудования за номером 8, вместе с ним изменились и VMware tools.
- VMware Workstation or other Virtual Machine. Workstation очень популярен среди администраторов и часто виртуальная машина из тестовой превращается во временную рабочую. Конвертер перенесет ее на ESXi, в среду vSphere без проблем. Выбираем так же этот пункт, если виртуальные машины работают у вас на VMware Fusion, VMware Player, VMware server 2.x
- Backup image or third-party virtual machine. Восстановление из имеющегося бэкапа или виртуальной машины другого производителя. Восстановление из резервной копии – это очень полезная функция и я ниже расскажу почему.
- Hyper-V server. Для перехода с платформы Microsoft на VMware. Отличается от third-party virtual machine тем, что у вас должен иметься работающий сервер Hyper-V и подключаться конвертер будет к нему. Виртуальные машины должны быть выключены.
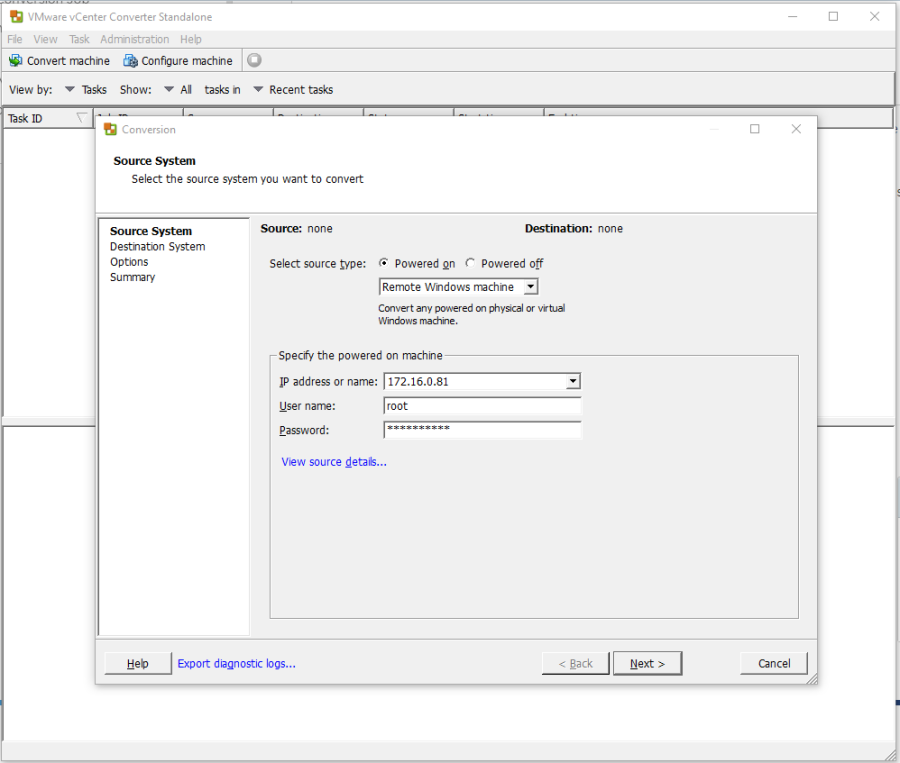
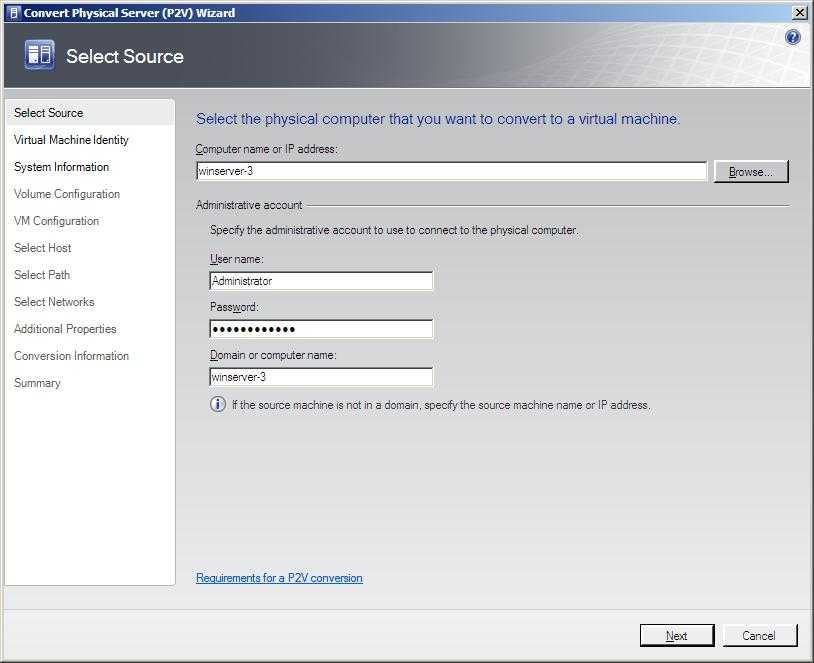
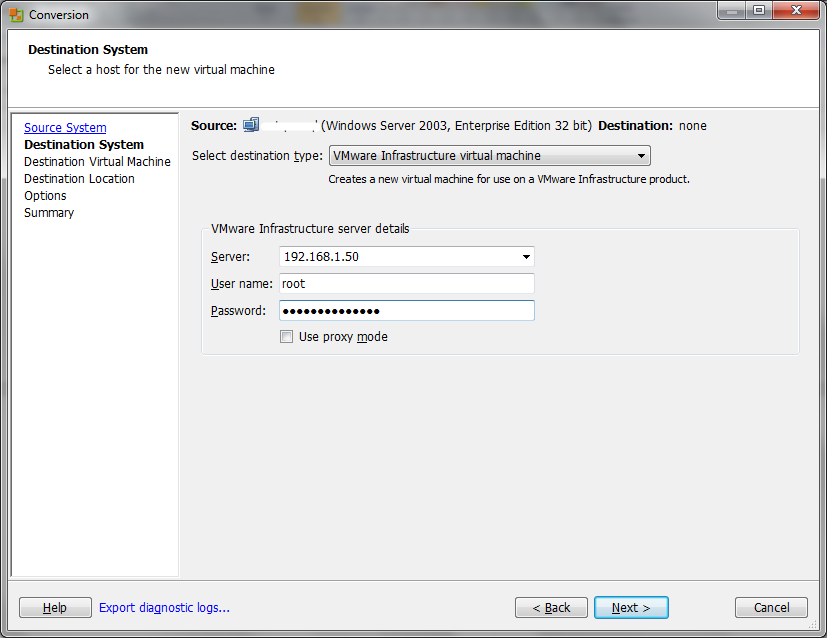
Для работы VMware Converter с Windows like операционной системой по схеме «Powered-on machine» нужны учетные данные администратора системы, чтобы конвертер мог подключиться, установить агента и начать миграцию. Для Linux систем нужно ввести пароль root и иметь возможность подключаться удаленно по SSH. Возможно, понадобиться поправить конфигурационный файл sshd и разрешить root вход. Еще для входа root должен быть в группе wheel.
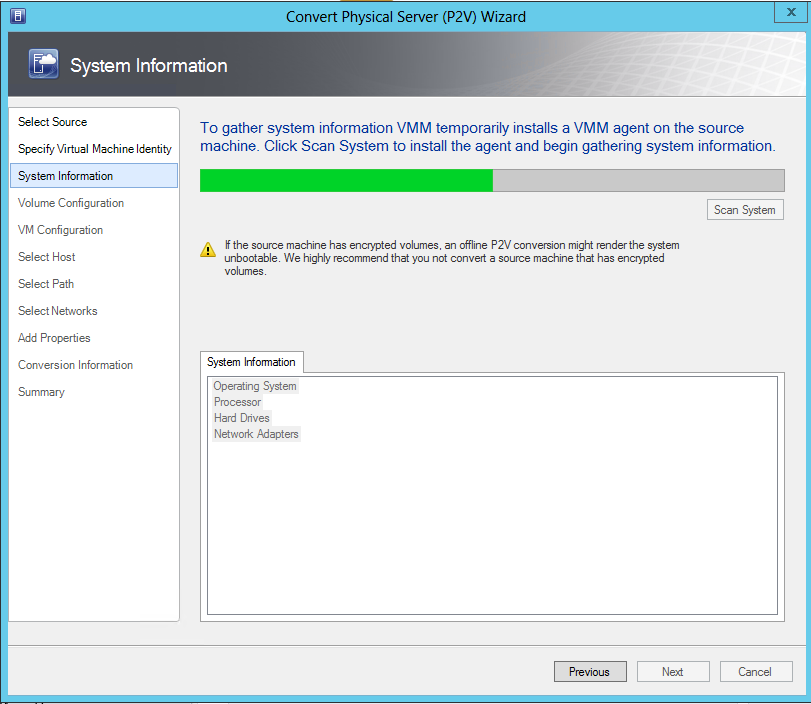
VMware Converter при корректном подключении определяет, какую операционную систему ему предстоит мигрировать. Сколько и какие у нее диски и разделы, сколько сетевых интерфейсов, оперативной памяти, процессоров. Все эти данные будут использованы для создания новой виртуальной машины на ESXi хосте. Я вбиваю адрес vCenter и учетные данные.
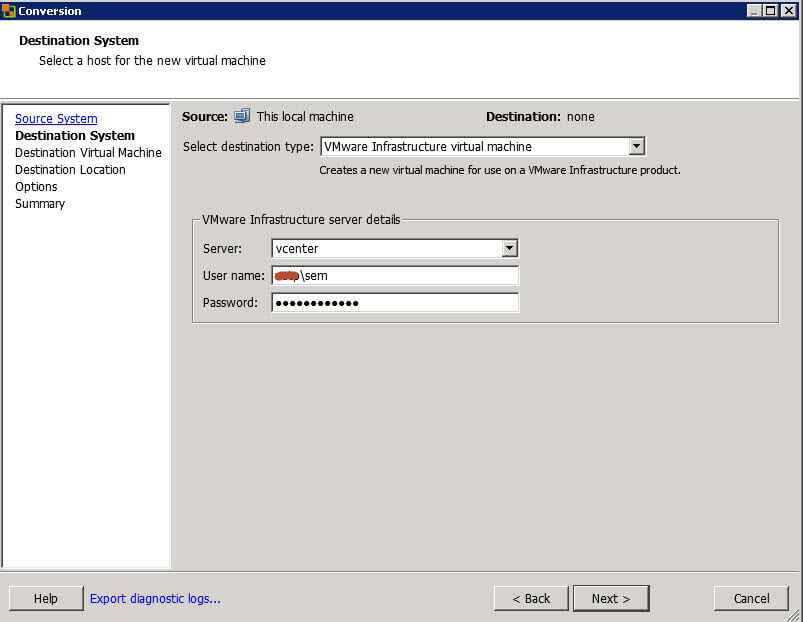
Как виртуализовать физический сервер с помощью VMware vCenter Converter Standalone 5.x.x-03
Игнорирую предупреждение на сертификат
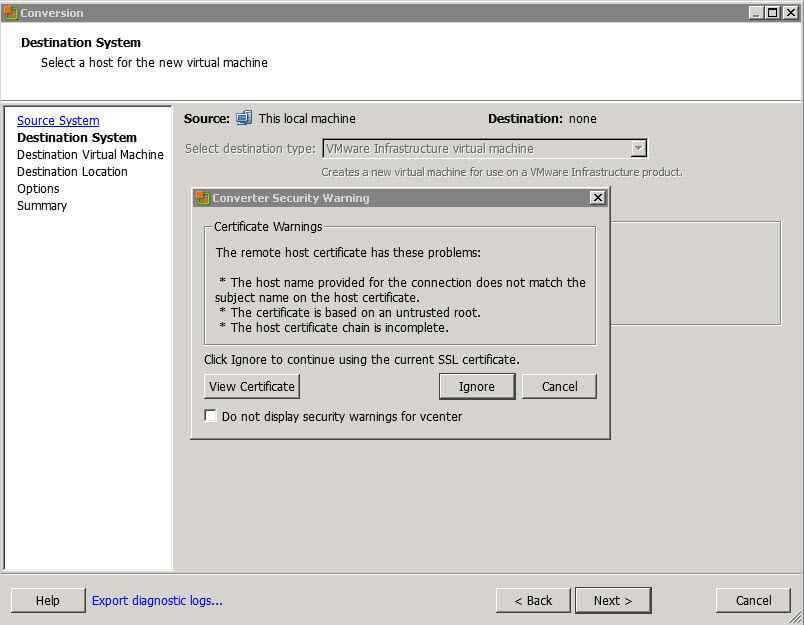
Как виртуализовать физический сервер с помощью VMware vCenter Converter Standalone 5.x.x-04
Выбираем папку проекта для мигрируемой машины
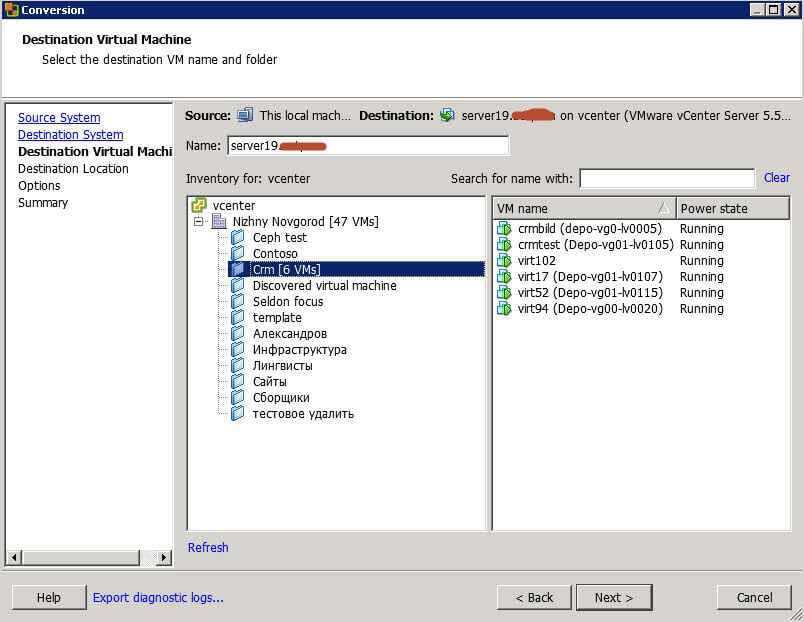
Как виртуализовать физический сервер с помощью VMware vCenter Converter Standalone 5.x.x-05
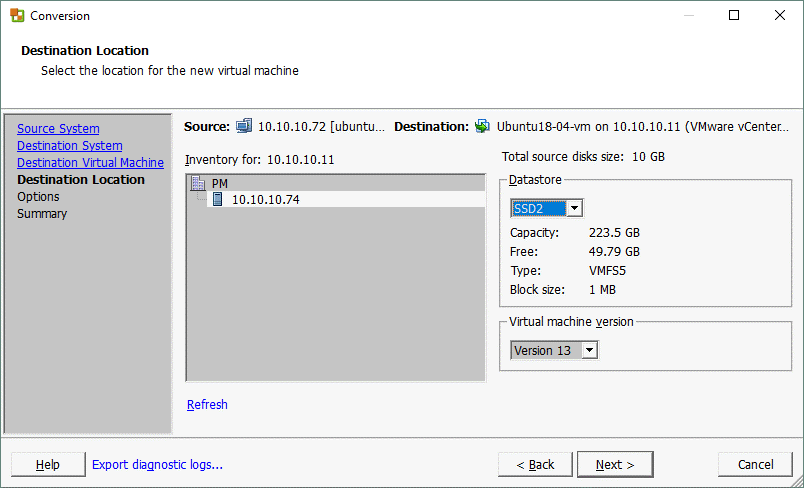
Следующий шаг. Указываем хост ESXi на котором будет запущена виртуальная машина. Хранилище, куда будут записаны файлы ВМ и версию виртуального оборудования (10-ая это последняя, на текущий момент). Подозреваю, что если бы я указал в качестве «Destination system vCenter server», то выбор был бы больше, чем из одного варианта. Отобразились бы все доступные хосты и data store
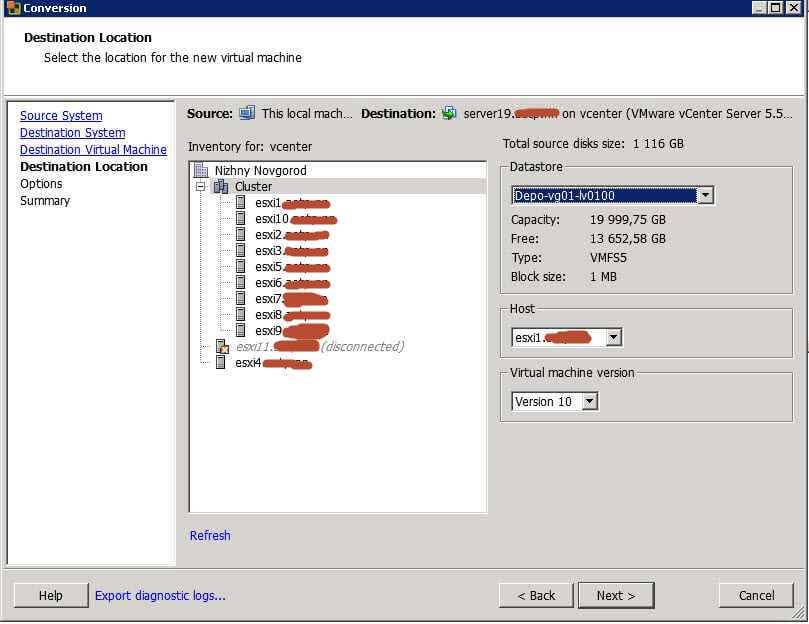
Как виртуализовать физический сервер с помощью VMware vCenter Converter Standalone 5.x.x-06
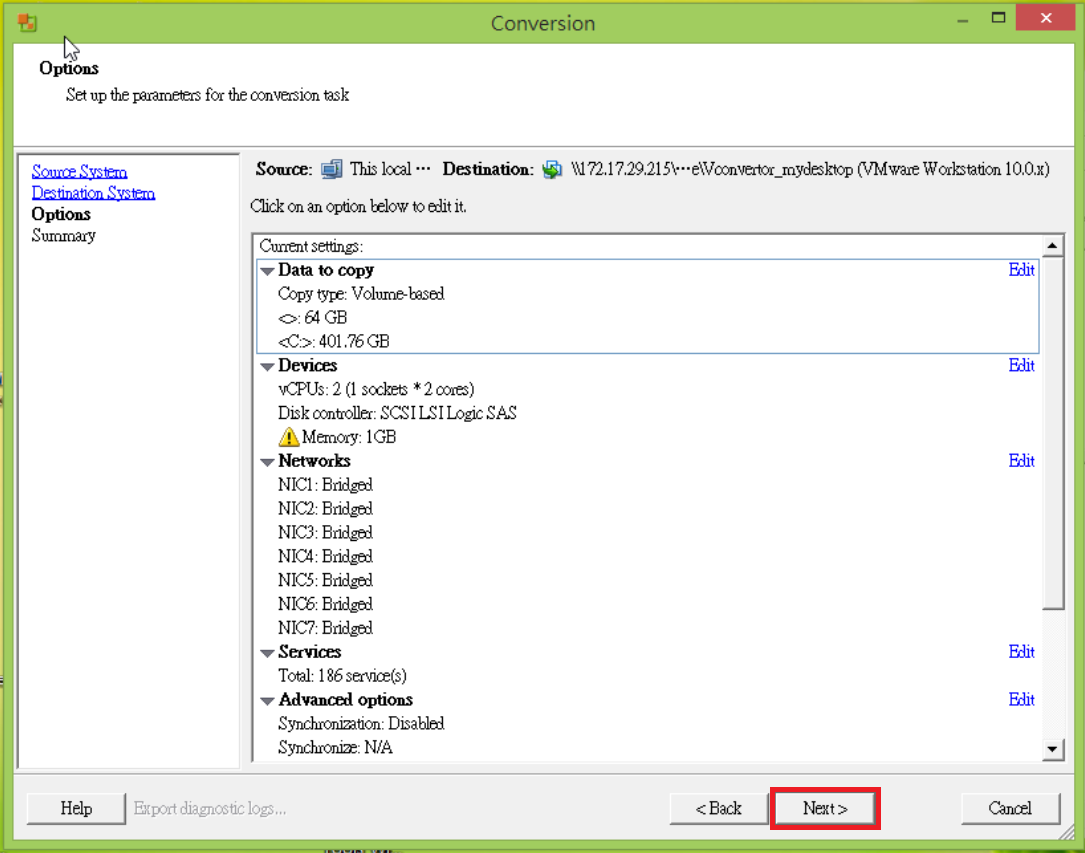
На следующей странице можно задать какие диски нужно конвертировать какие нет, сколько нужно сетевых интерфейсов и многое другое.
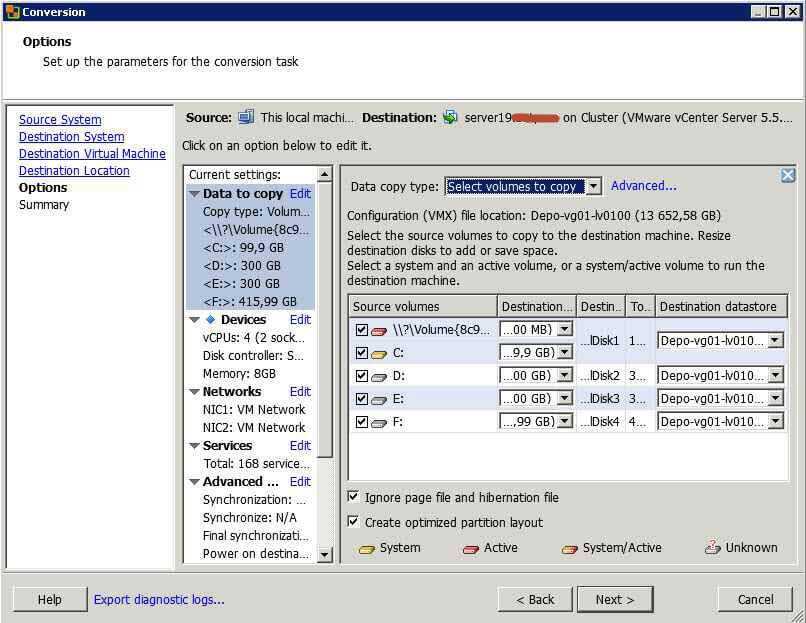
Как виртуализовать физический сервер с помощью VMware vCenter Converter Standalone 5.x.x-07
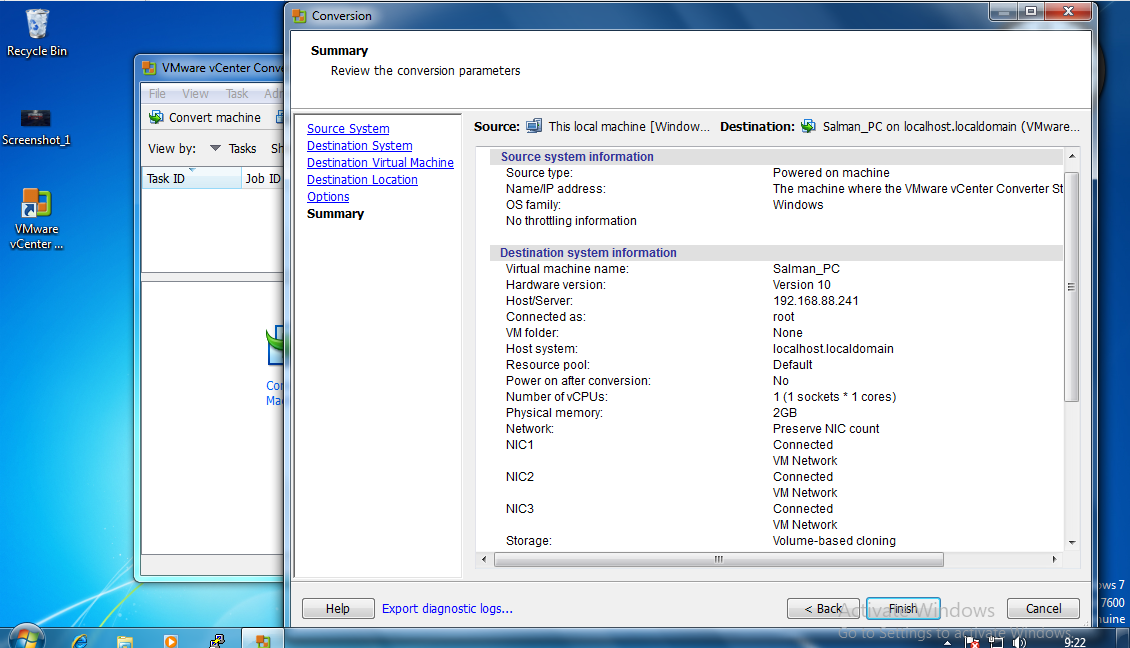
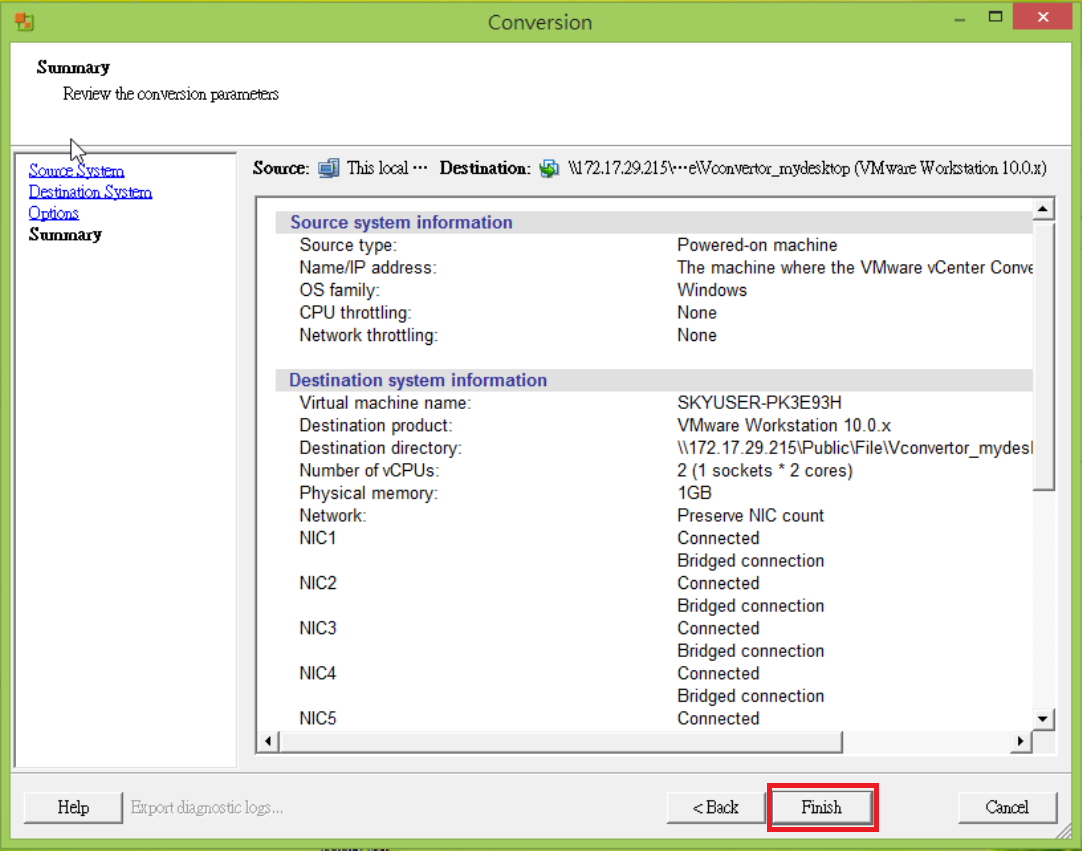
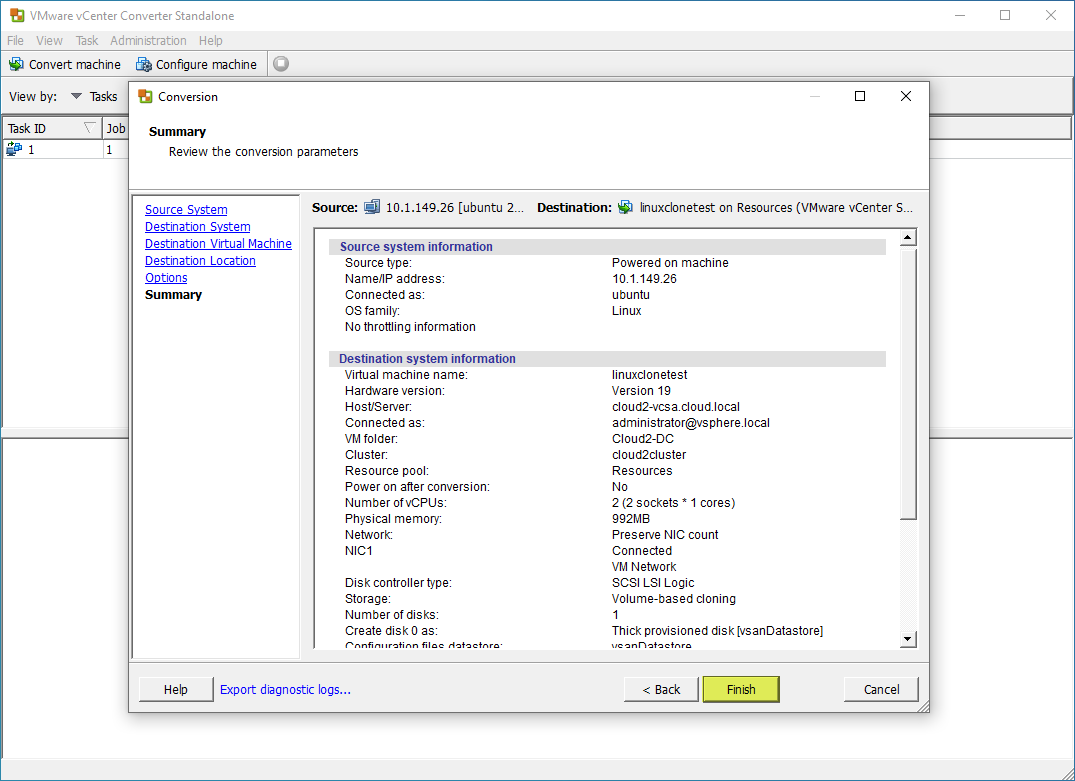
Смотрим сводку
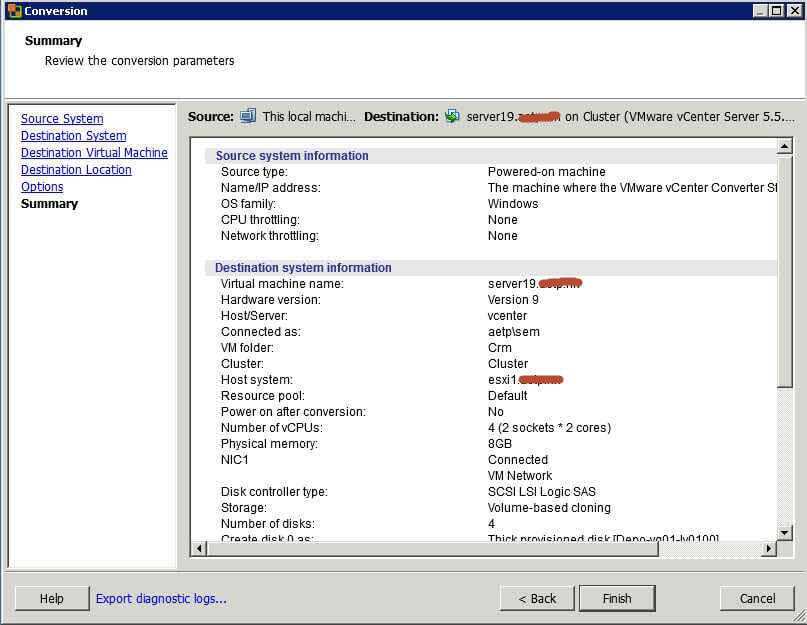
Как виртуализовать физический сервер с помощью VMware vCenter Converter Standalone 5.x.x-08
Finish. Теперь если посмотреть vCenter, там появился задача создания виртуальной машины.
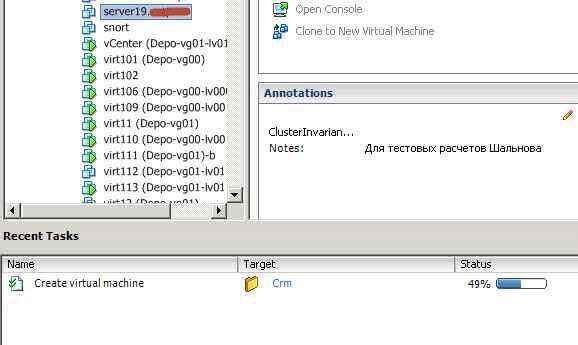
Как виртуализовать физический сервер с помощью VMware vCenter Converter Standalone 5.x.x-09
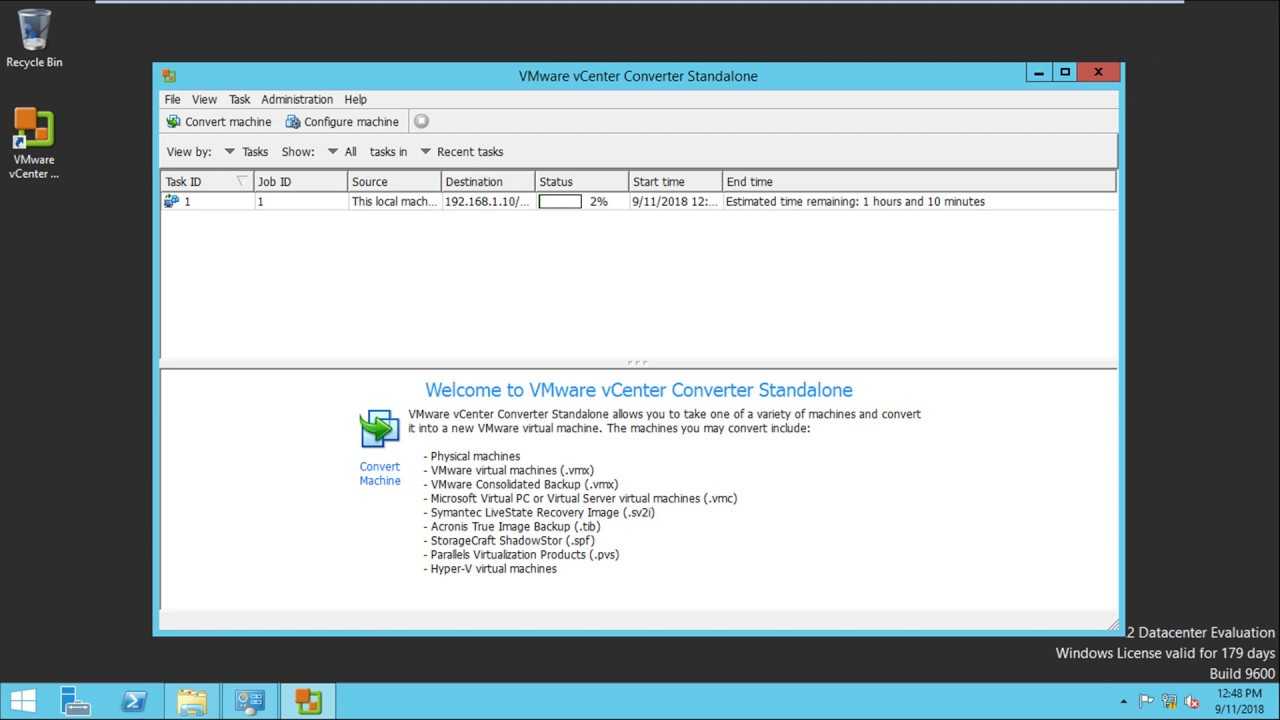
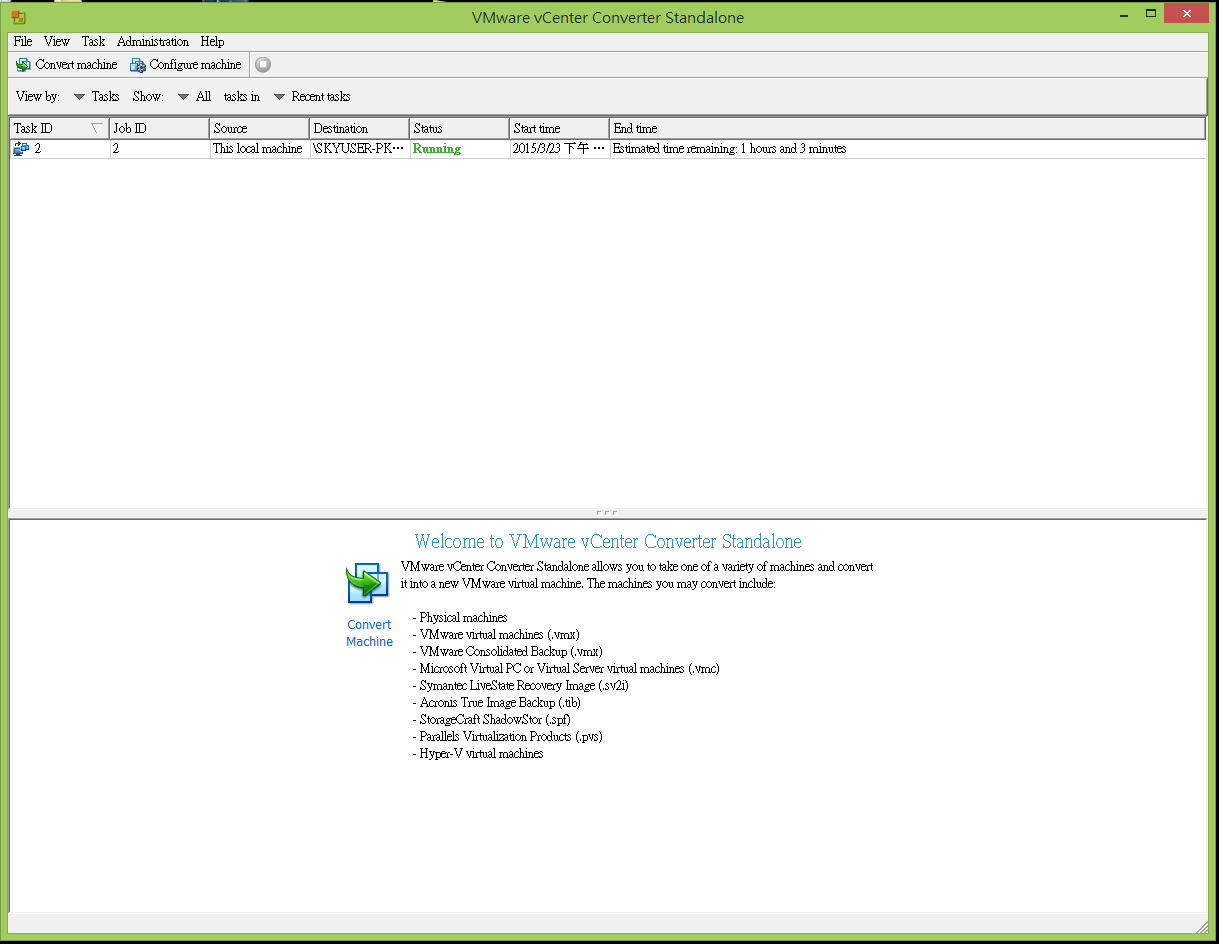
В самом конверторе будет отображаться время выполнения задания. Как видите миграция P2V в Vmware, очень тривиальная.
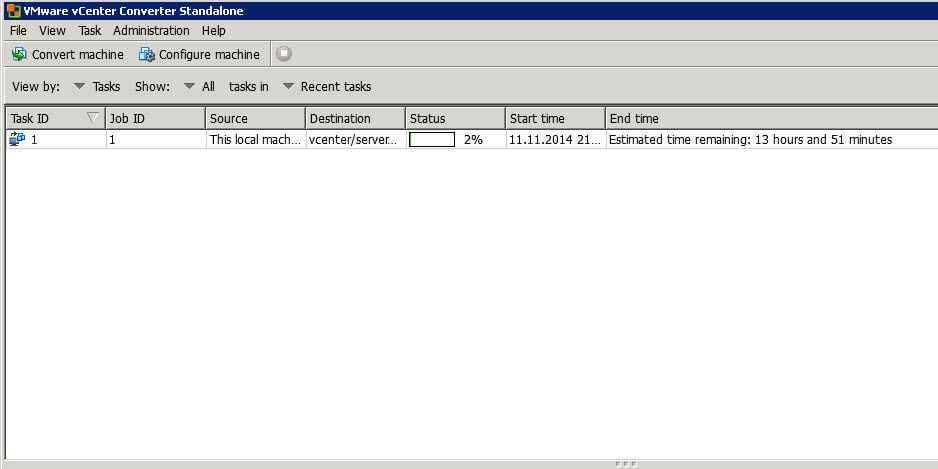
Как виртуализовать физический сервер с помощью VMware vCenter Converter Standalone 5.x.x-10
Cloning Powered-on Windows Physical and Virtual Machines Overview
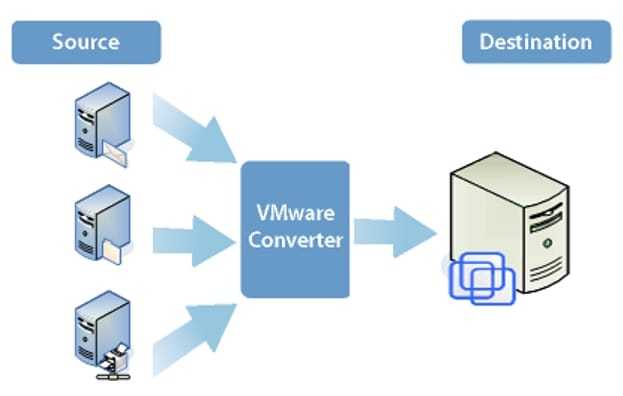
What does the process look like to clone a powered-on physical or virtual machine? The beauty of the VMware Converter cloning process is it does not modify the source physical or virtual machine, aside from the VMware Converter agent installation (which can be removed).
The VMware Converter clone process involves copying the source disks or volumes to the destination virtual machine. Part of the copy process is transferring the data that exists on the source hard disk to the destination virtual disk. One of the abilities of VMware Converter is to modify the disk layout as part of the conversion process. This capability is actually one of the use cases mentioned above.
You can change the destination virtual disk to have a different size, file layout, and other characteristics. As part of the conversion process, VMware Converter’s system reconfiguration introduces the drivers necessary so the migrated operating system continues to function on the new virtual hardware. One of the important drivers needed is the new storage drive to recognize the VMware storage controller types.
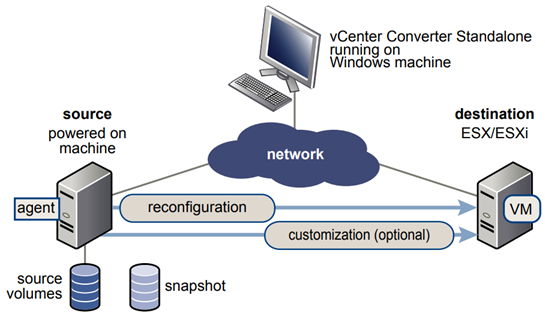
Overview of the VMware Converter conversion workflow
How to Download Microsoft Virtual Machine Converter
Virtual Machine Converter is freely available from the Microsoft download site. That link was the most current as of the time of writing, but being the Internet, things are always subject to change. To ensure that you’re getting the latest version:

- Access http://www.microsoft.com/downloads.
- In the search box, enter Virtual Machine Converter.
- From the results list, choose the most recent version.
The download page will offer you mvmc_setup.msi and MVMC_cmdlets.doc. The .doc file is documentation for the PowerShell cmdlets. It is not required, especially if you don’t intend to use the cmdlets. The .msi is required.
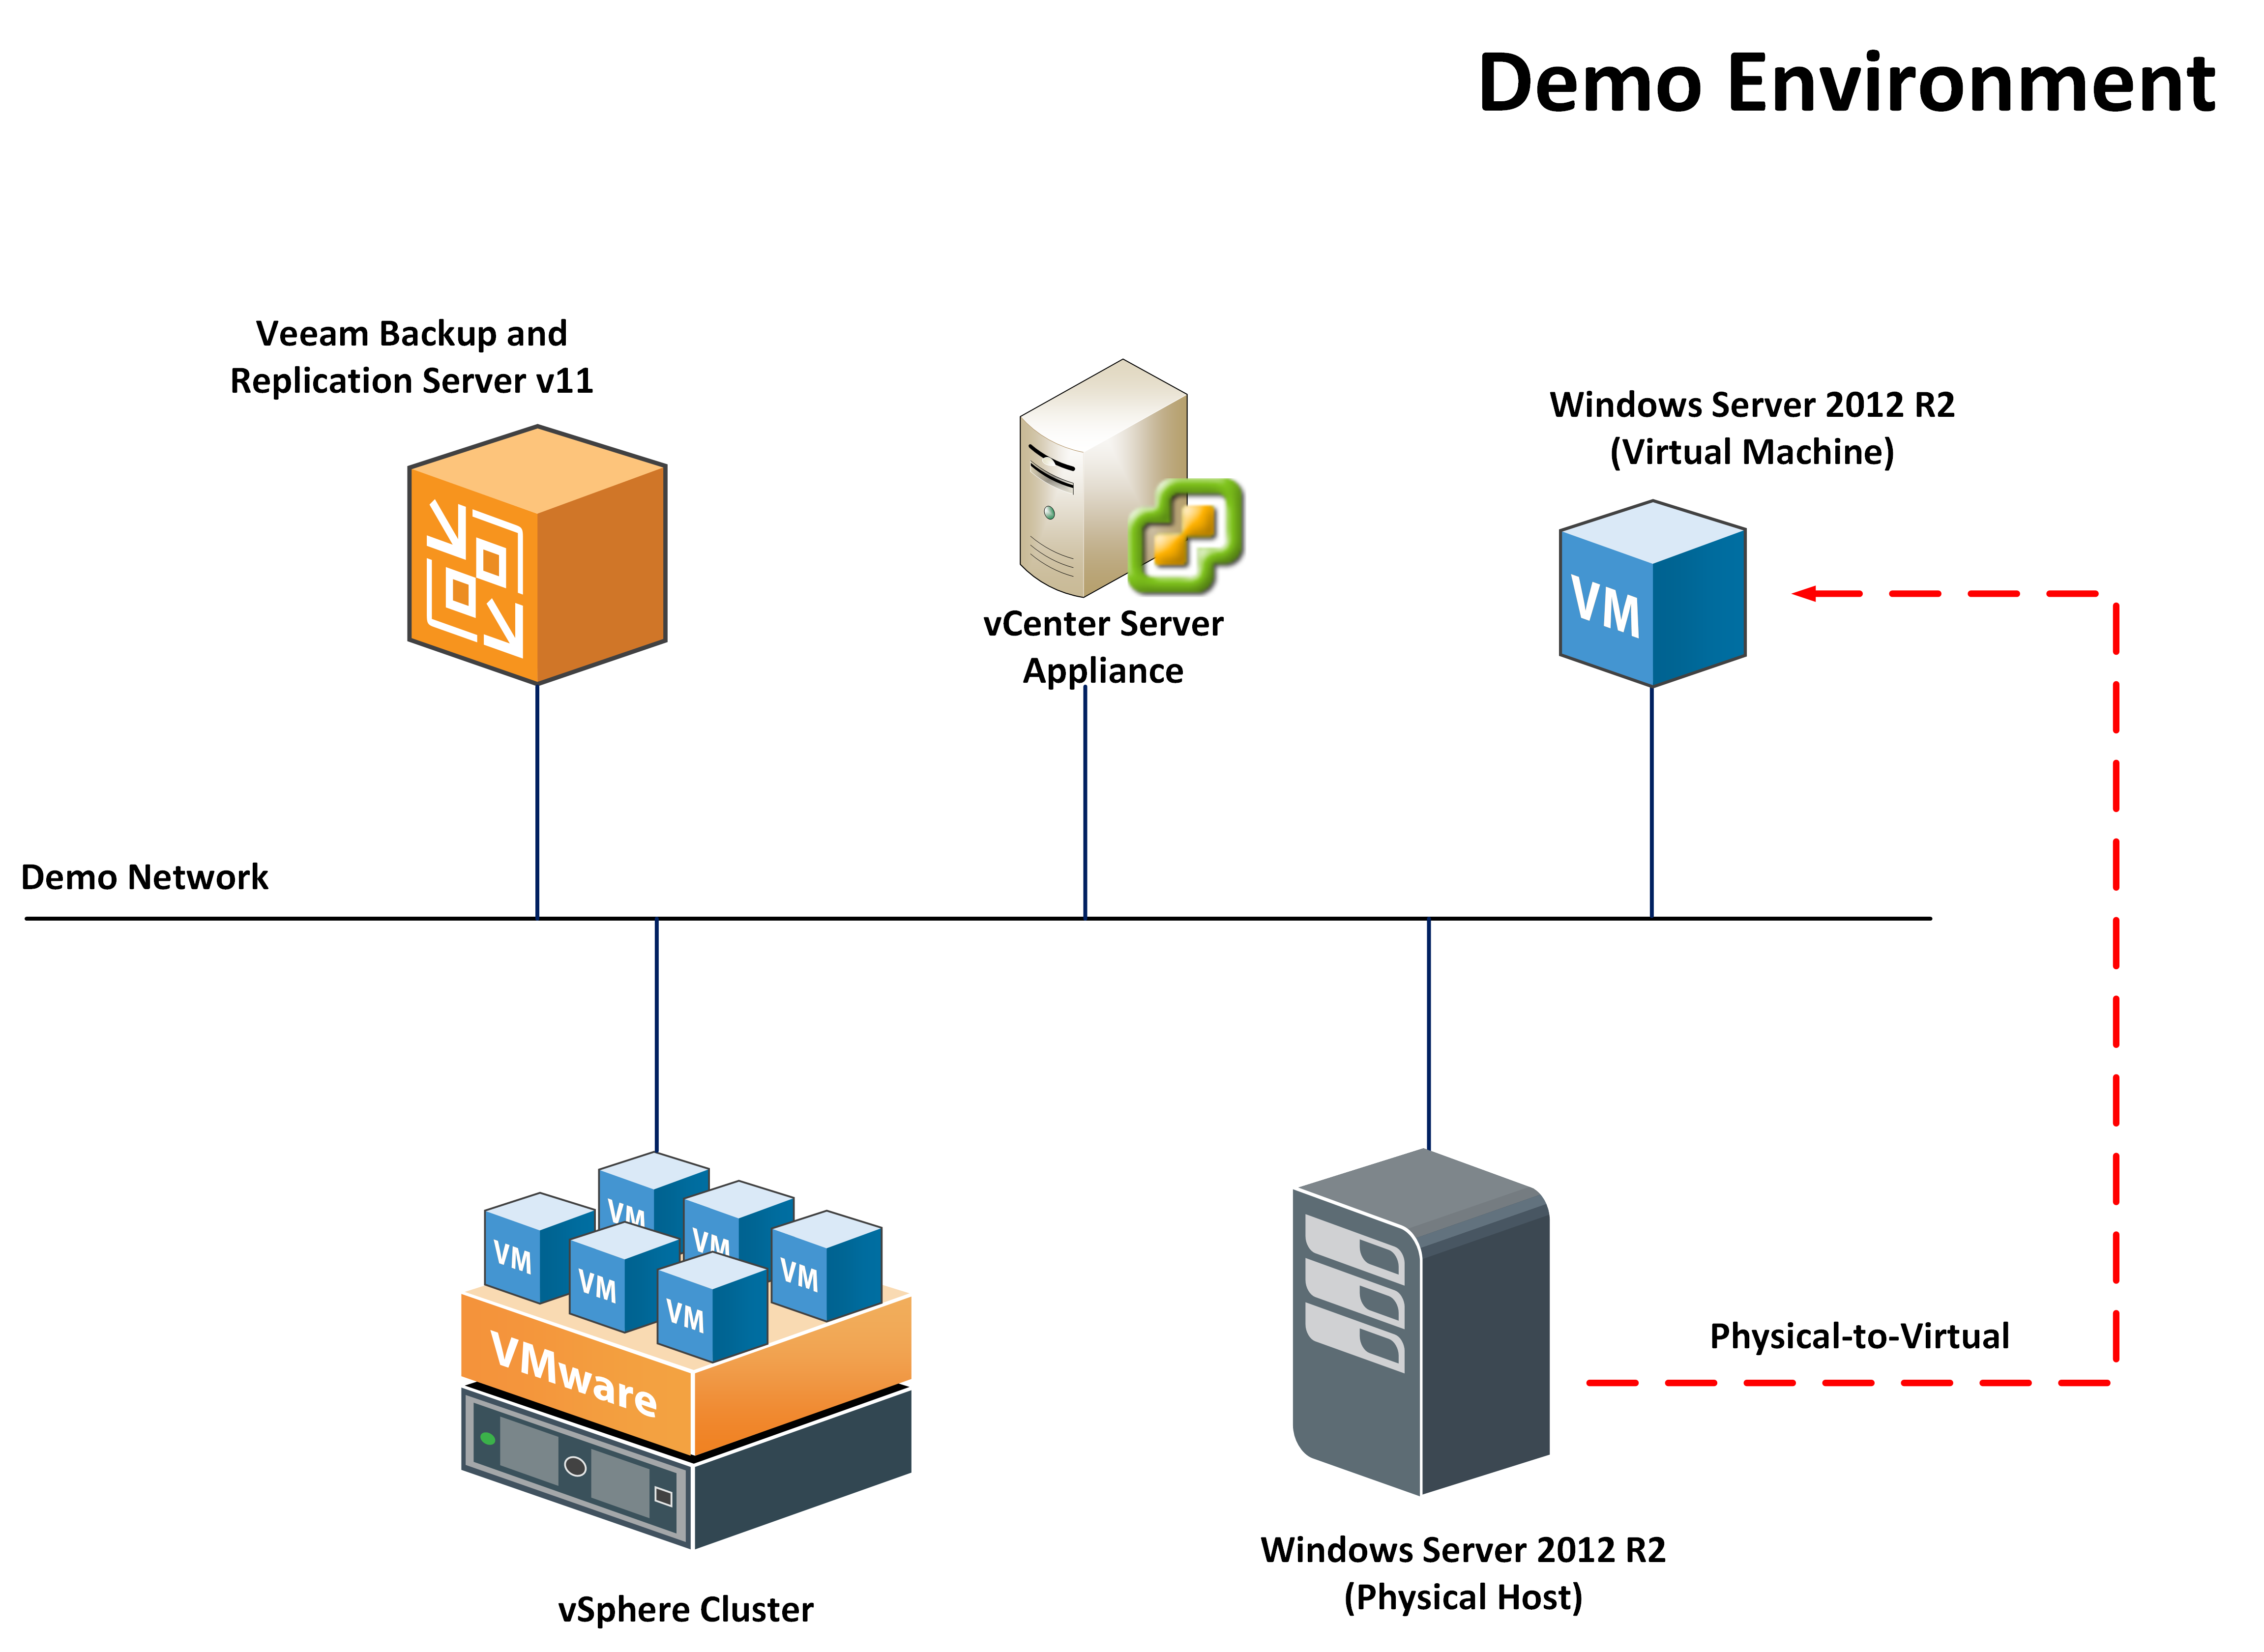
Introduction
The single most popular use for virtualization, by far, is to consolidate physical servers to virtual servers. Absolutely, the easiest way to do this is to perform a physical to virtual (P2V) conversion. With a P2V conversion, you use either an imaging application or a dedicated P2V conversion application to take all data on a physical computer, move that data to the virtualized infrastructure, modify the drivers on the transferred operating system, and boot that converted virtual machine – now virtualized.
Besides performing a P2V conversion, you may also have some VMs that are virtualized on another vendor’s virtualization platform. When you convert these virtual machines into your new virtualized infrastructure, this is called a virtual to virtual (V2V) conversion.
Introduction (the necessity of converting a standard bare-metal server into a VM and backup to a cloud hosting service)
As of today, there’s no doubt of virtualization being the most discussed and developed aspect in the modern IT sphere. Therefore, engineers nowadays face more and more tasks that require quite specific knowledge, and there’s no way to avoid that. Case in point: just lately, I had to transform a few Windows Server 2016 R2 bare-metal servers (one of them was the domain controller) into VMs. UEFI served as a boot sector for every single one of them, which, as you can guess, was another obstacle.
I had to do it for the following reasons:
– A penny saved is a penny earned, and virtual environment enables you to cut down your expenses significantly;
– Infrastructure management has never been more simple;
– Great scalability possibilities;
– You can access your resources in the cloud anytime, anywhere, if you have the internet access and an appropriate device;
– Amazon Web Services and Microsoft Azure offer a chance for the whole infrastructure to go cloud, with multiple platforms all over the world;
– As I have already told you, as long as you have the internet connection, you’re good to go, and with 12 000 Starlink satellites from SpaceX, the internet will be available, well, pretty much anywhere. That’s not even mentioning the British OneWeb network!

But there’s always a “but.”
Virtualization isn’t a rookie on the market. There are already tons of hypervisors from different vendors and with varying levels of functionality and a whole army of VMs, ready for deployment. In most cases, each vendor has its own types of VMs, sadly, rarely compatible with their rivals. The ones everybody heard of are Hyper-V, KVM, and ESXi, but there are more hypervisors explicitly tailored for the specific tasks.
Now you can see how deploying the VMs for a particular hypervisor can affect another hypervisor. The very process of migration between different hypervisors or such triviality as replacing the equipment can become challenging tasks even for an experienced admin. The different cloud platforms provide various types of VMs too. The most common ones these days are *.vmdk (AWS Amazon) and *.vhdx (Microsoft Azure).
Of course, no one would want to do that if possible, but sometimes, pricelist planning, working priorities, or just a budget shortage can push you to the need to migrate VMs from one cloud to another.
How to Convert a VirtualBox VM to a VMware VM
If you need to perform V2V migration from VirtualBox to VMware Workstation or VMware ESXi, you can use a variety of different methods: converting virtual disks, exporting to an OVF template, etc. One of such methods is outlined below.
The basic algorithm is the following:
1. Convert a virtual disk of a VirtualBox format to a virtual disk of the VMware format (vdi to vmdk).
VBoxManage clonehd VirtualDisk.vdi VirtualDisk-tmp.vmdk —format vmdk
2. Upload the file to the datastore connected to an ESXi host; for example, by using an SCP client such as WinSCP
3. Convert the uploaded VMware Workstation .vmdk virtual disk file to the VMware ESXi format (.vmdk and -flat.vmdk files) by using vmkfstools.
vmkfstools -i VirtualDisk-tmp.vmdk -d thin VirtualDisk.vmdk
4. Create a new VM using the existing virtual disk.
When converting virtual machines, follow VMware V2V migration best practices. Be sure to check out the blog post about Cross-platform recovery where you can read how to convert a VMware ESXi VM to a VirtualBox VM from a backup.
Happy Ending
Although it’s not usually the case with Ethan Hunt, my mission turned out to be quite possible! Both migrating and converting processes were completed with the utmost success. As you can probably guess yourselves, the more diverse and broad market becomes, the more big companies need tools for migration between hypervisors from different vendors or simple P2V conversion. V2V made it look easy. The efficiency of StarWind V2V, like any other software product in general, is dependent on the specifics of a task. However, I can tell that it’s a perfect fit for the most common scenarios.
Of course, you’re probably wondering why it is free at all if it were so good. As the response from the vendor support team goes, it is for attracting new clients for other products and promoting their reputation. However, I still think that one day they’ll release a new, improved version, not so free by then. Speaking of this moment, StarWind V2V is basically a Swiss Army knife for migration processes, and I can hardly name something better in this regard.
Tools to Perform a P2V Conversion
There are a number of options for performing a P2V. These are the most common methods:
- Microsoft Virtual Machine Converter (MVMC) version 3.0 (or later). This is the preferred method, as it will perform a true conversion.
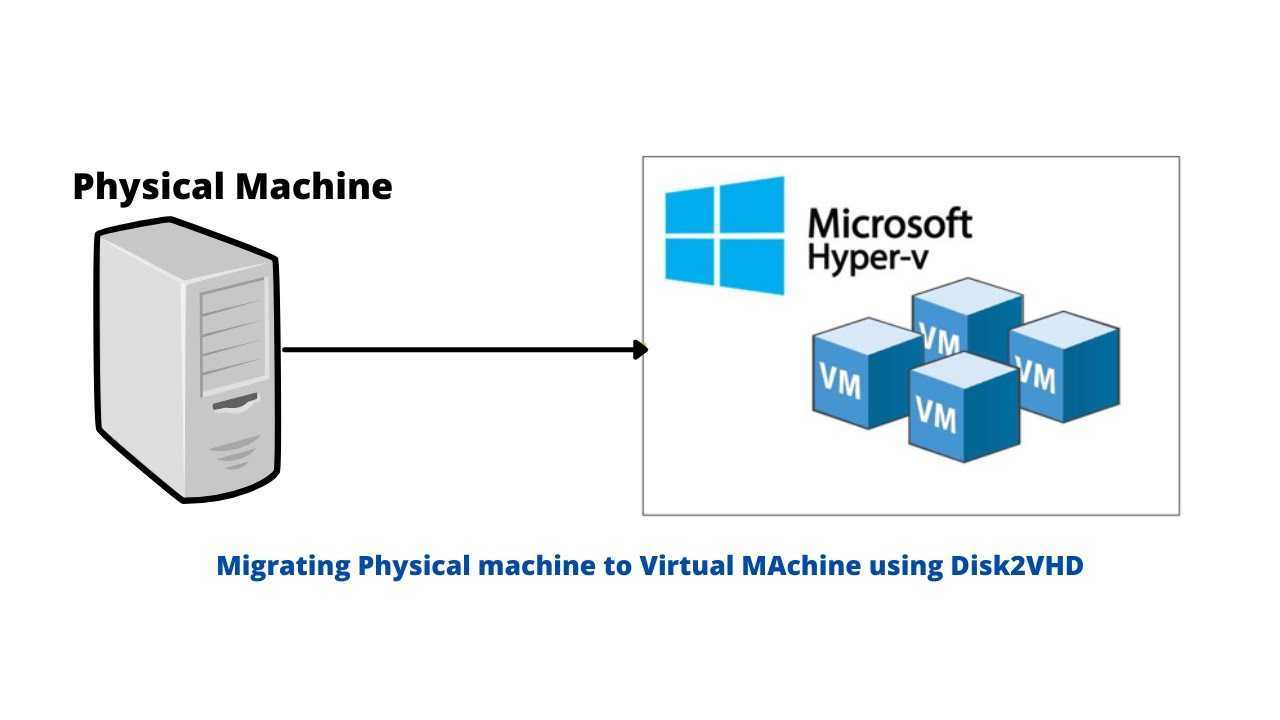
- Disk2VHD is provided by Sysinternals, which is now part of Microsoft. This tool converts a live hard disk to a VHDX. It is not truly a P2V operation as the operating environment is completely unmodified, but the resulting VHDX can be attached to a new virtual machine.
- Disk clone utilities such as Clonezilla. I wrote an article about using Clonezilla that was intended for V2P, but truthfully it could be used for just about any migration type.
- Standard backup and restore software like Altaro VM Backup. You could back up the physical environment using traditional software, build a new virtual machine with an empty copy of the operating system, and restore from backup.
Was this helpful?
Do you want to become a member of Altaro Dojo?
What is P2V?
Intuitively, P2V stands for “physical to virtual” and represents the process of converting and migrating a physical computer image into a virtual machine (VM). Unlike a migration where you take the applications and data from one computer and copy them to an entirely new platform, with VMware Converter for P2V, you take an exact image-level copy of the physical computer and transform it into a virtual machine.
The virtual machine then retains the same state as the physical computer, including the operating system, applications, configuration, data, and even assigned resources. However, after a P2V operation, the assigned resources, such as CPU and memory, can easily be adjusted or changed.
What is the purpose of P2V operations?
The VMware Converter for P2V operation allows organizations to achieve the objective of server consolidation. Since the onset of the server virtualization movement with modern hypervisors, it provides much more efficient use of server hardware resources with the powerful technology and hardware in current enterprise servers.
Modern CPU, memory, and storage resources are generally not used to their fullest potential by a single workload loaded on the bare metal server itself and running multiple workloads on the same hardware instead of just one. Instead, organizations can utilize the underlying resources much more by running a hypervisor on top of the bare metal server.
Instead of having to “lift and shift” physical servers to virtual machines using challenging migration processes, organizations can use the VMware Converter for P2V process to simply take the Server as-is and seamlessly convert it to a virtual machine. It helps organizations realize the objective of their server consolidation projects.
In addition, as physical server hardware ages and nears the end of its lifecycle, organizations can use the VMware Converter for P2V process to move workloads off servers that are no longer supported to virtual machines running in supported hypervisor environments, such as VMware vSphere.
My Thoughts on VMware Converter
VMware Converter is an excellent tool for converting both physical hosts and virtual machines. You can target a wide variety of environments with the tool, and it automates much of the process, making the conversion seamless. As shown, VMware Converter can convert both Windows and Linux hosts that are powered on, and it can also convert virtual machines that are powered off in both VMware and Hyper-V environments.
Take note of the prerequisites and use cases that will not work. Also, as shown by the conversion results, VMware Converter has not been updated in over three years since 2018. Therefore, depending on the virtual machine version and other configuration options selected, it may or may not work without error targeting the newest VMware solutions, such as vSphere 7.0 Update 2 and higher.
Learn more about VMware Converter here: vCenter Converter: P2V Virtual Machine Converter | VMware
Was this helpful?
Do you want to become a member of Altaro Dojo?
Using VMware Converter for Converting a Linux Host
The process of converting a running Linux server using VMware Converter is not much different using the VMware Converter UI. Here, we select Remote Linux machine. Enter the connection information for the remote Linux server.
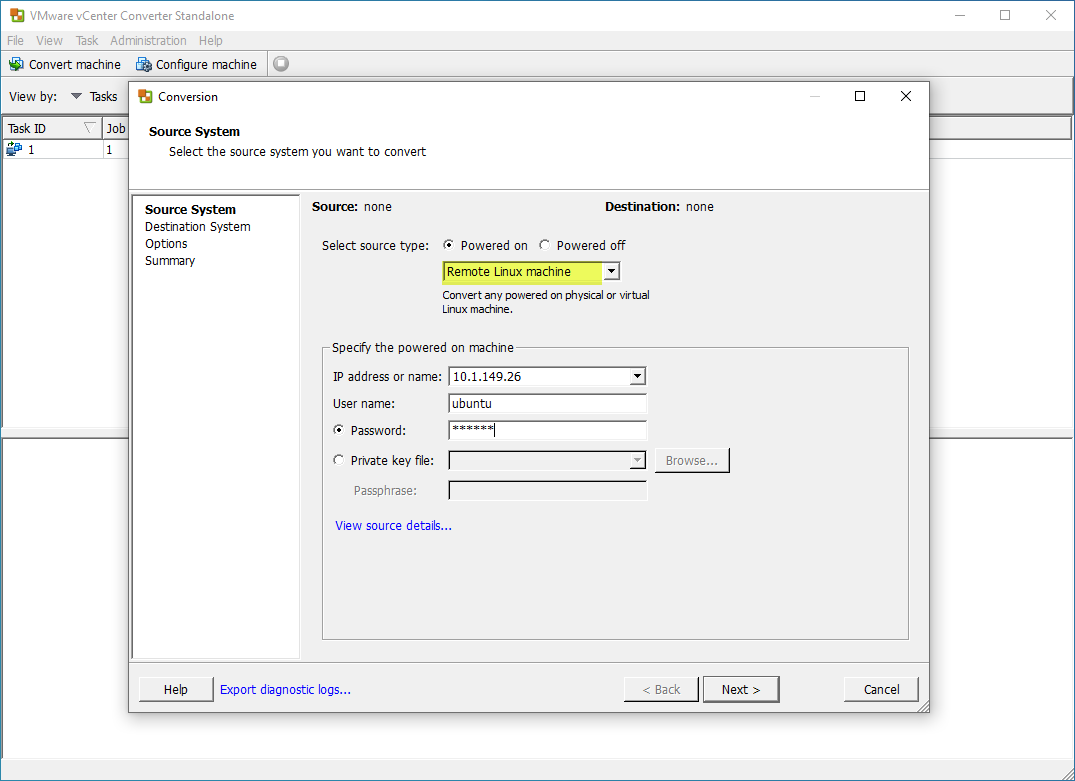
Select the remote Linux server and enter connection information
Accept the certificate warning coming from the remote Linux server via the SSH connection.
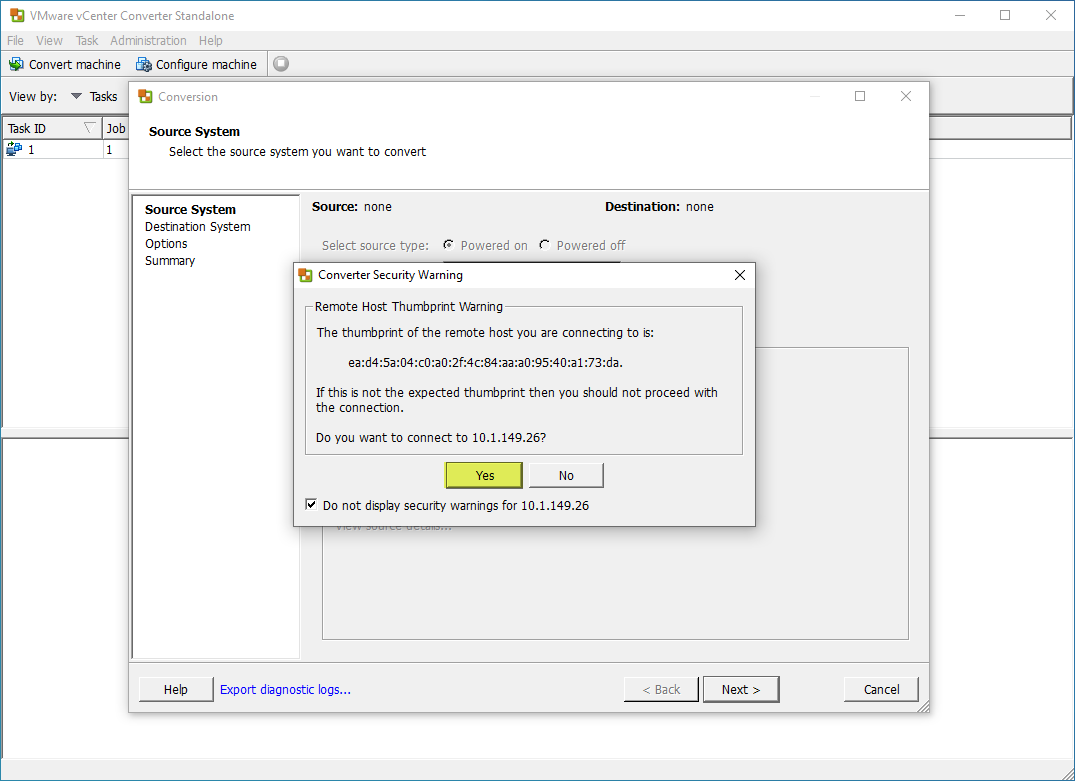
Accept the certificate warning for the remote Linux server
Note using VMware Converter for the remote Linux host, we only have the option to target a VMware infrastructure server. If we select powered off, we can select other targets.
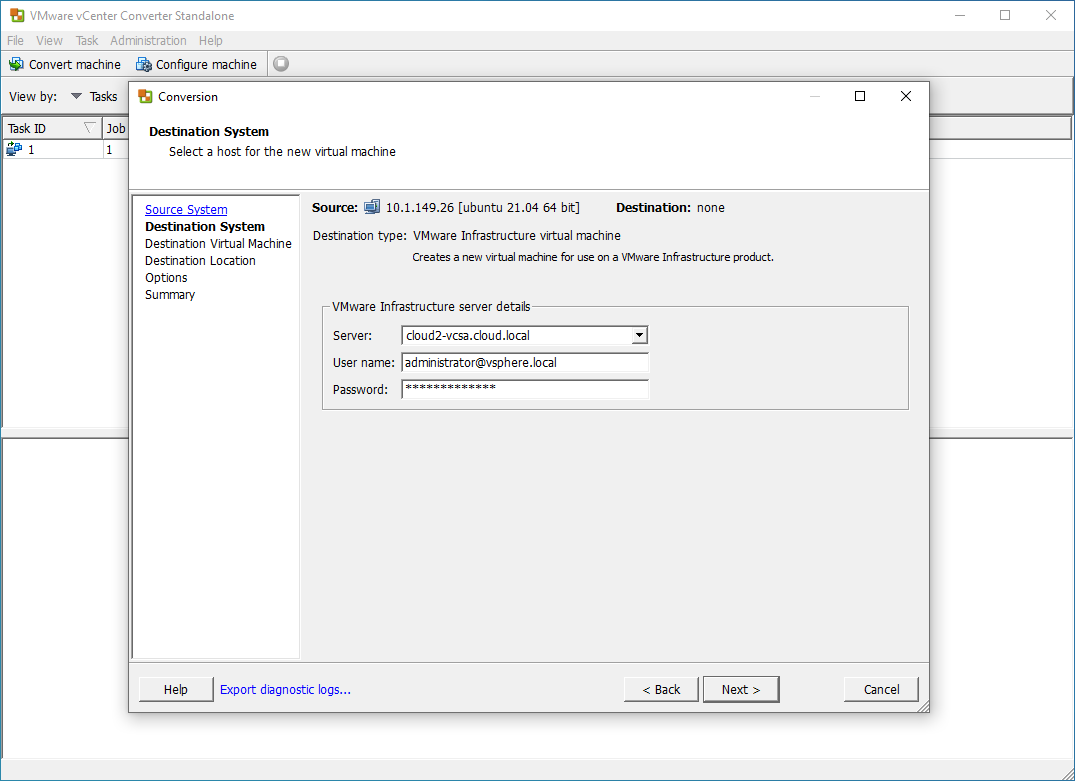
Choose the destination system for the Linux machine
Choose the virtual machine name for the vSphere inventory.
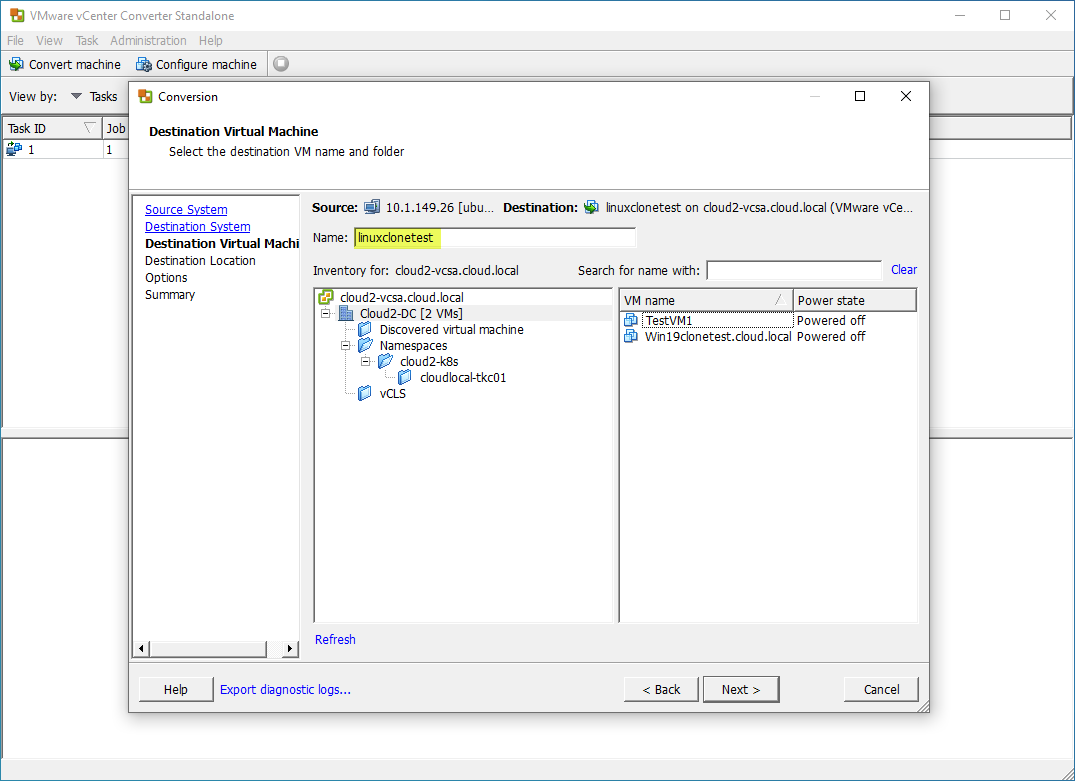
Choose the virtual machine name for the vSphere inventory
Choose virtual machine storage for the resulting virtual machine.
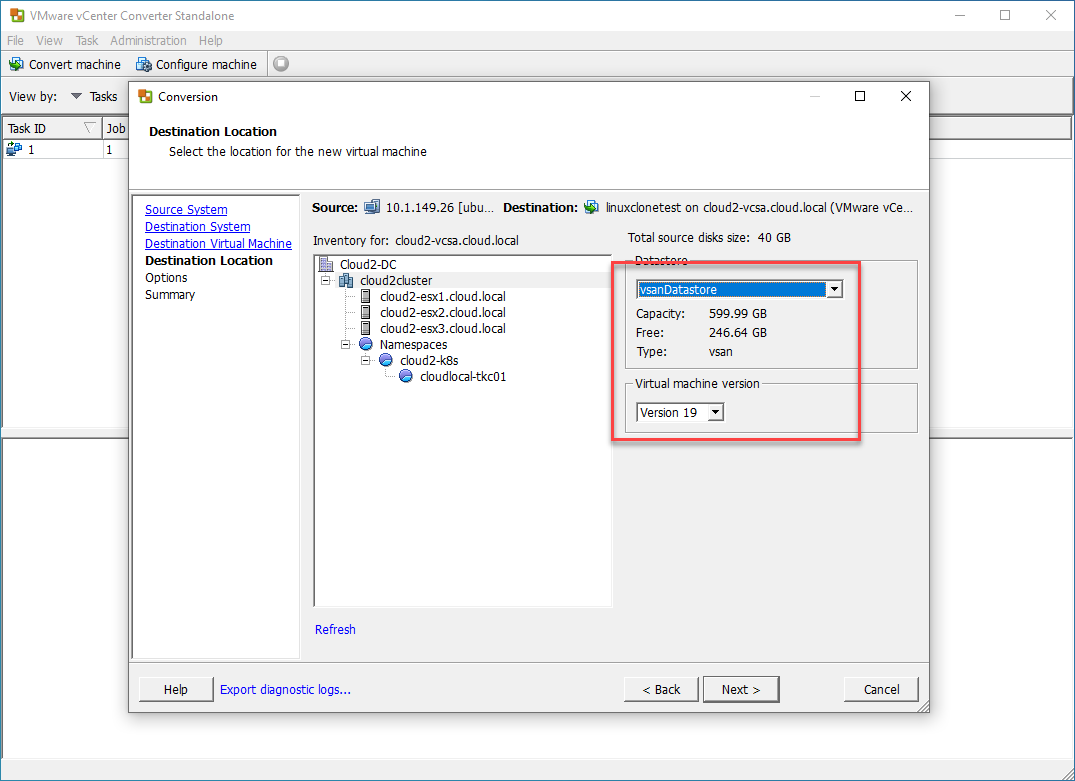
Select the storage and virtual machine version
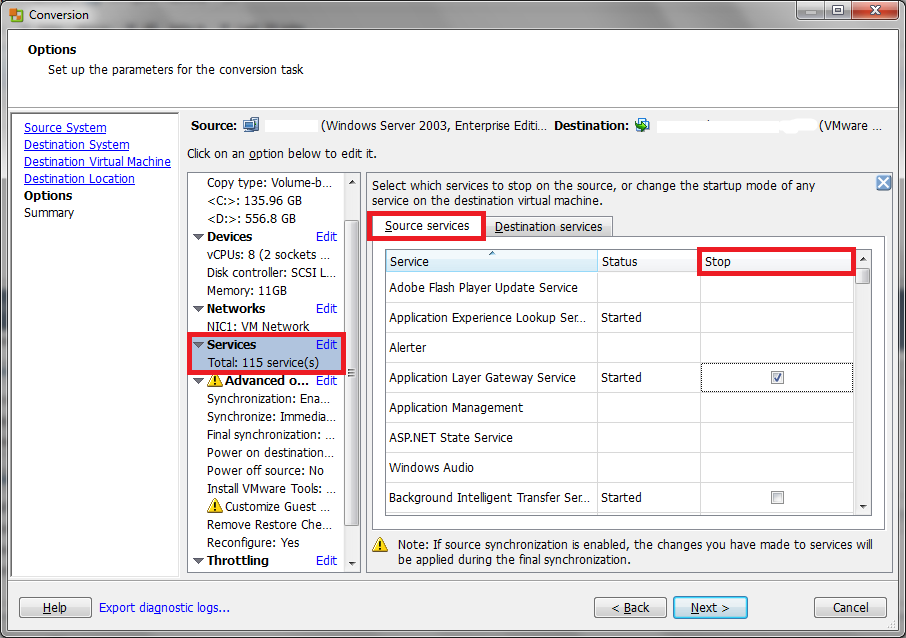
On the Options page, edit the configuration options if needed for the Linux virtual machine.
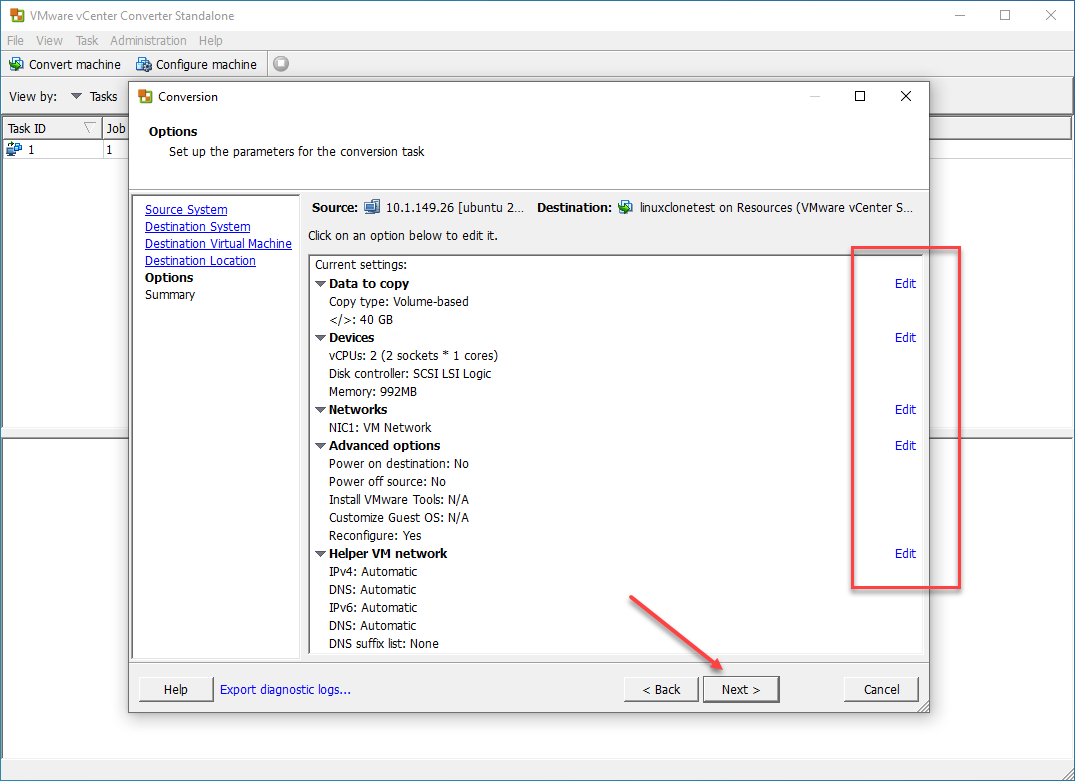
Edit the configuration options on the Options screen for the Linux VM
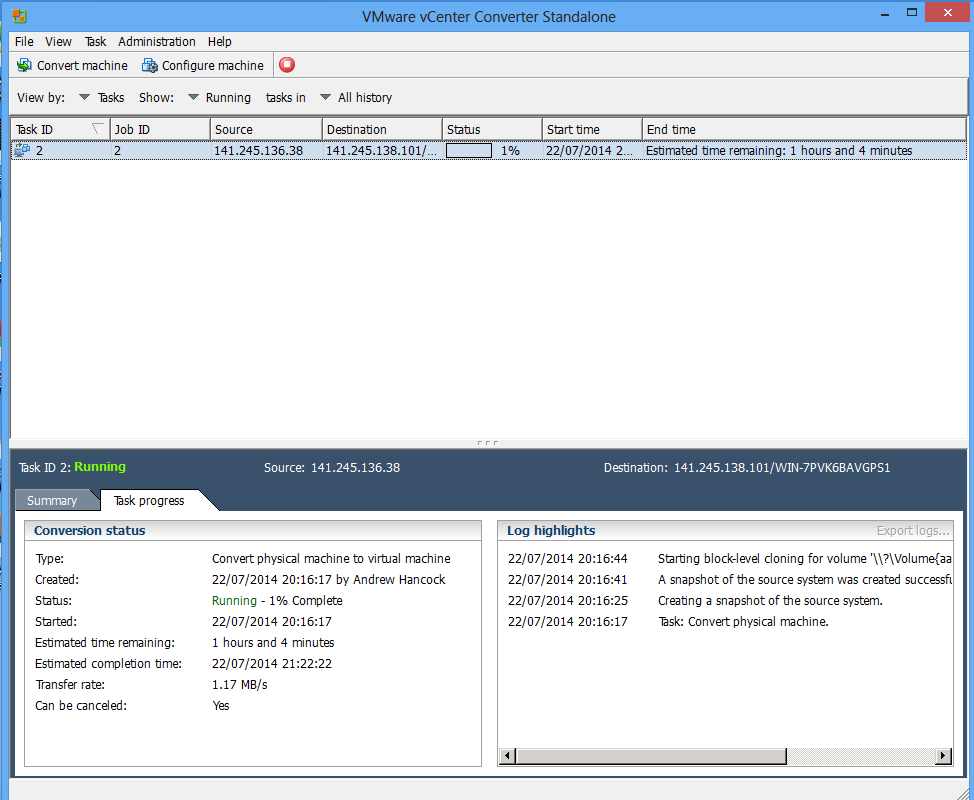
Begin the conversion process by clicking Finish.
Begin the conversion of the Linux host with VMware Converter
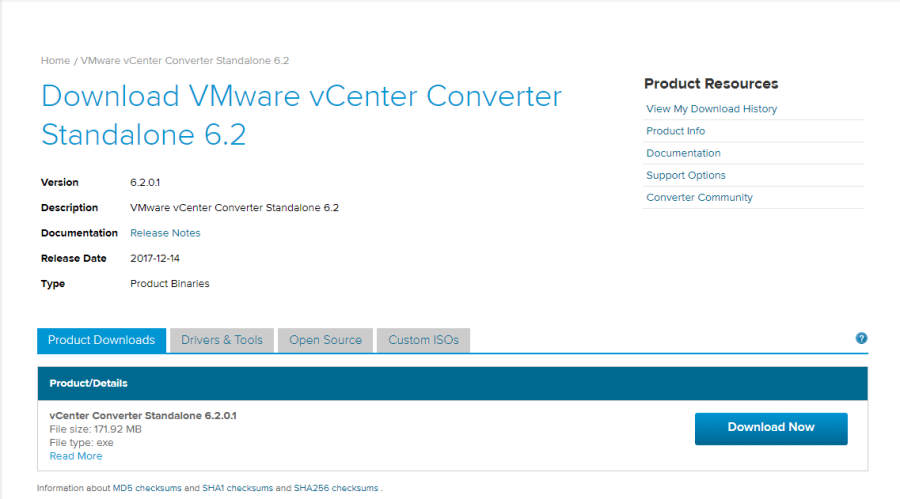
VMware vCenter Converter Standalone
Next goes some cool stuff from VMware. Its Free VMware vCenter Converter allows converting VMs created on different platforms to VMware formats, as well as P2V (Physical To Virtual) conversion. VMs can migrate directly to the vSphere environment. During migration, a small agent needs to be installed on the source machine. One interesting feature of VMware vCenter Converter Standalone is a possibility of reconfiguring VMs and adjusting their parameters. Migration could be done by running VMs with no downtime. Moreover, conversion of several VMs could be done simultaneously. The VMware vCenter Converter can be deployed as a standalone client or integrated to vCenter.
A VMware account is required for downloading:


