Save and Apply the Policy
Now we can save the policy, and apply it now or at a later time.
- Click Next on the Save Security Policy screen.
- Now you get the option to save the settings you’ve configured using the wizard. In the Security policy file name box, type a filename including the full path to the file. Alternatively, click Browse to select a name and location.
You also have the option to view the settings configured using the wizard by clicking View Security Policy, and to add a security template (.inf file) to the settings. If you decide to include a security template, any settings it includes cannot be rolled back using the security wizard.
- Once you’re done, click Next to continue.
- Finally, you have the option to apply the settings now, or later on the Apply Security Policy screen. Don’t forget that settings shouldn’t be applied directly to production systems without thorough testing, so proceed with caution! Click Next to continue.
- Click Next on the Application complete screen.
- Click Finish to close the wizard.
In the next part of this series, I’ll show you how to apply and roll back this policy using the GUI, how to convert a SCW policy into a Group Policy Object (GPO) and how to secure multiple servers using SCW.
Server Options
The specifications of our imaginary company state that the company has two buildings – Building A and Building B. In our first article, we created a scope called “Building A, Floor 1” so a scope for our first building is already made. In this article, we will create a scope for Building B, Floor 1, using the instructions from our Basic DHCP Configuration article and the following specifications for the scope:
After creating the scope, we want to activate it as well.
Notice that, in creating this scope, we had to input a lot of the same information from our “Building A, Floor 1” scope. In the event that we had several other scopes to create, we would surely not want to be inputting the same information each time for each scope.
That is where server options are useful. Server options allow you to specify options that all the scopes have in common. In creating two scopes, we noticed that our scopes had the following in common:
- DNS servers
- WINS servers
- Domain name
To avoid having to enter this information again, we will create these options as server options. To do this:
1. On the DHCP MMC, right-click Server Options and choose Configure Options

When the Server Options window comes up, take a moment to scroll down through the long list of available options. Not all options are needed or used in every environment. In some cases, however, a needed option is not available. For example, Cisco IP phones require Option 150 but because that option is not available it would have to be defined manually. Other than that, options 006 DNS Servers , 015 DNS Domain , and 003 Router are generally sufficient.
2. Scroll down to option 006 DNS Servers and place a checkmark in its box. This will activate the Data Entry section. In that section, type 192.168.0.252 for the IP Address and click Add. Then enter 192.168.1.252 as another IP Address and click Add again. This will add those two servers as DNS servers.
3. Scroll down to option 015 DNS Domain Name and place a checkmark in its box. This will activate the Data Entry section. In that section, enter firewall.cx in the String Value text field.
4. Scroll down to option 044 WINS/NBNS Servers and place a checkmark in its box. This will activate the Data Entry section. In that section, enter 192.168.0.251 for the IP Address and click Add. Then enter 192.168.1.251 as another IP Address and click Add again. This will add those two servers as WINS servers.
5. Scroll down to option 046 WINS/NBT Node Type and place a checkmark in its box to activate the Data Entry section. In that section, enter “0x8” for the Byte text field and click OK . This will set the workstation node type to ‘Hybrid’ which is preffered.
Back on the DHCP MMC, if you click on the Server Options node you will see the following:
Subsequent scopes will inherit these options if no scope options are specified. However, if scope options are specified then the scope options would override the server options in assignment.
If we did have Cisco IP phones in our environment we would define Option 150 as follows:
1. Right-click the server node on the DHCP MMC and choose Set Predefined Options
2. When the Predefined Options and Values window comes up, click Add
3. When the Options Type window comes up, type a name for the option such as “TFTP Server for Cisco IP Phones”.
4. On the Data Type drop-down menu, select IP Address.
5. On the Code text field, enter 150.
6. On the Description text field, type a description for the scope, such as “Used by Cisco IP Phones”.
7. Check the box next to Array
8. Click OK twice.
If you go back to the Scope/Server Options window again, you will see Option 150 available.
Troubleshoot Wireless Authentication with ACS
Perform these steps:
-
Go to ACS > Monitoring and Reports, and click Launch Monitoring & Report Viewer.
-
A separate ACS window will open. Click Dashboard.
-
In the My Favorite Reports section, click Authentications – RADIUS – Today.
-
A log will show all RADIUS authentications as either Pass or Fail. Within a logged entry, click on the magnifying glass icon in the Details column.
-
The RADIUS Authentication Detail will provide much information about the logged attempts.
-
ACS Service Hit Count can provide an overview of attempts matching the rule(s) created in ACS. Go to ACS > Access Policies > Access Services, and click Service Selection Rules.
PEAP Authentication Fails with ACS Server
When your client fails PEAP authentication with an ACS server, check if you find the NAS duplicated authentication attempt error message in the Failed attempts option under the Report and Activity menu of the ACS.
You might receive this error message when Microsoft Windows XP SP2 is installed on the client machine and Windows XP SP2 authenticates against a third party server other than a Microsoft IAS server. In particular, Cisco RADIUS server (ACS) uses a different method to calculate the Extensible Authentication Protocol Type:Length:Value format (EAP-TLV) ID than the method Windows XP uses. Microsoft has identified this as a defect in the XP SP2 supplicant.


For a Hotfix, contact Microsoft and refer to the article PEAP authentication is not successful when you connect to a third-party RADIUS server . The underlying issue is that on the client side, with windows utility, the Fast Reconnect option is disabled for PEAP by default. However, this option is enabled by default on the server side (ACS). In order to resolve this issue, uncheck the Fast Reconnect option on the ACS server (under Global System Options). Alternatively, you can enable the Fast Reconnect option on the client side to resolve the issue.
Perorm these steps in order to enable Fast Reconnect on the client that runs Windows XP using Windows Utility:
-
Go to Start > Settings > Control Panel.
-
Double-click the Network Connections icon.
-
Right-click the Wireless Network Connection icon, and then click Properties.
-
Click the Wireless Networks tab.
-
Choose the Use Windows to configure my wireless network settings option in order to enable windows to configure the client adapter.
-
If you have already configured an SSID, choose the SSID and click Properties. If not, click New in order to add a new WLAN.
-
Enter the SSID under the Association tab. Make sure that Network Authentication is Open and Data Encryption is set to WEP.
-
Click Authentication.
-
Choose the Enable IEEE 802.1x authentication for this network option.
-
Choose PEAP as the EAP Type, and click Properties.
-
Choose the Enable Fast Reconnect option at the bottom of the page.
CLIENT Configuration for PEAP using Windows Zero Touch
In our example, CLIENT is a computer that runs Windows XP Professional with SP that acts as a wireless client and obtains access to Intranet resources through the wireless AP. Complete the procedures in this section in order to configure CLIENT as a wireless client.
Perform a Basic Installation and Configuraiton
Perform these steps:
-
Connect CLIENT to the Intranet network segment using an Ethernet cable connected to the hub.
-
On CLIENT, install Windows XP Professional with SP2 as a member computer named CLIENT of the demo.local domain.
-
Install Windows XP Professional with SP2. This must be installed in order to have PEAP support.
Note: Windows Firewall is automatically turned on in Windows XP Professional with SP2. Do not turn the firewall off.
Install the Wireless Network Adapter
Perform these steps:
-
Shut down the CLIENT computer.
-
Disconnect the CLIENT computer from the Intranet network segment.
-
Restart the CLIENT computer, and then log on using the local administrator account.
-
Install the wireless network adapter.
Note: Do not install the manufacturer’s configuration software for the wireless adapter. Install the wireless network adapter drivers using the Add Hardware Wizard. Also, when prompted, provide the CD provided by the manufacturer or a disk with updated drivers for use with Windows XP Professional with SP2.
Configure the Wireless Network Connection
Perform these steps:
-
Log off and then log in using the WirelessUser account in the demo.local domain.
-
Choose Start > Control Panel, double-click Network Connections, and then right-click Wireless Network Connection.
-
Click Properties, go to the Wireless Networks tab, and make sure the Use Windows to configure my wireless network settings is checked.
-
Click Add.
-
Under the Association tab, enter Employee in the Network name (SSID) field.
-
Choose WPA for the Network Authentication, and make sure that Data encryption is set to TKIP.
-
Click the Authentication tab.
-
Validate that EAP type is configured to use Protected EAP (PEAP). If it is not, choose it from the drop-down menu.
-
If you want the machine to be authenticated prior to login (which allows login scripts or group policy pushes to be applied), check Authenticate as computer when computer information is available.
-
Click Properties.
-
As PEAP involves authentication of the Server by the client, ensure that the Validate server certificate is checked. Also, make sure the CA that issued the ACS certificate is checked under the Trusted Root Certification Authorities menu.
-
Choose Secured password (EAP-MSCHAP v2) under Authentication Method as it is used for inner authentication.
-
Make sure the Enable Fast Reconnect check box is checked. Then, click OK three times.
-
-
Right-click the wireless network connection icon in systray, and then click View Available Wireless Networks.
-
Click the Employee wireless network, and then click Connect. The wireless client will show Connected if the connection is successful.
-
After authentication is successful, check the TCP/IP configuration for the wireless adapter by using Network Connections. It should have an address range of 10.0.20.100-10.0.20.200 from the DHCP scope or the scope created for the CorpNet wireless clients.
-
In order to test functionality, open up a browser and browse to http://10.0.10.10 (or the IP address of the CA server).

Dynamic DNS
At this point, our imaginary network can service a significant number of clients, but those clients can only be referenced by IP address. Sometimes it is necessary or helpful to reference clients by their host names rather than IP addresses.
DNS resolves client host names to IP addresses. But for DNS to be able to do that, client host names and IP addresses must already be registered in DNS. Servers are typically registered manually in DNS by the administrator, but workstations are not. So how do client workstations get registered in DNS? The answer is to use dynamic DNS (DDNS), a feature that will allow clients, or the DHCP server itself, to register clients in DNS automatically upon the client’s assignment of an IP address. Fortunately, DDNS is setup to automatically work in a domain environment, granted that DNS is also setup correctly in the network.
To view the options available for DDNS:
- On the DHCP MMC, right-click the server node and choose Properties
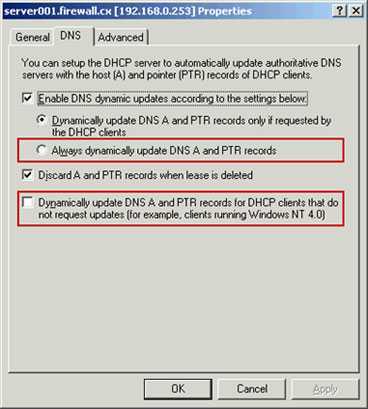
- When the Properties window comes up, click the DNS tab.
If the network has some clients that are not in the domain, have legacy Windows operating systems, or are not capable of registering their host names and IP addresses in DNS, the two options marked below would need to be selected:
But if that were the case, you would also have to specify credentials that the DHCP server would use for DDNS on behalf of the clients. To do this, you would:
- Click the Advanced tab on the Properties window.
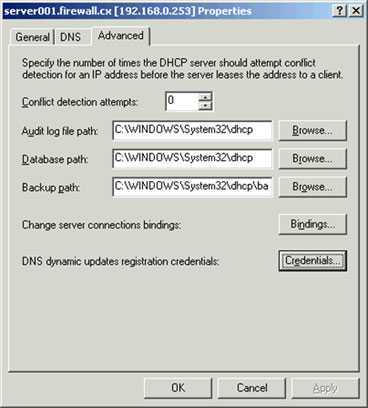
1.Click the Credentials button.
2. When the DNS Dynamic Update Credentials window comes up, enter an administrator username and password and firewall for the domain. In a real-world environment, you would create a separate username and password that would be used solely for DDNS and enter it here instead.
3. Click OK twice to exit the Properties window.
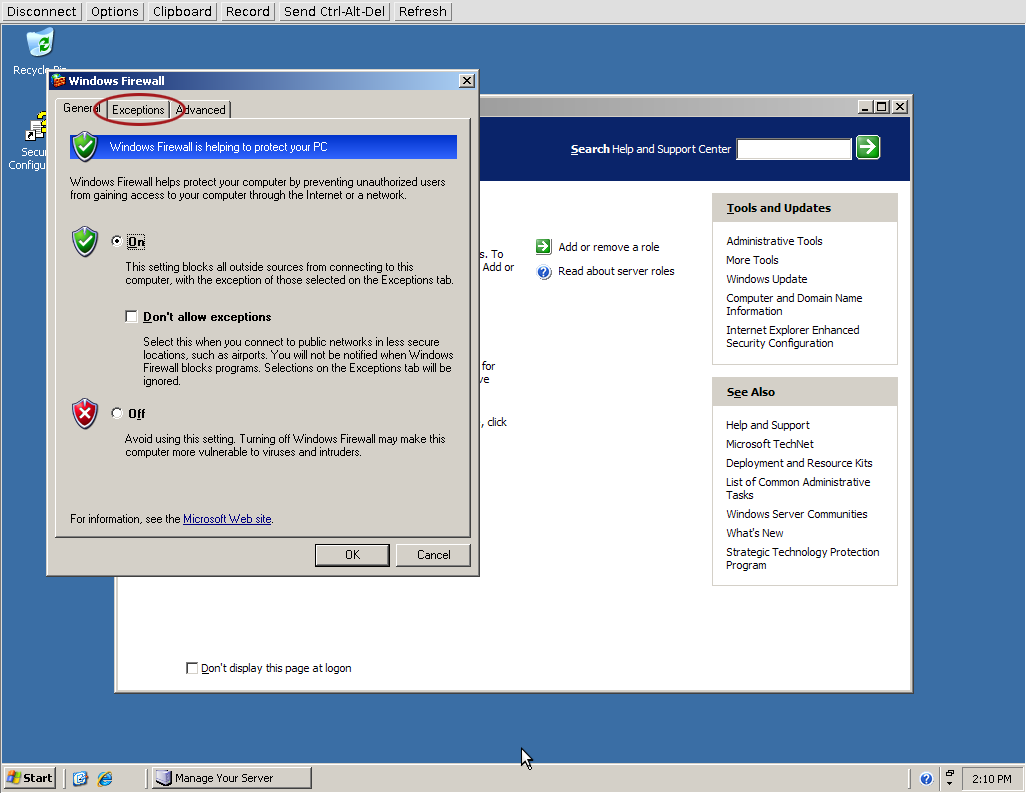
Getting to the Security Configuration Wizard
The Security Configuration Wizard is not installed by default after you install Windows Server 2003 service pack 1. You will need to go through the Add/Remove Windows Components applet in Control Panel to install the Wizard.
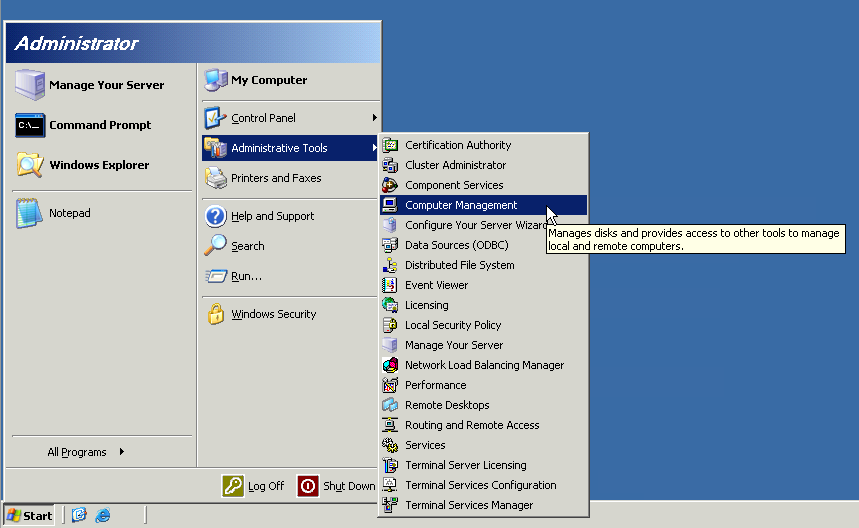
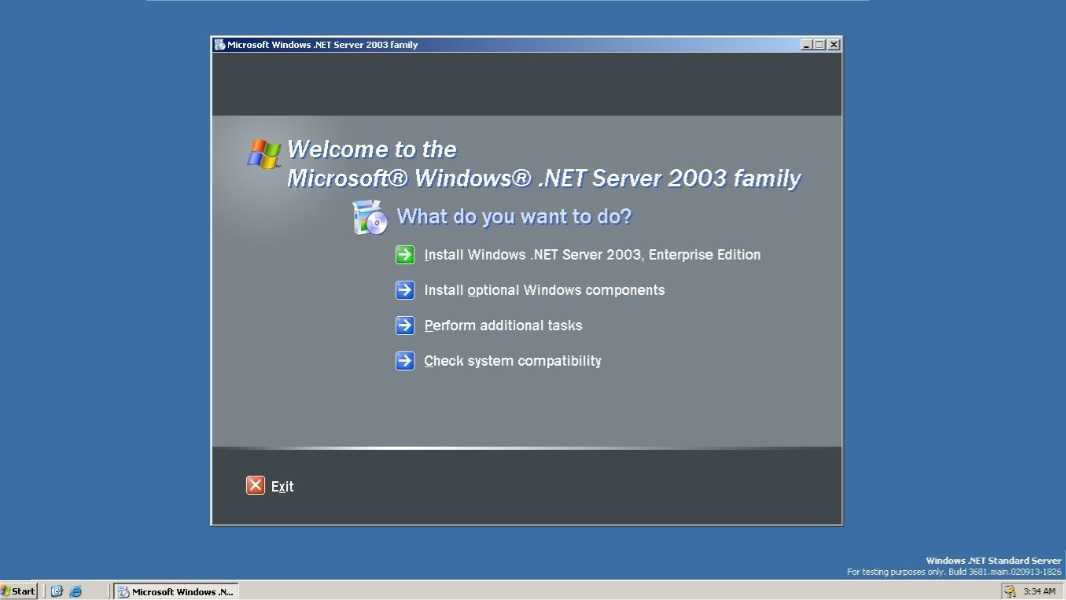
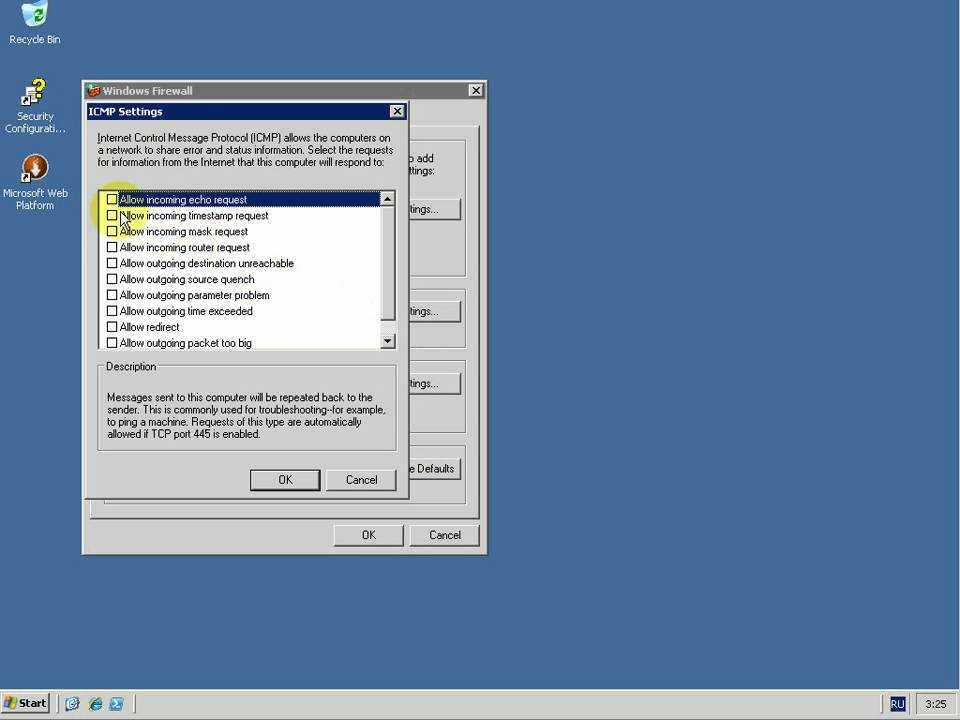
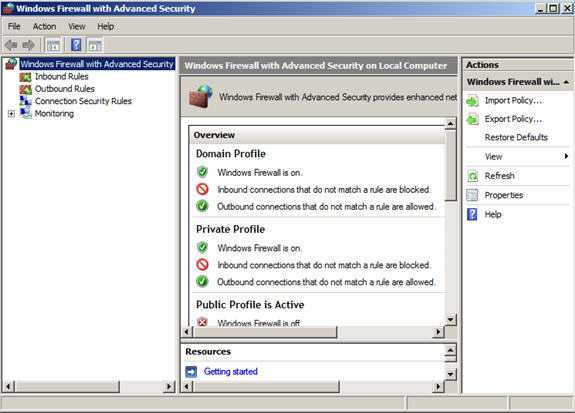
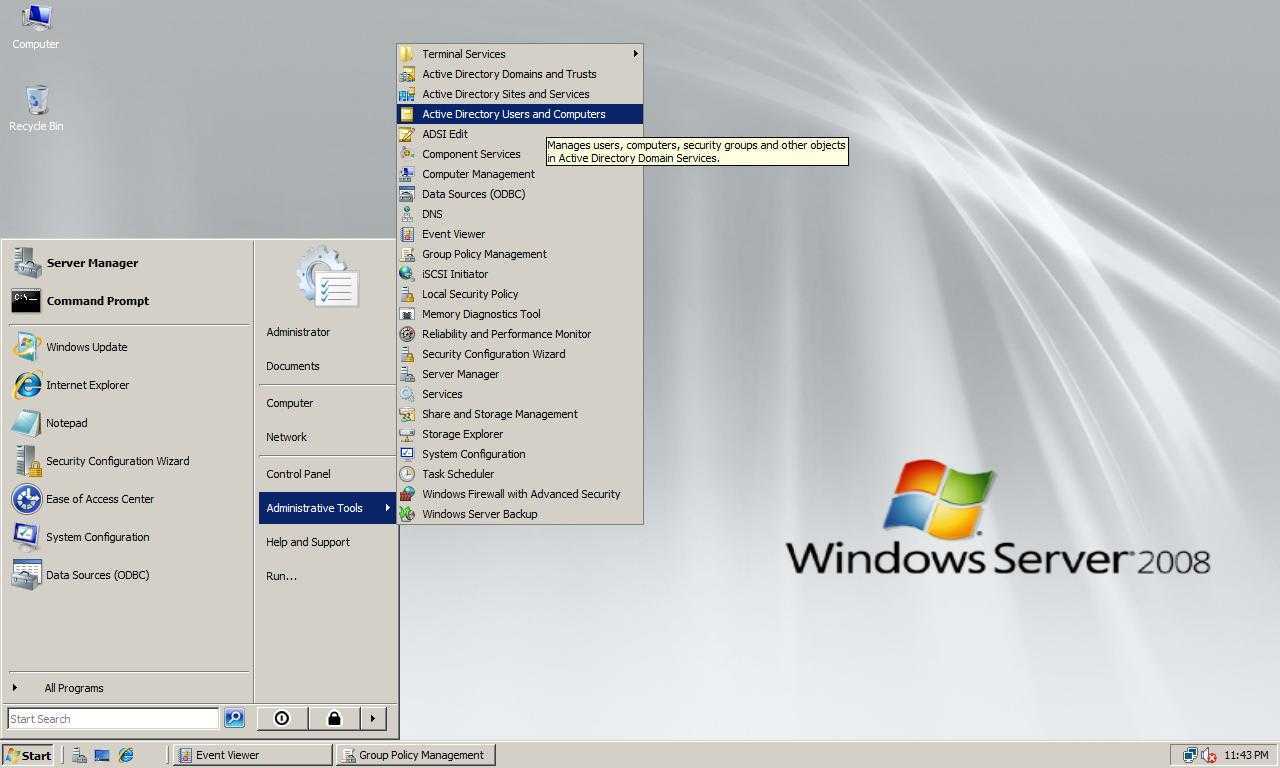
After the Wizard is installed, you can access it easily by going to the Administrative Tools menu off of the Start Menu. Once you start the Wizard, you will be presented with the screen shown in Figure 1.
You should note the message that is highlighted with the yellow yield sign. The message indicates that the wizard will detect inbound ports that are being used by this server. This requires that all applications that use inbound ports be running before you run the Wizard and create the security policy.
Network Rules
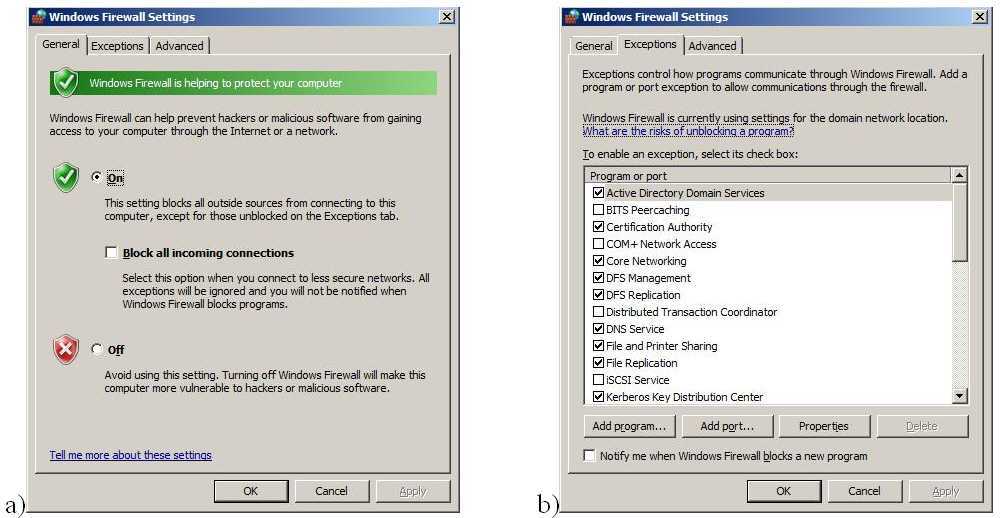
The next part of the wizard configures Windows Firewall rules.
- Click Next on the Network Security screen to continue.
- The Network Security Rules screen shows a list of firewall rules required for the roles and features installed on the server.
Here you can add and edit rules as necessary, but you’ll likely want to accept the rules as determined by the wizard. Even though a rule exists for Remote Desktop (TCP-In), it’s not enough to make a Remote Desktop Connection to your server. You’ll need to add three rules to enable Remote Desktop.
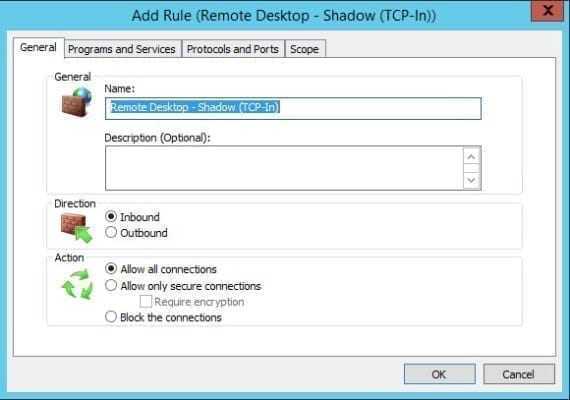
- Click Add on the Network Security Rules screen.
- In the Add Rule dialog, type Remote Desktop – Shadow (TCP-In) in the Name: field.
- Under Action, make sure that Allow all connections is selected.
- Switch to the Programs and Services tab. Under Programs, select This program. In the This program field, type %SystemRoot%system32RdpSa.exe
- Switch to the Protocols and Ports tab. Set the Protocol Type to TCP. Leave the Local Port and Remote Port options set to All Ports.
- Click OK to add the new rule.
- Add a second new rule but this time call it, Remote Desktop – User Mode (TCP-In). Set the This program field to %SystemRoot%system32svchost.exe and set Local Port to Specific Ports and type 3389 in the field below the menu.
- Add a third rule. Call it, Remote Desktop – User Mode (UDP-In). Set the This program field to %SystemRoot%system32svchost.exe and set Protocol Type to UDP instead of TCP. Set Local Port to Specific Ports and type 3389 in the field below the menu.
- Now that you have the three rules necessary for Remote Desktop Access in the list, you can click Next to continue.
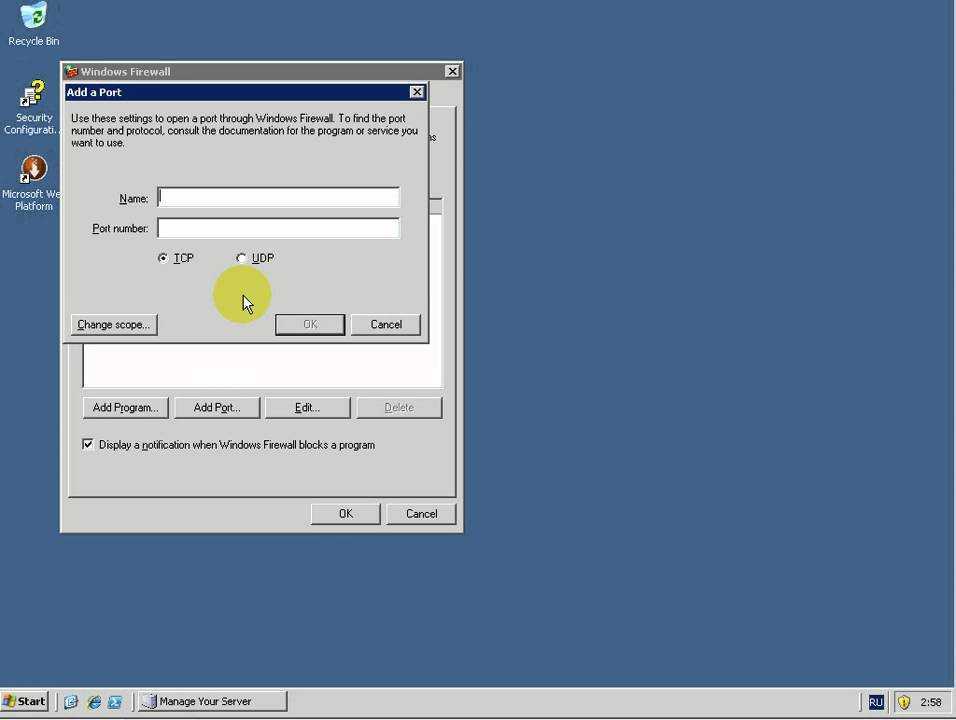
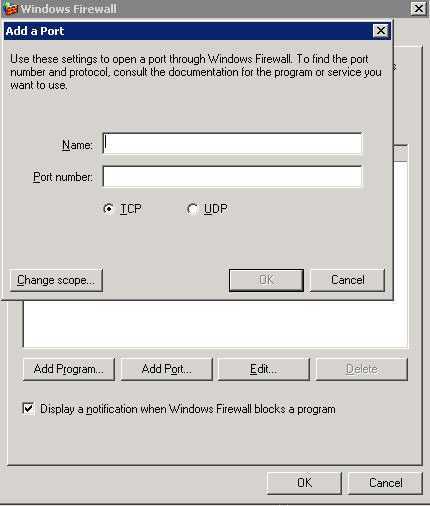
Set Windows Firewall rules for Remote Desktop
The Windows Firewall rules allow any device to connect to Remote Desktop Services on TCP port 3389. Although Microsoft Azure uses random ports for Remote Desktop by default, no special rule to accommodate this is required on Azure VMs so the default firewall rules that use port 3389 will work properly.
Security Compliance Manager (SCM)
Security Compliance Manager — бесплатный инструмент, разрабатываемый в Microsoft Solution Accelerators. Он позволяет быстро сконфигурировать компьютеры при помощи набора готовых групповых политик и пакетов конфигурации, созданных на основе рекомендаций руководства по безопасности Microsoft и различных best practices. Большой плюс его в том, что он избавляет админа от чтения тонн документации и ошибок, ведь всегда можно пропустить что‑то важное. А так просто просматриваем, сравниваем и применяем рекомендуемые параметры безопасности. Кроме настройки ОС Win, поддерживается также IE, Echange Server и MS Office. О его возможностях скажет такой факт, что, например, только для IE доступно более 150 параметров.
Администратор может экспортировать и импортировать свои конфигурации в SCM, упрощая распространение настроек. Поддерживается и возможность применения установок для компьютеров, не входящих в домен.
Установка SCM очень проста, мастер самостоятельно инсталлирует все что нужно. Хотя .NET Framework 3.5 лучше поставить заранее при помощи диспетчера сервера — бывает, что мастер не всегда с этим справляется. В состав пакета входит SQL Server 2008 Express, но при наличии SQL Server можно использовать и его.
Далее SCM запустится автоматически и импортирует шаблоны Baseline Security, на что может уйти несколько минут. В последующем шаблоны можно импортировать автоматически или добавлять вручную. Интерфейс не локализован, но прост и понятен. Начальная страница содержит несколько информационных областей, на которых представлены дополнительные ссылки и информация по дальнейшим действиям. Слева в панели находится дерево Baseline Library, в котором отображены все доступные базовые параметры, сгруппированные по продуктам. При выборе конкретного параметра в середине будет подробная информация: критичность, значение по умолчанию, рекомендация Microsoft и Customized, показывающий все изменения.
Базовые параметры менять нельзя, но щелчком по ссылке «Customize this settings …» или Duplicate можно сделать копию и ее изменить под свои условия. Все возможные действия доступны в панели Actions справа. Здесь находятся пункты для экспорта и импорта настроек, в подменю Baseline находим пункты, позволяющие сравнить/совместить, дублировать, удалить параметры. Реализован поиск, позволяющий быстро найти нужный по ключевым словам.
Кроме графической консоли, поставляется инструмент командной строки, позволяющий управлять локальными групповыми политиками компьютера, импортировать и экспортировать их. Все команды выполняются от имени администратора. Для экспорта локальных параметров с компьютера просто выполни команду
Чтобы установить параметры, следует указать идентификатор GUID нужного объекта GPO:
Дополнительный параметр GPOPack позволяет объединять в один самораспаковывающийся файл все, что нужно для применения базовых параметров безопасности (не требует установки LocalGPO). Используя такой архив, можем быстро установить политики на новых ОС.
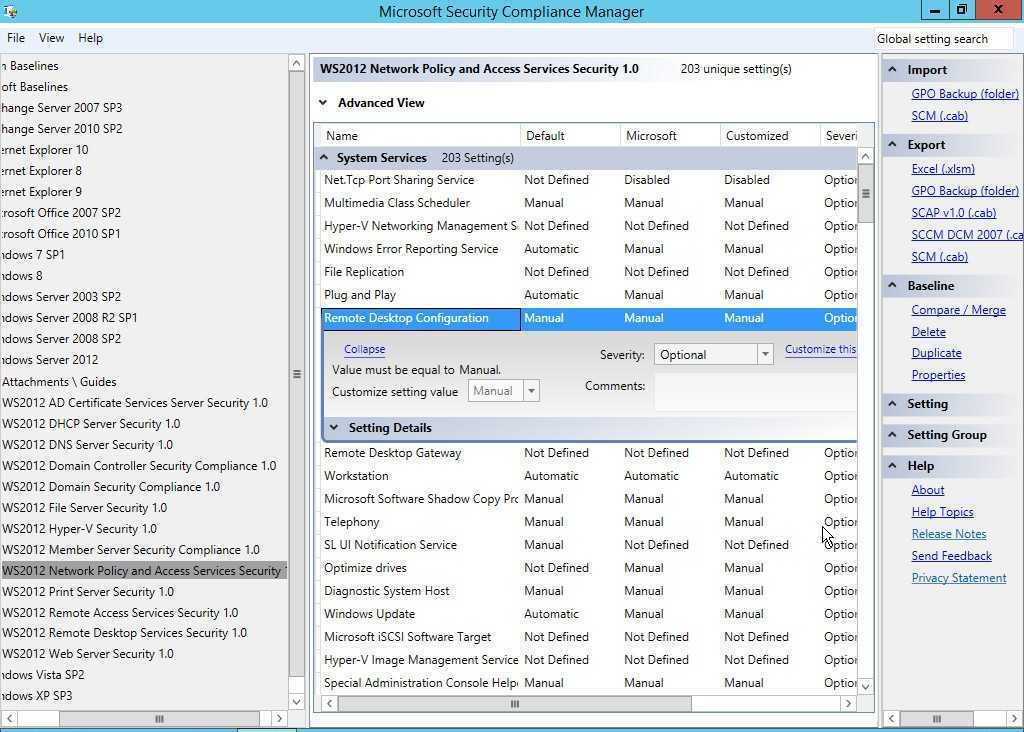 Редактирование политики в Security Compliance Manager
Защита Локального SAM
Локальный SAM на каждом рядовом сервере уникален, поэтому, каждый рядовой сервер должен учитываться, когда защищается имущество, расположенное на сервере. Локальный SAM содержит и конфигурации, и объекты, которые являются основными для рассмотрения, когда блокируется доступ к серверу. Внутри Локального SAM вы захотите рассмотреть следующие области для защиты:
Account Policies (Политики учетных записей) – политики учетных записей для рядового сервера управляют политиками паролей и политиками блокировки учетных записей для всех пользовательских учетных записей, хранящихся в Локальном SAM. Это наилучшая практика для гарантирования, что политики учетных записей соответствуют или превосходят политики учетных записей, установленные для пользовательских учетных записей домена, которые настроены на контроллере домена. По умолчанию, рядовые серверы будут иметь такие же политики учетных записей, как и контроллеры домена, но очень легко это изменить, используя Group Policy Object (GPO – Объект Политики Групп).
User Accounts (Пользовательские учетные записи) – всегда есть одна активная пользовательская учетная запись на каждом рядовом сервере по умолчанию, которая является учтенной записью Администратора. Эта учетная запись нуждается в защите всеми средствами. Если атакующий захватывает управление сервером с помощью этой учетной записи, то не будет ничего, чего бы не смог сделать атакующий или к чему он не имел бы доступ. Некоторые рекомендуемые настройки для защиты этой учтенной записи включают: ее переименование, не использование ее для чего-либо, кроме восстановления сервера, установка сложного пароля/идентификационной фразы и запрещение ее. Все эти опции доступны через GPO, за исключением установки сложного пароля/идентификационной фразы. Однако, с помощью такого инструмента, как PolicyMaker (www.desktopstandard.com/policymaker), пароль может быть установлен, используя настройку GPO.
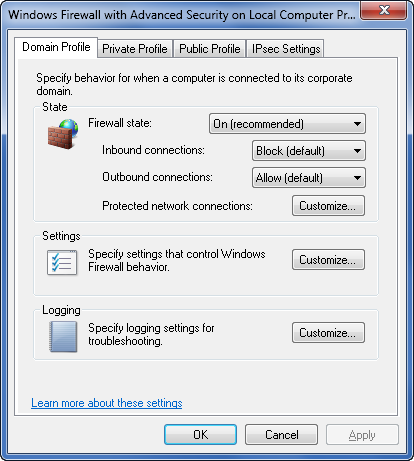
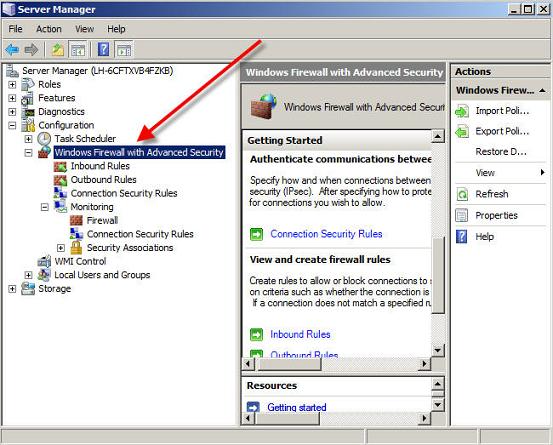
Groups (Группы) – каждый рядовой сервер имеет набор локальных групп. Некоторые группы обеспечивают повышенные привилегии для выполнения задач администрирования на этом сервере. Эти группы должны быть как следует защищены и настроены, для гарантирования, что только нужные пользователи имеют членство в этих группах. Есть GPO настройка, называемая “Restricted Groups” (Ограниченные Группы), которая может управлять членством в существующих группах, как показано на Рисунке 1.
Рисунок 1: “Restricted Groups” управляют членством в существующих группах на рядовом сервере
Снова PolicyMaker поднимает управление логическими группами на новый уровень, позволяя ограниченное управление членством в группе, включая опции фильтрации только для определенных рядовых серверов.
Prerequisites
Requirements
There is an assumption that the installer has knowledge of basic Windows 2003 installation and Cisco Wireless LAN controller installation as this document only covers the specific configurations to facilitate the tests.
For initial installation and configuration information for the Cisco 5508 Series Controllers, refer to the Cisco 5500 Series Wireless Controller Installation Guide. For initial installation and configuration information for the Cisco 2100 Series Controllers, refer to the Quick Start Guide: Cisco 2100 Series Wireless LAN Controller.
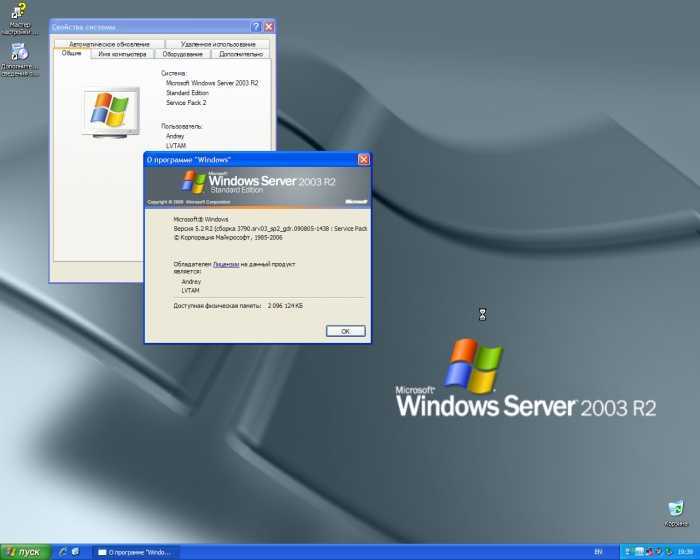
Microsoft Windows 2003 installation and configuration guides can be found at Installing Windows Server 2003 R2 .
Before you begin, install the Microsoft Windows Server 2003 with SP1 operating system on each of the servers in the test lab and update all Service Packs. Install the controllers and lightweight access points (LAPs) and ensure that the latest software updates are configured.
Windows Server 2003 with SP1, Enterprise Edition, is used so that auto-enrollment of user and workstation certificates for PEAP authentication can be configured. Certificate auto-enrollment and autorenewal make it easier to deploy certificates and improve security by automatically expiring and renewing certificates.
Components Used
The information in this document is based on these software and hardware versions:
-
Cisco 2106 or 5508 Series Controller that runs 7.0.98.0
-
Cisco 1142 Lightweight Access Point Protocol (LWAPP) AP
-
Windows 2003 Enterprise with Internet Information Server (IIS), Certificate Authority (CA), DHCP, and Domain Name System (DNS) installed
-
Cisco 1121 Secure Access Control System Appliance (ACS) 5.1
-
Windows XP Professional with SP (and updated Service Packs) and wireless network interface card (NIC) (with CCX v3 support) or third party supplicant.
-
Cisco 3750 Switch
The information in this document was created from the devices in a specific lab environment. All of the devices used in this document started with a cleared (default) configuration. If your network is live, make sure that you understand the potential impact of any command.
Working With Security Policies
Once you launch the Wizard, you will first be prompted to make a decision about the security policy you are going to be working with. You can create a new policy, edit an existing policy, apply an existing policy, or rollback the last applied policy. All of these options can be seen in Figure 2.
Security policies are created as XML files, using the XML file extension. The default security policy storage location is C:\Windows\Security\msscw\policies. You can provide a description with each security policy, which is extremely useful if you have a multitude of policies.
When you work with the security policy XML file, you won’t be working with the file as a whole; you will be working with the file in different sections. These sections are organized and referenced within the Security Configuration Wizard interface using a security configuration database structure. You can view the security configuration database using the SCW Viewer, which can be seen in Figure 3.
A Word of Warning
Although I’ll remind you from time to time as part of the instructions included in this article, modifying security settings from the defaults risks creating application compatibility or network connection problems. In the worst case scenario, you could lose access to a remote server, which would be especially catastrophic if it is located in a remote datacenter with no Integrated Lights Out facility.
Therefore, any security policies created using SCW should be thoroughly tested in a pre-production environment, and when you get around to applying policies on production servers, there should be a back out plan that doesn’t rely on SCW’s rollback feature. If you can’t make a connection to the server, you might not be able to perform a rollback so easily!
Server Roles, Features and Additional Options
In this section of the wizard, we will configure what Server Roles, Features and other options the security policy should include.
- Click Next on the Role-Based Service Configuration screen. This part of the wizard collects data on the roles and features installed on the server so that a rule set can be determined for service and firewall configuration.
- On the Select Server Roles screen, check the list of installed roles to make sure it corresponds to the functions your server performs. To make it easier to check the list, you can choose Selected roles from the View menu. Once you’re done, click Next.
- Now do the same for installed features on the Select Client Features screen. If the server is joined to an Active Directory domain, check that Domain Member is selected. Click Next to continue.
- On the Select Administration and Other Options screen, check the list of selected options. If you need more information about any of the available options, click the arrow to the left of the description.
In this example, I want to check Remote Desktop in the list because I use it for remote administration of the server. If it’s not selected, SCW disables the service in the policy. Note that in the figure below I selected Remote Administration Options from the menu just to make it easier to find the Remote Desktop option.
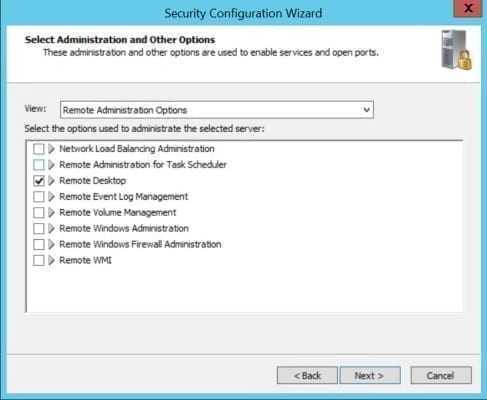
Select Administration and Other Options in the Security Configuration Wizard (Image Credit: Russell Smith)
- Finally, check any other services your server requires on the Select Additional Services screen and click Next.
- On the Handling Unspecified Services screen, decide how you want services not specified in the policy to be dealt with. You have the option to ignore any services not specified in the policy and allow them to run unchanged, or to disable services not included in the policy by selecting Do not change the startup mode of the service or Disable the service respectively. Click Next to continue.
- The Confirm Service Changes screen displays a handy summary of the current service configuration on the server and how that will change after the policy has been applied. Check through the list to make sure there will be no nasty surprises and click Next to continue.