Установка
Имеется пакет VirtualBox OSE 1.6.6 для Debian Lenny. Он также доступен в backports для Debian Etch. В репозитории testing лежит пакет VirtualBox OSE 3.1.4
Lenny
Установите пакет virtualbox-ose и соответствующие Вашей системе модули ядра: # aptitude install virtualbox-ose virtualbox-ose-modules-$(uname -r)
Следуя руководству по udev перезагрузите установленные правила
(Обратите внимание на баг ):
# invoke-rc.d udev reload
Загрузите модуль ядра для VirtualBox:
# modprobe vboxdrv
Добавьте свою учётную запись пользователя у группу vboxusers:
# adduser yourusername vboxusers. Вам нужно заново зайти под учётной записью, чтобы изменения вступили в силу
Вам нужно заново зайти под учётной записью, чтобы изменения вступили в силу.
VirtualBox OSE может быть запущен .
Для загрузки модуля vboxdrv при запуске системы необходимо отредактировать файл /etc/default/virtualbox-ose и установить LOAD_VBOXDRV_MODULE to 1.
Lenny Backports
Поскольку VirtualBox OSE версии 1.6.6 является устаревшим, Вы можете использовать новую версию из lenny-backports для получения новой функциональности и ,возможно, исправлении существующих ошибок в старой версии.
-
Пропишите нужные репозитории в файл /etc/apt/sources.list. Например:
 # Backported packages for Debian Lenny
 deb http://www.backports.org/debian lenny-backports main
- Обновите список доступных пакетов и установите пакет debian-backports-keyring :
 # aptitude update
 # aptitude -t lenny-backports install debian-backports-keyring
Если в Вашей системе ещё не установлен ключ для репозитория backports.org, система спросит Вас о продолжении установки из недоверяемого источника. Введите Yes в приглашении.
- Установите нужные заголовки ядра для системы. Пример:
 # aptitude update
 # aptitude install linux-headers-2.6-$(uname -r | sed 's,.*-,,')
- Установите пакет lenny-backports/virtualbox-ose.
# aptitude -t lenny-backports install virtualbox-ose
Эта команда также установит все необходимые сопутствующие пакеты, а DKMS соберёт модули ядра для Вашей системы.
VirtualBox OSE может быть .
Чтобы модули VirtualBox OSE не грузились при запуске системы, надо отредактировать файл /etc/default/virtualbox-ose и установить значение переменной LOAD_VBOXDRV_MODULE в 0.
Etch
-
Добавьте Debian Backports репозиторий в файл /etc/apt/sources.list. Пример:
 # Backported packages for Debian Etch
 deb http://www.backports.org/debian etch-backports main
- Обновите список доступных пакетов и установите пакет etch-backports/debian-backports-keyring:
 # aptitude update
 # aptitude -t etch-backports install debian-backports-keyring
Система может спросить Вас о продолжении установки из неподписанного источника. Введите в приглашении Yes.
- Установите пакеты module-assistant,etch-backports/virtualbox-ose и etch-backports/virtualbox-ose-source.
 # aptitude update
 # aptitude -t etch-backports install module-assistant virtualbox-ose virtualbox-ose-source
-
Соберите и установите пакет virtualbox-ose-modules-* для Вашей системы используя Module-Assistant:
# m-a a-i virtualbox-ose-source
-
Загрузите модуль VirtualBox:
# modprobe vboxdrv
-
Добавьте своего пользователя в группу vboxusers:
# adduser yourusername vboxusers
Перелогиньтесь для вступления изменений в силу.
VirtualBox OSE может быть .
Для автоматической загрузки модуля vboxdrv при запуске системы, отредактируйте файл /etc/default/virtualbox-ose и установите переменную LOAD_VBOXDRV_MODULE в 1.
Squeeze
-
Обновите список доступных пакетов. Установите пакеты linux-headers, virtualbox-ose, virtualbox-ose-dkms и virtualbox-ose-qt:
# aptitude update
# aptitude install linux-headers-2.6-$(uname -r | sed 's,.*-,,') virtualbox-ose virtualbox-ose-dkms virtualbox-ose-qt
DKMS соберёт модули VirtualBox для Вашего ядра.
VirtualBox OSE может быть .
Для предотвращения загрузки модулей VirtualBox при старте системы, отредактируйте файл /etc/default/virtualbox-ose и установите значение переменной LOAD_VBOXDRV_MODULE в ноль.
Установка Linux на VirtualBox
Для того чтобы установить Linux на VirtualBox нам понадобиться несколько вещей:
Образ диска с Linux — определитесь какой дистрибутив вы собираетесь устанавливать и загрузите его образ на официальном сайте, например, Ubuntu или Fedora
Также обратите внимание на архитектуру образа, если у вас 32 битная основная система, то вряд ли у вас получиться запустить 64 бит гостевую;
Установленная виртуальная машина — VirtualBox, это кроссплатформенная программа, которая может работать не только в Linux, но и в Windows и MacOS. Поэтому вы можете запускать Linux в любой операционной системе
Для большинства из них можно скачать установщик VirtualBox на официальном сайте программы;
Компьютер с поддержкой аппаратной виртуализации — конечно, вы можете запускать виртуальные машины и без поддержки аппаратной виртуализации, но они будут работать в разы медленнее. Большинство современных процессоров поддерживают AMD-V или Intel-VT-X. Посмотрите нельзя ли включить такую возможность в вашем BIOS.
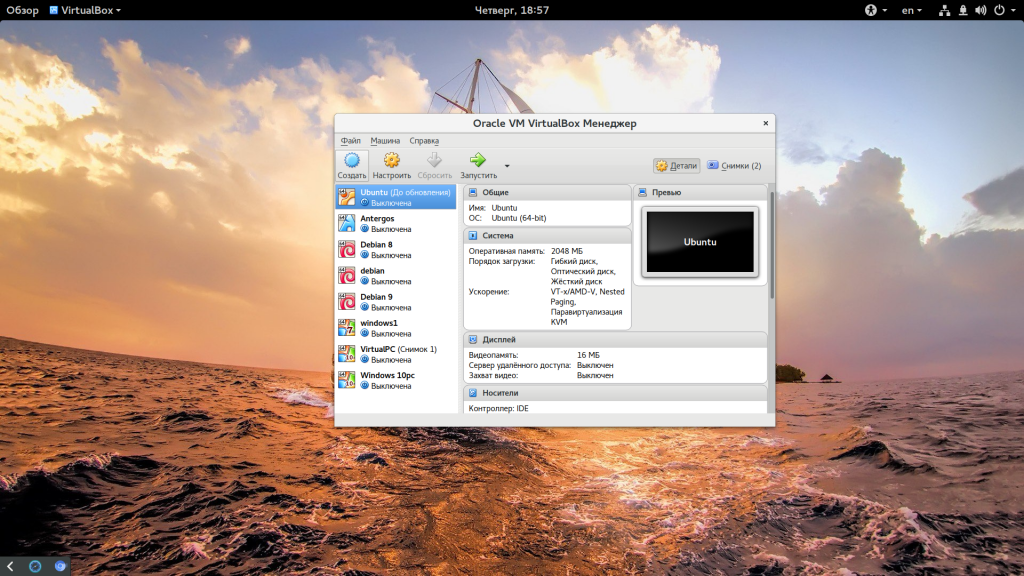
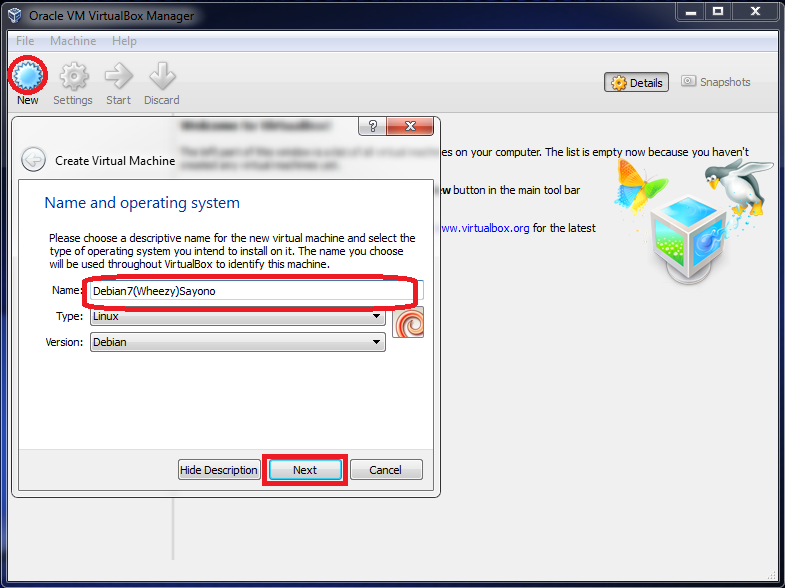
Если у вас все это поддерживается мы можем перейти к созданию виртуальной машины. Запустите VirtualBox и нажмите кнопку создать:
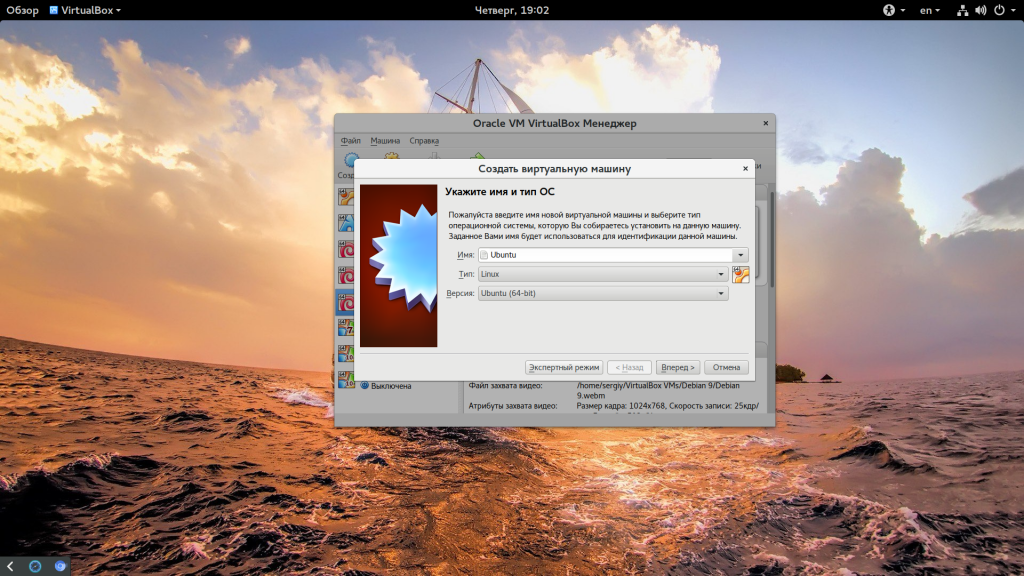
 В первом окне мастера введите название вашей новой виртуальной машины, выберите тип (Linux) и дистрибутив, например, Ubuntu:
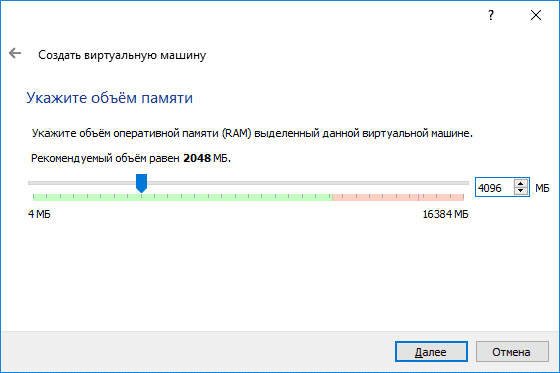
Следующий шаг — нужно выбрать количество оперативной памяти для вашей машины, но умолчанию VirtualBox предлагает количество памяти в зависимости от используемой машины, но для современных дистрибутивов будет достаточно 2 Гб, это нужно для более плавной и удобной работы, хотя система будет работать и при 1024 Мб и даже меньшем объеме.
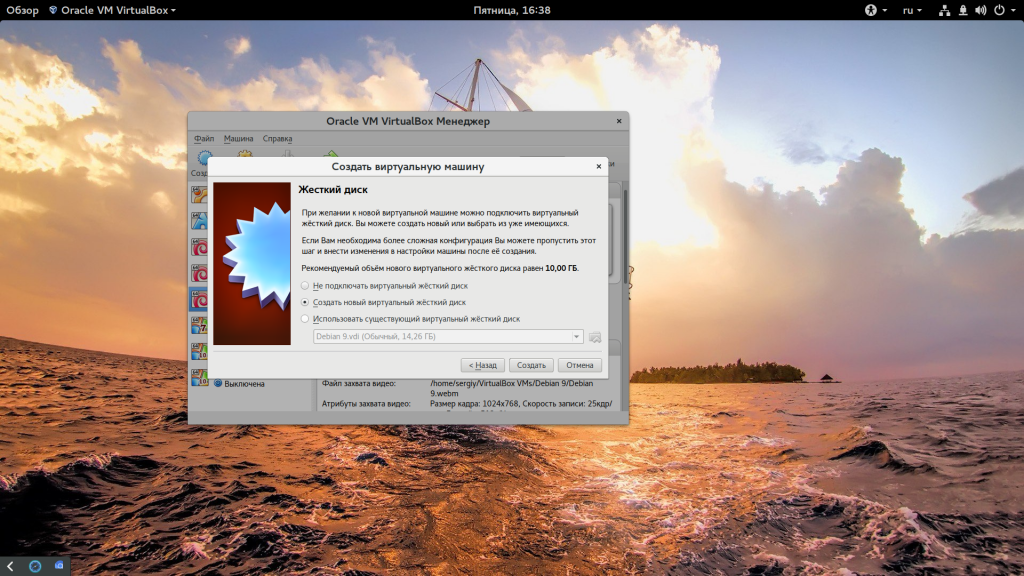
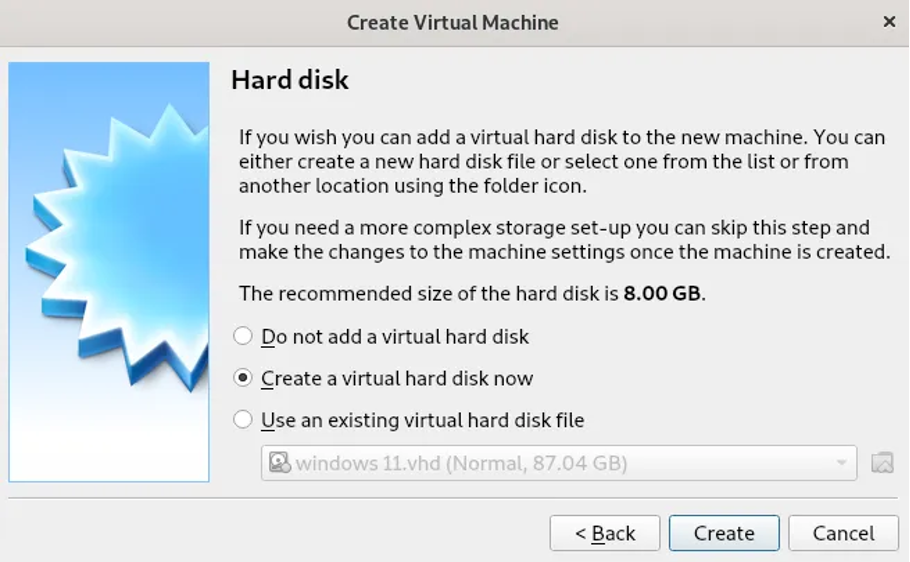
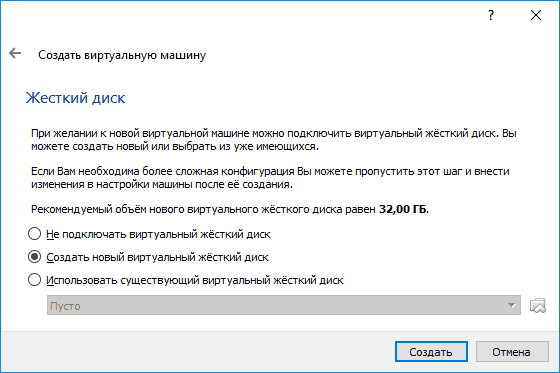
Дальше нам необходимо создать жесткий диск для установки системы, объем диска зависит от операционной системы, но поскольку вы можете создавать динамический диск, который будет изменять размер реального файла в файловой системе по мере наполнения, то можно указать 30 или даже 50 Гб чтобы было точно достаточно.
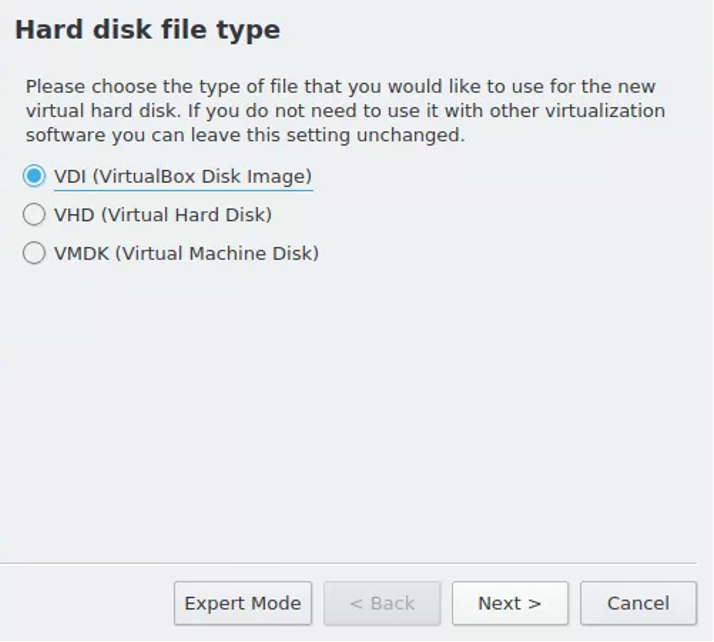
Сначала выберите «Создать новый виртуальный жесткий диск», затем выберите тип диска:
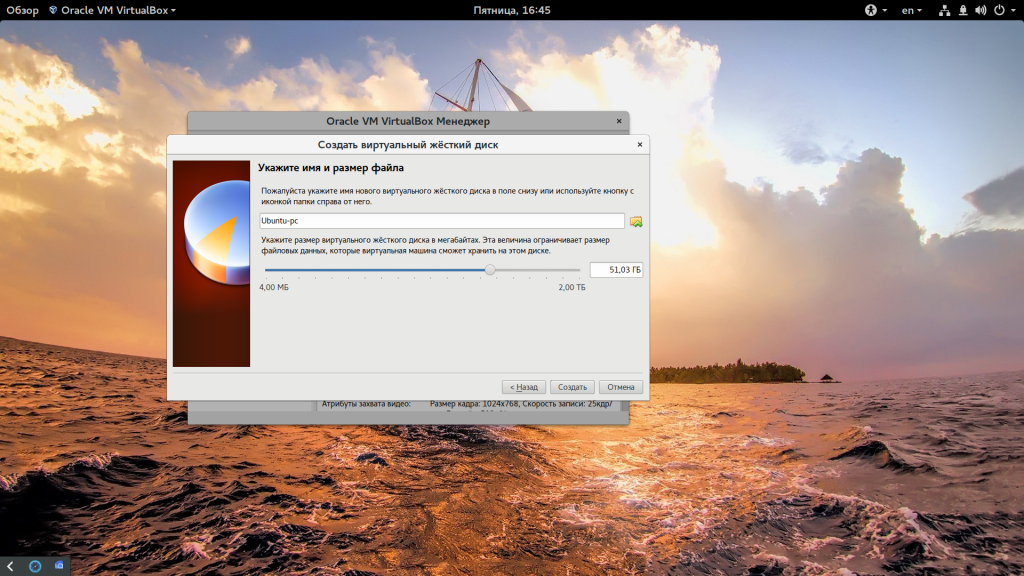
 Наиболее часто для виртуальных машин используется диск типа VDI. Затем выберите размер диска и имя для его файла. Хотя и есть возможность использовать место по мере необходимости, лучше так не делать на HDD, лучше выделяйте все место сразу, это увеличит производительность до 10%:
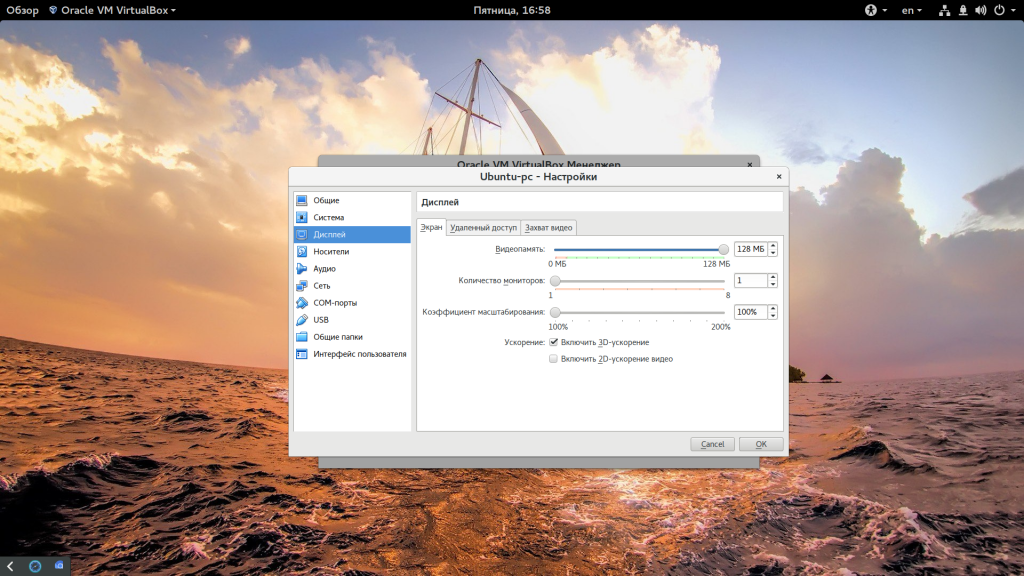
Виртуальная машина почти готова, но нужно еще кое-что настроить. По умолчанию VirtualBox выделяет 16 мегабайт оперативной памяти для машин, но современным дистрибутивам этого мало, поэтому нажмите «Настройки», а затем на вкладке «Дисплей» установите значение видеопамяти в 128 мегабайт. Этого уже должно хватить. Кроме того, отметьте галочку 3D ускорения:
Еще нас будет интересовать раздел «Система», вкладка «Материнская плата», здесь нужно выбрать чипсет » ICH9″, Linux работает с ним лучше, также отметьте галочки часов в UTC.
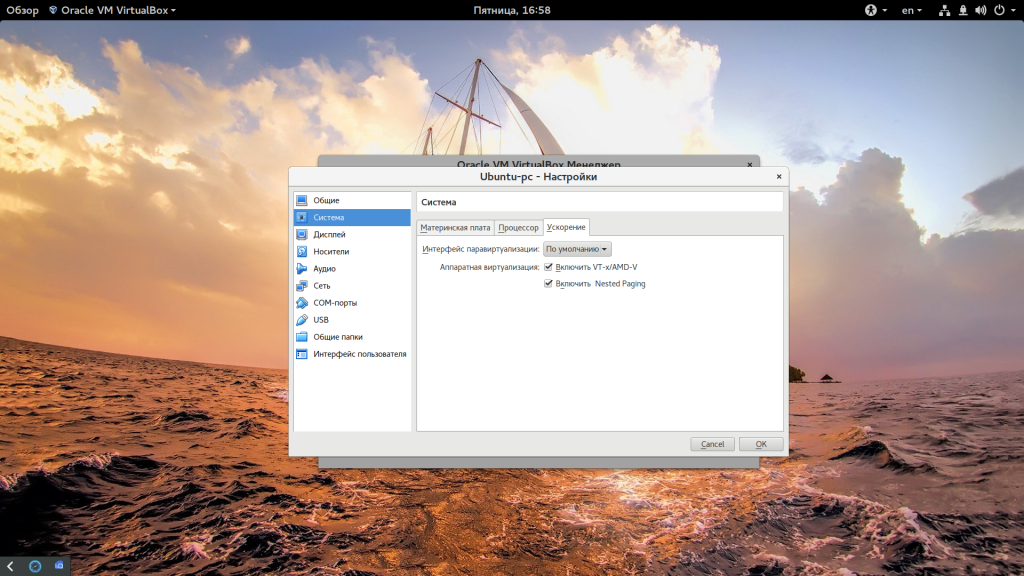
На вкладке «Процессор» нужно отметить использовать «PAE/NX», и не выбирайте много процессоров, одного ядра будет достаточно. В разделе «Ускорение» отметить все галочки и выбрать ваш гипервизор, в Linux лучше всего использовать KVM:
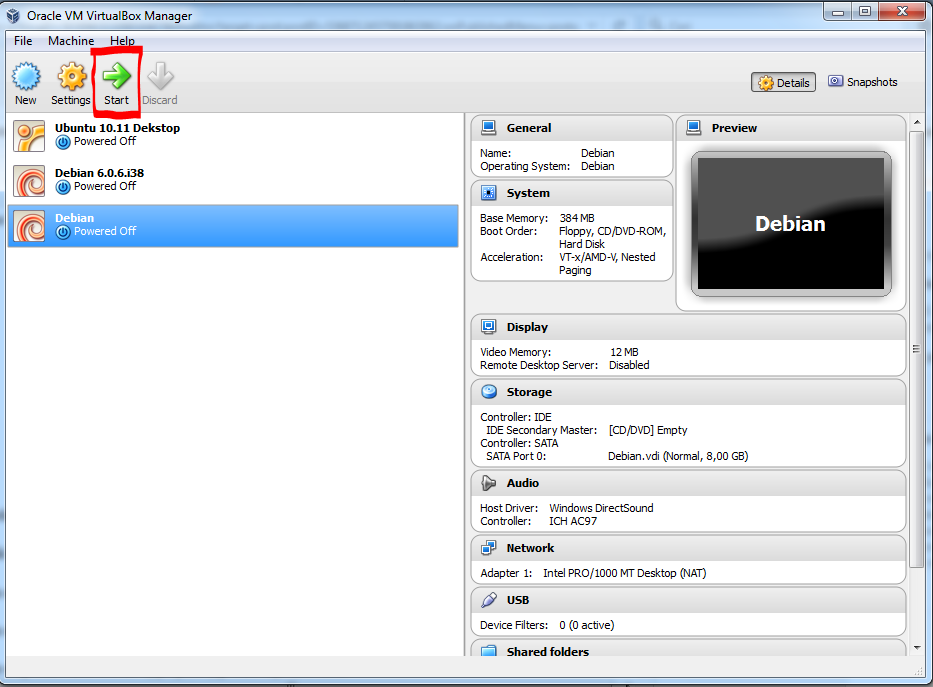
Дальше запускайте виртуальную машину:
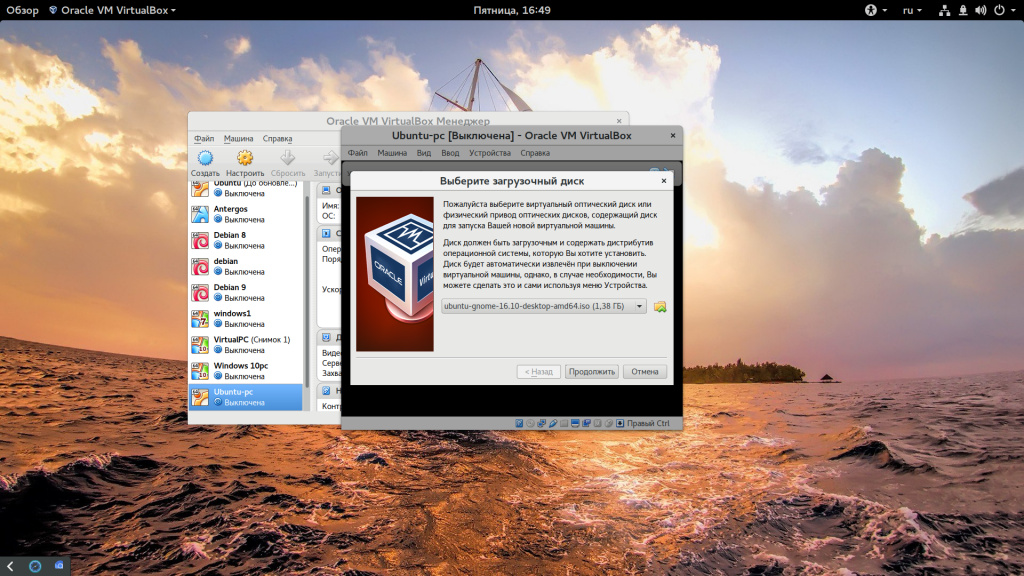
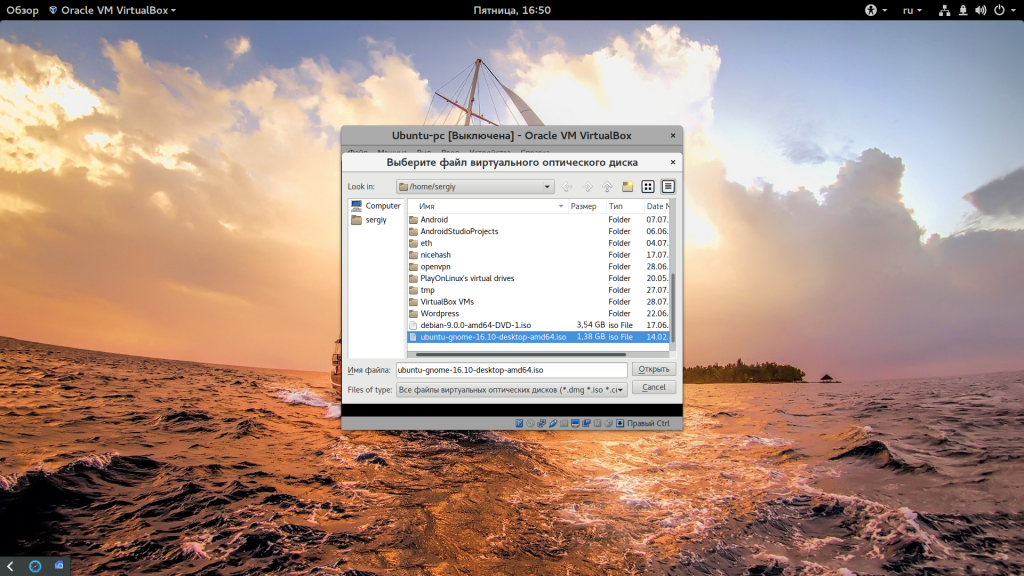
При первом запуске вам будет предложено выбрать установочный носитель, с которого будет проводиться установка, это может быть реальный CD привод или же просто образ в файловой системе:
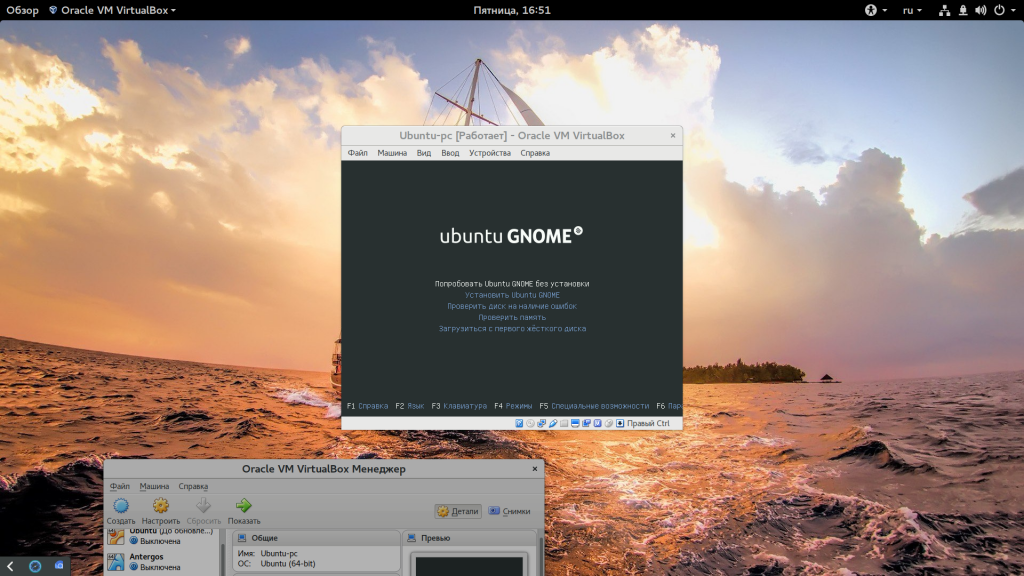
Дальше будет запущена виртуальная машина и операционная система, которую вы выбрали и вам необходимо выполнить все действия для установки:
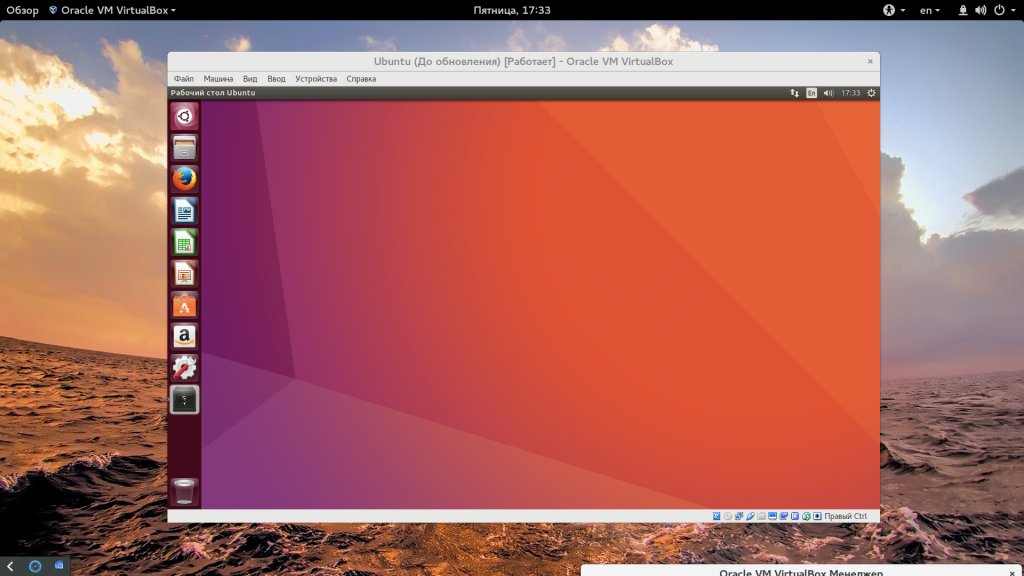
Мы не будем рассматривать установку Ubuntu, поскольку это уже подробно описано в одной из предыдущих статей.
Но после завершения установки есть еще несколько настроек. Во-первых — вам нужно установить дополнения гостевой ОС Ubuntu или для другого выбранного вами дистрибутива. Процесс везде одинаковый. Также, если вы используете Ubuntu, нужно включить облегченный режим Unity, чтобы все работало быстрее. Для этого выполните:
На всякий случай, команда для отключения этого режима:
Эти команды работают в Ubuntu 17.04, в более ранних версиях такой режим можно включить только через CompizConfig. Теперь установка Linux на VirtualBox полностью завешена и система готова к использованию.
×
Installing VirtualBox
Debian Sid/Unstable
For Sid, VirtualBox is available in the «contrib» section of Debian, only for the amd64 architecture, while the guest additions are in the «non-free» section of Debian. It can be installed as such:
-
Add the «contrib» and the «non-free» components to /etc/apt/sources.list, for example:
# Debian Unstable "Sid"
deb http://deb.debian.org/debian/ sid main contrib non-free
-
Update the list of available packages:
sudo apt update
-
Install the virtualbox package, for instance:
sudo apt install virtualbox
-
Optionally install the extension pack with:
sudo apt install virtualbox-ext-pack
Debian 10 «Buster» and Debian 11 «Bullseye»
Packages for VirtualBox are not officially available in stable releases of Debian, due to lack of cooperation from upstream on security support for older releases. See
However, new versions of VirtualBox are made available to stable users on a «rolling» basis by Debian Fast Track, a Debian project. This is currently available for Debian 10 and 11.
-
Add the Fast Track repository by following the instructions at https://fasttrack.debian.net/
-
-
Install the VirtualBox package with:
sudo apt install virtualbox
-
Optionally install the extension pack with:
sudo apt install virtualbox-ext-pack
Oracle Virtualbox third-party repository
Oracle packages VirtualBox for a number of Linux distributions themselves, including Debian. These are completely unsupported by Debian, but you may find them interesting if you need a new version faster than Fast Track provides, or wish to stick close to upstream.
See Oracle’s instructions on the VirtualBox Wiki.
Причины, по которым я не выбрал бы его сейчас
- Отсутствие хороших web-морд. Имеющийся web-интерфейс, несмотря на то, что он позволяет совершать с виртуальными машинами большинство требуемых действий (создание, снимки, удаление, создание виртуальных сетей), и реализован очень качественно, обладает следующими ограничениями:
- Не позволяет назначать права на виртуальные машины (предоставления доступа разработчиками по списку только к своим машинам)
- Не позволяет управлять несколькими физическими серверами из одной панели управления
- Не отображает статистику по загрузке сервера
- Пишется сторонними разработчиками, не имеющими отношения к VirtualBox, в их свободное время, из-за чего вызывает опасение возможность прекращения его развития
- Более медленная работа при большом количестве запущенных виртуальных машин по сравнению с KVM.
- Оговорка в лицензии
Steps to Download And Install Debian 11 (Bullseye) on Virtual Box
Step 1Download ISO file from the official website here
What is an ISO file?ISO is a commonly used extension for an image of a disc formatted using an ISO 9660 file system standard, often known as CDFS, and intended for compact discs. A disc image is simply an electronic representation of the data as it would appear on a disc (in this case, a CD-ROM or DVD). The disc image might contain everything that would normally be stored on a drive, such as an operating system, data, software, media files, and so on.
While ISOs are not required to install any operating system, they may be a simple alternative for installing an operating system into a new virtual machine if you are utilizing a virtual machine.
Step 2Create bootable media once the ISO file is downloaded. Bootable media can be created using any of the following:
Rufus, Ventoy, WoeUSB
Step 3Now, create Virtual Machines to run our Operating System. For this, we will be using Virtual Box in this tutorial. However, you can also go for VMWare.
Next, create a new Virtual Machine in the Virtual box and name it with your choice.
Step 4We will assign memory and hard disk to the VM since it is virtually an operating system and will need some running resources. This step is recommended to have high RAM and Hard Disk in your machine while installing Virtual Operating Systems as we will be sharing the memory with the Virtual Machine Instance.
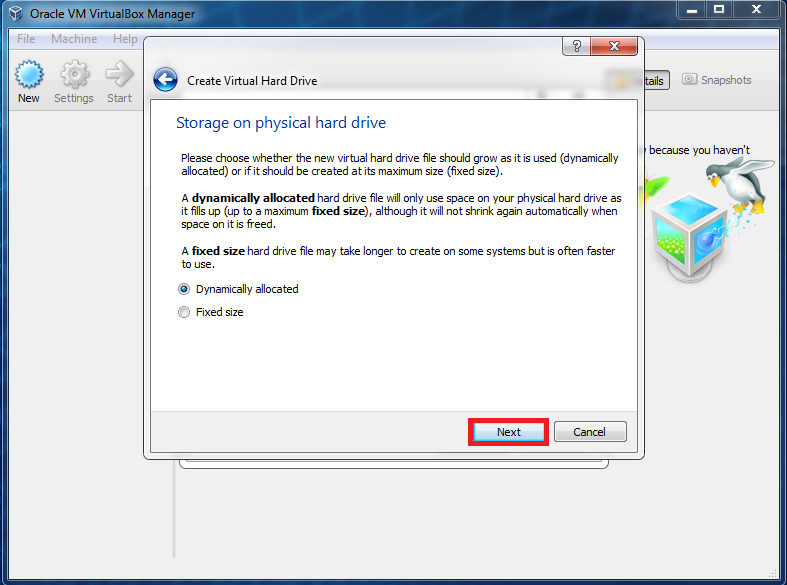
Create a “Virtual Hard Disk” for our use case and select RAM according to your machine.
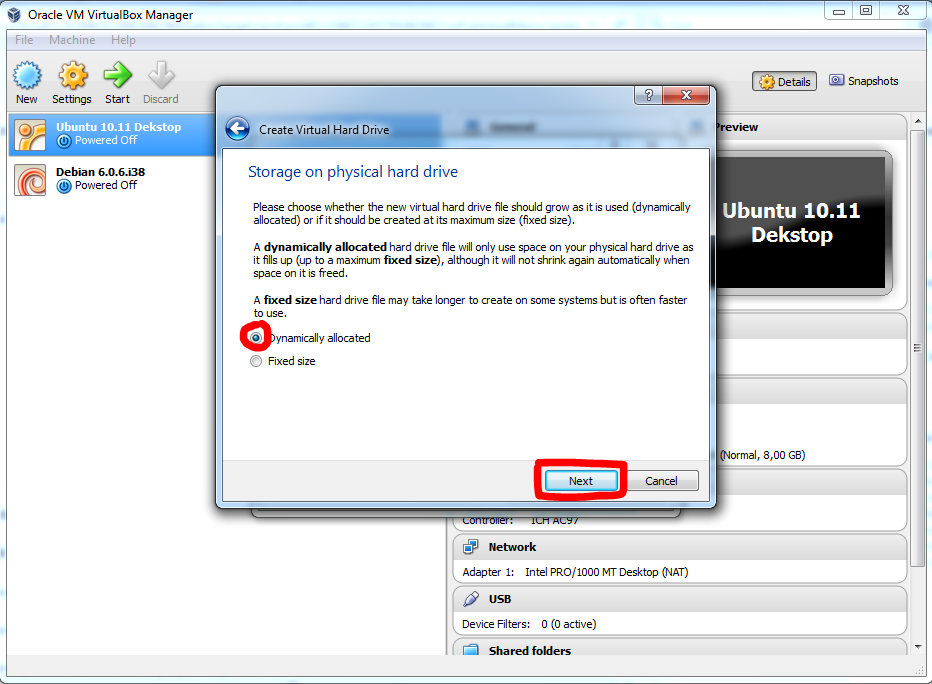
Choose the storage type as “Dynamically Allocated” in the next step.
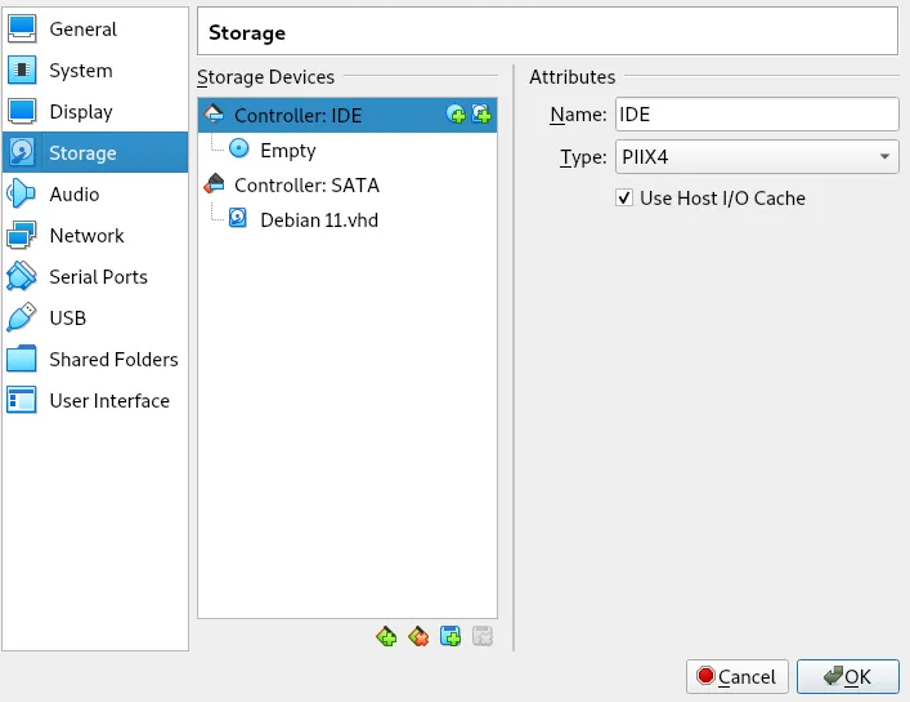
Step 5We have now created a VM instance in VirtualBox. Let’s load the ISO file.
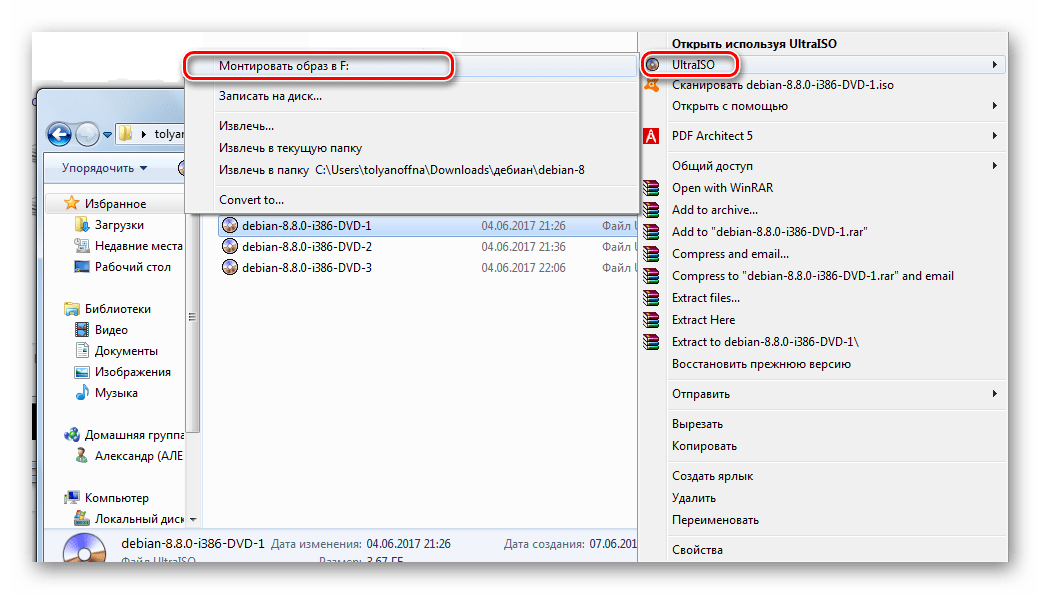
Go to Storage -> Click on “Empty” below “Controller: IDE” -> Go to the ISO file location and mount it.
You have now created the VM for your new Operating System.
Next, we will deal with the core installation of the Debian Operating System. The below guide would remain the same irrespective of whether you install it in VMWare, VirtualBox, or physical machine.
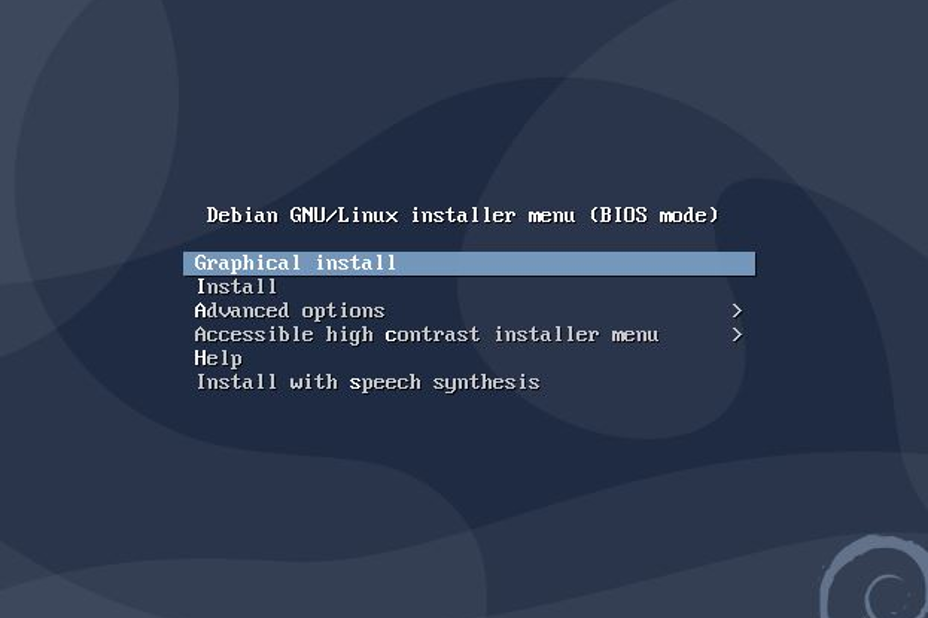
Step 6Start the virtual instance you created. It is analogous to starting a physical machine using a bootable disk or USB while dual booting your system. You should see the below screen once you start your instance. Choose the “Graphical Install” option.
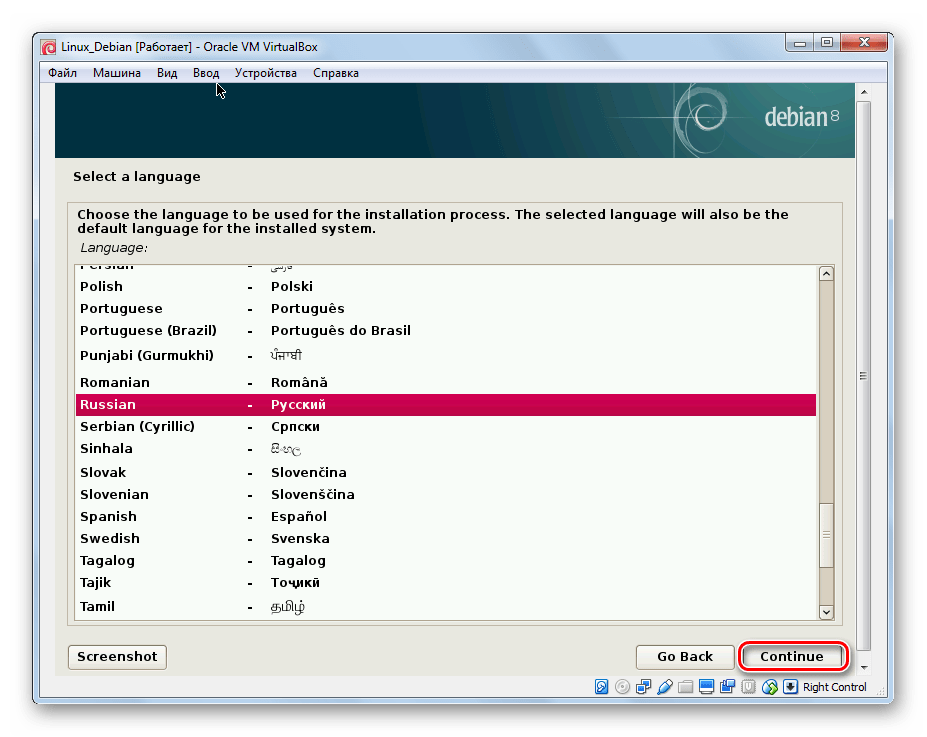
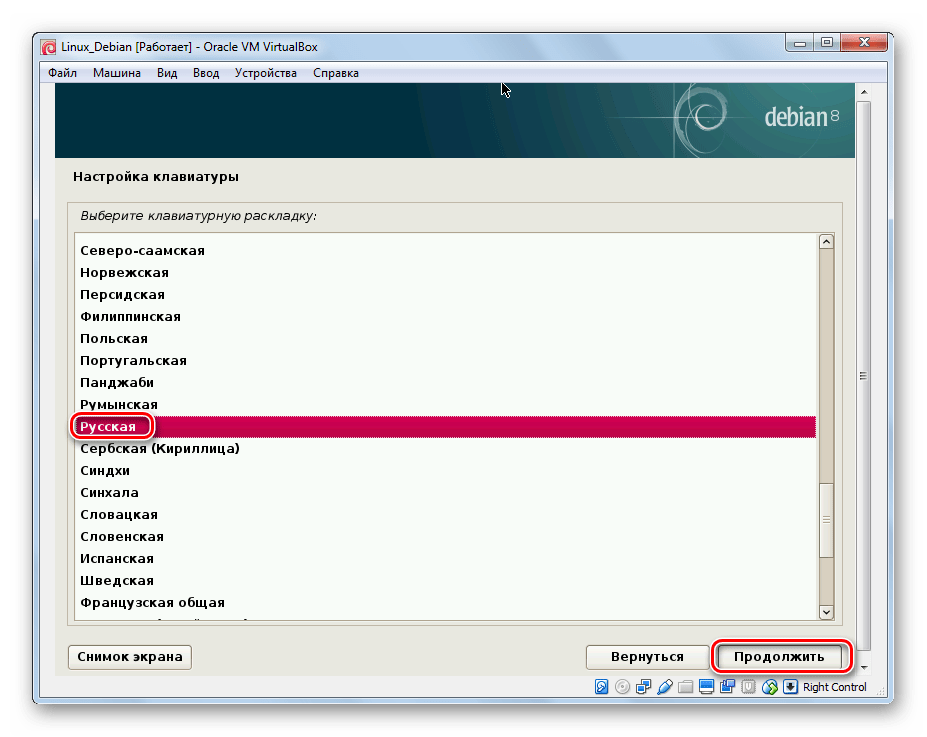
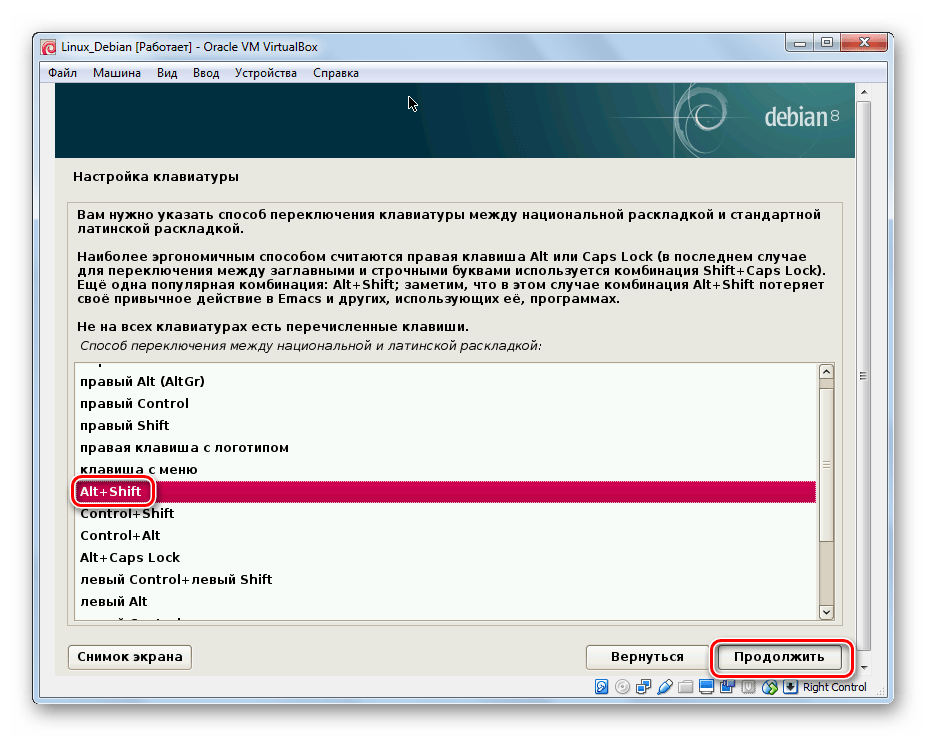
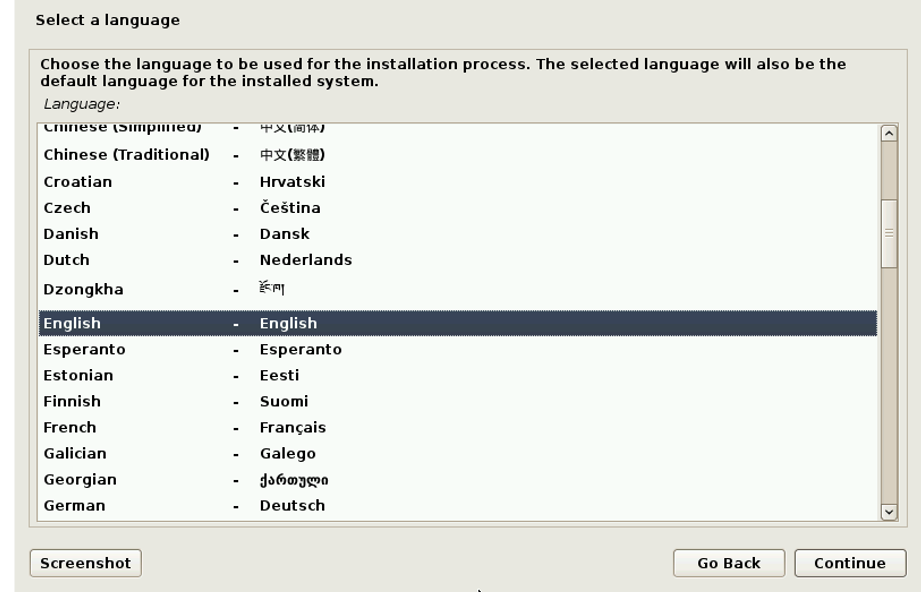
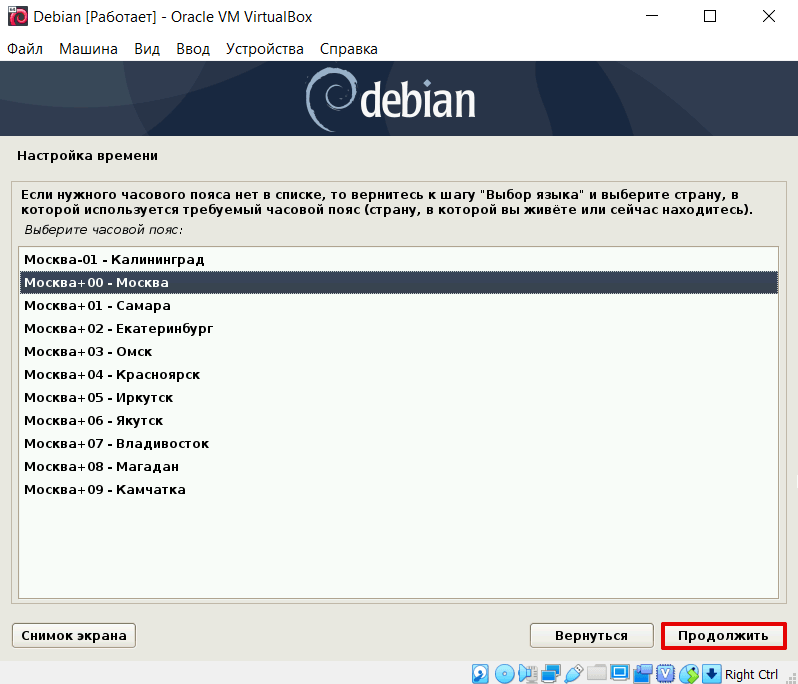
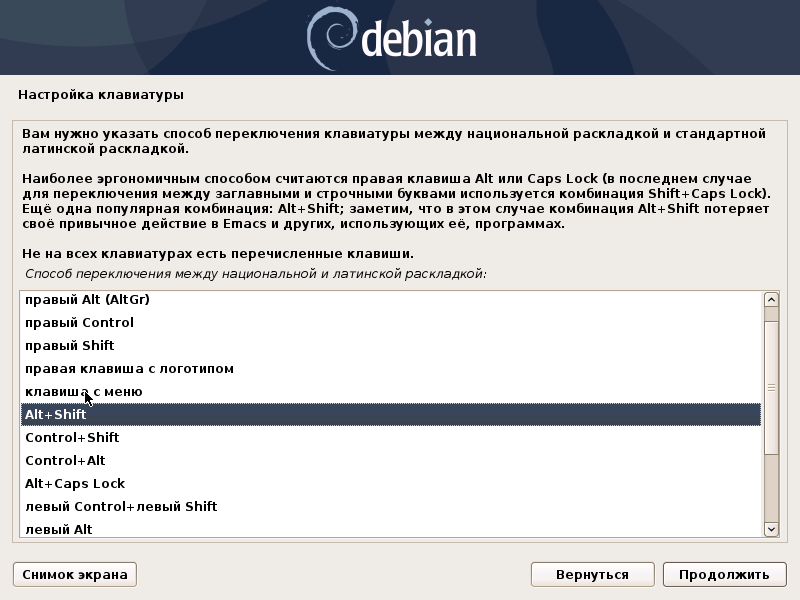
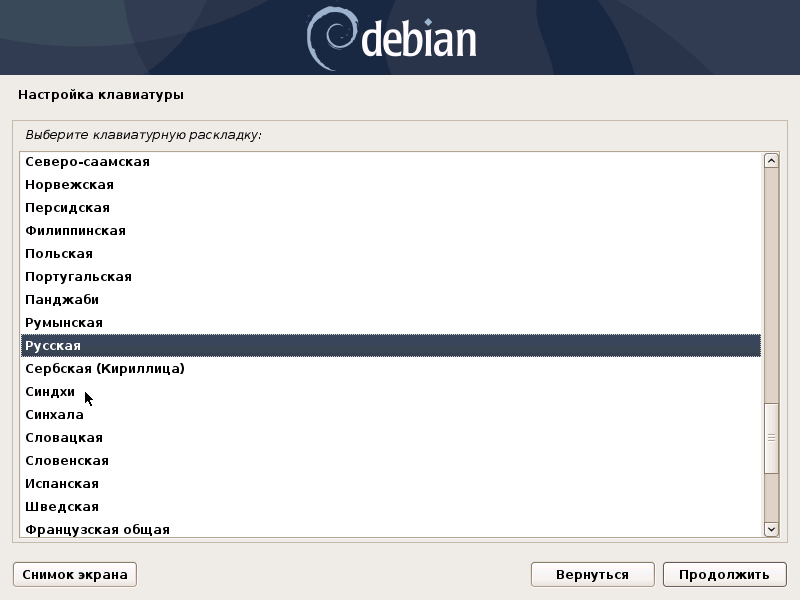
Select your preferred options in the “Location”, “Timezone”, “Language”, “KeyBoard Configuration” in forthcoming sections and install these components.
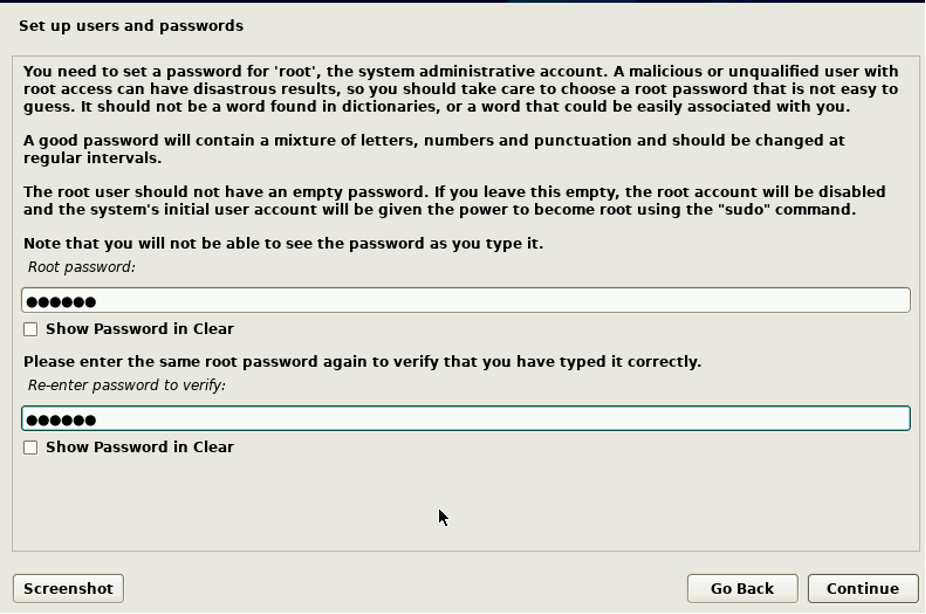
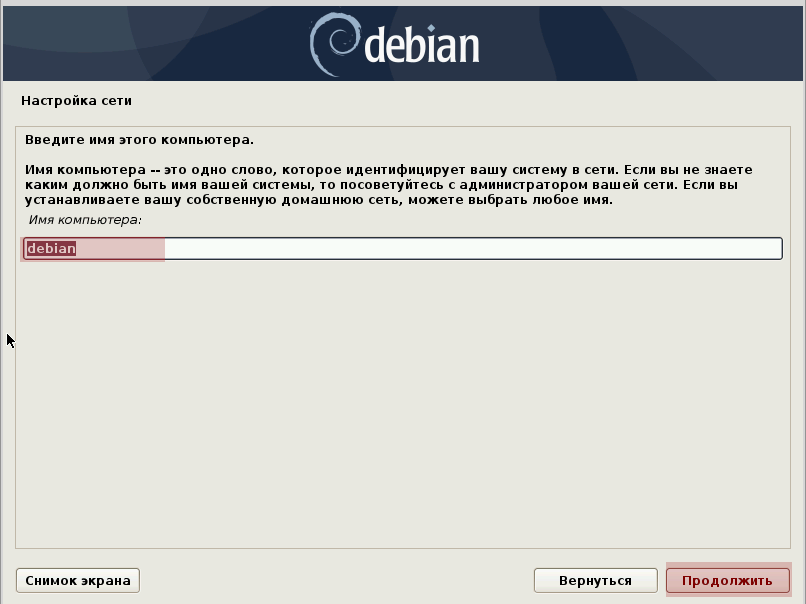
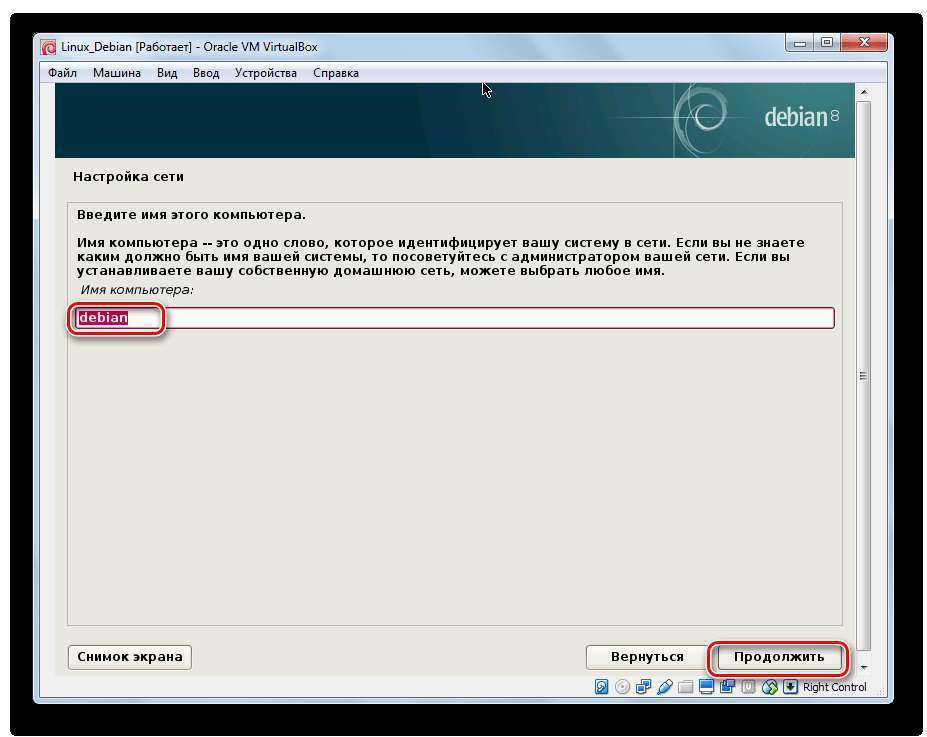
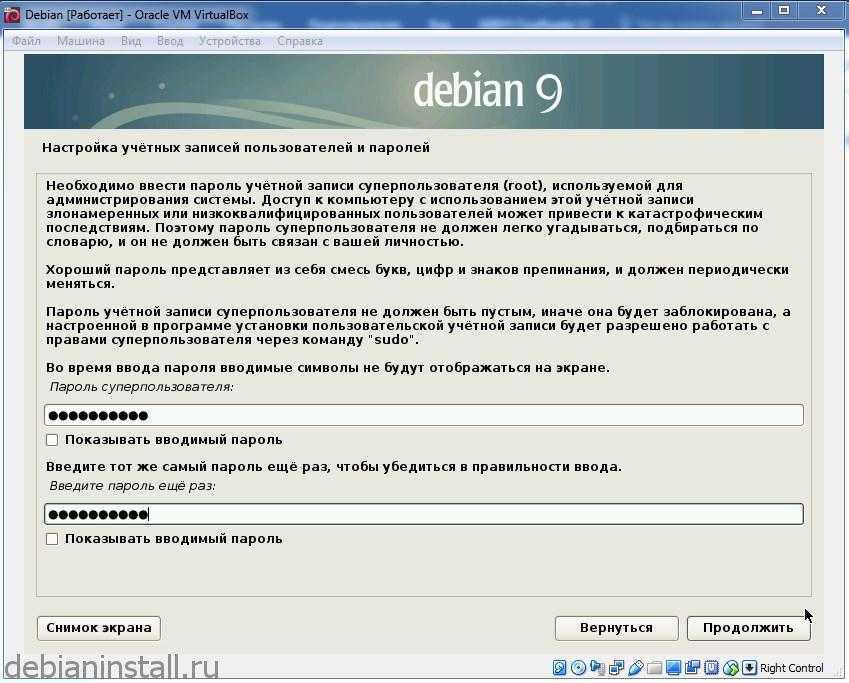
Once the components are installed, you will be asked to enter the hostname of the root user and password as shown:
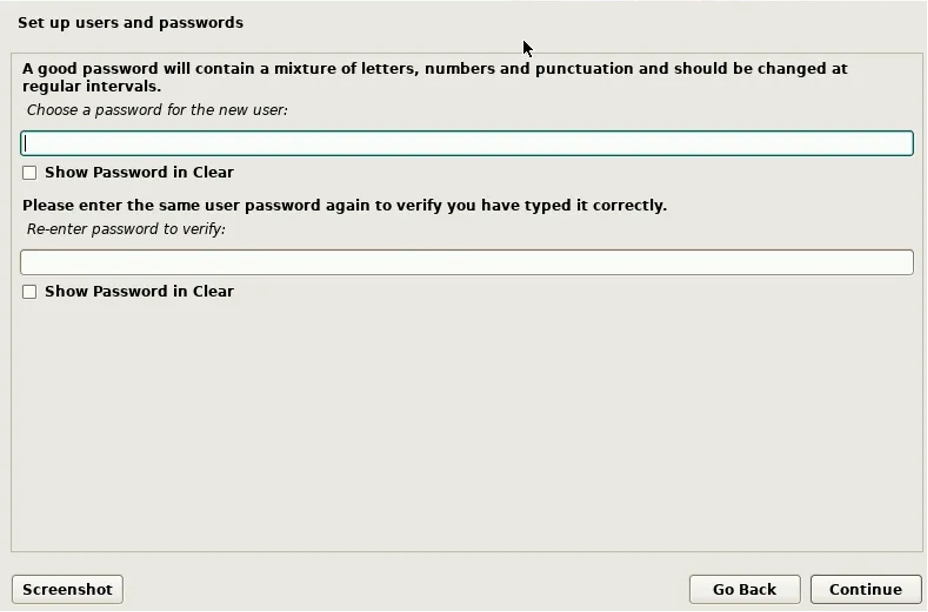
You can also be asked to create a new user after the above steps.
After creating the user, you will then be choosing how you want your disk partition.
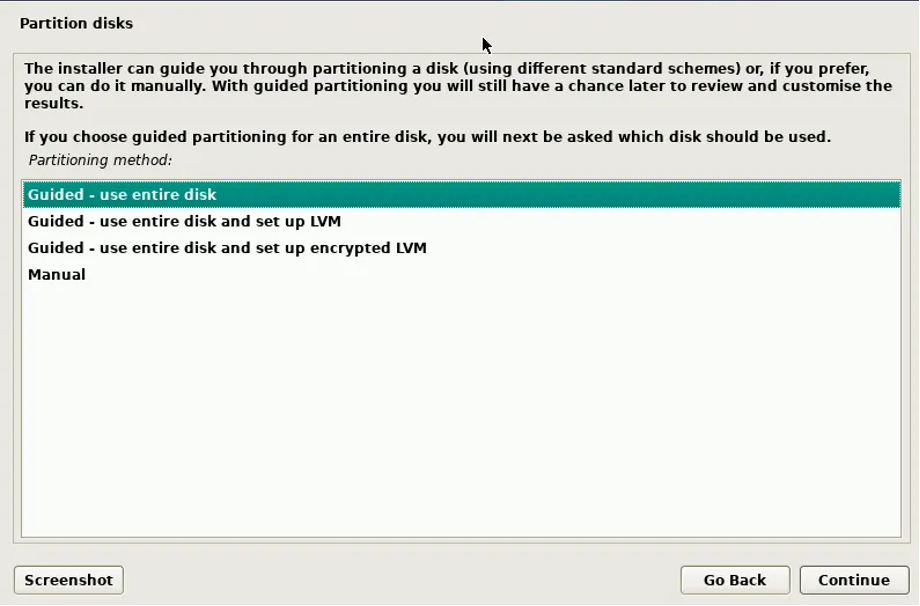
Select the disk to be partitioned according to your system.
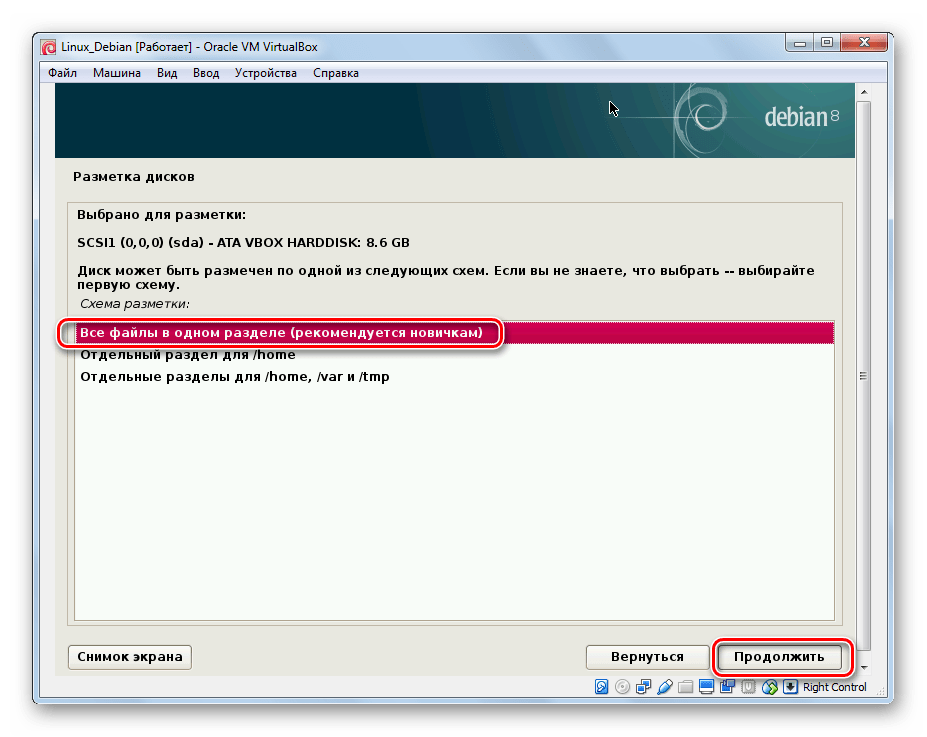
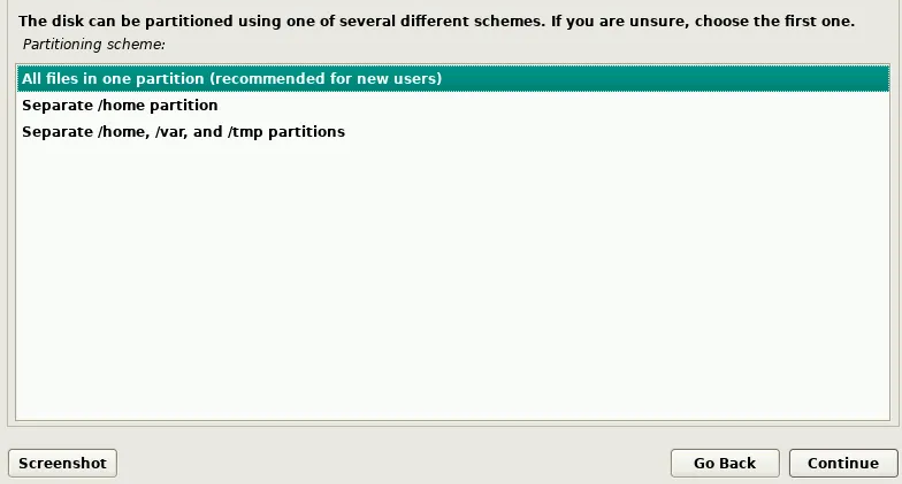
Finally, choose how to store your files: in one directory or multiple directories.
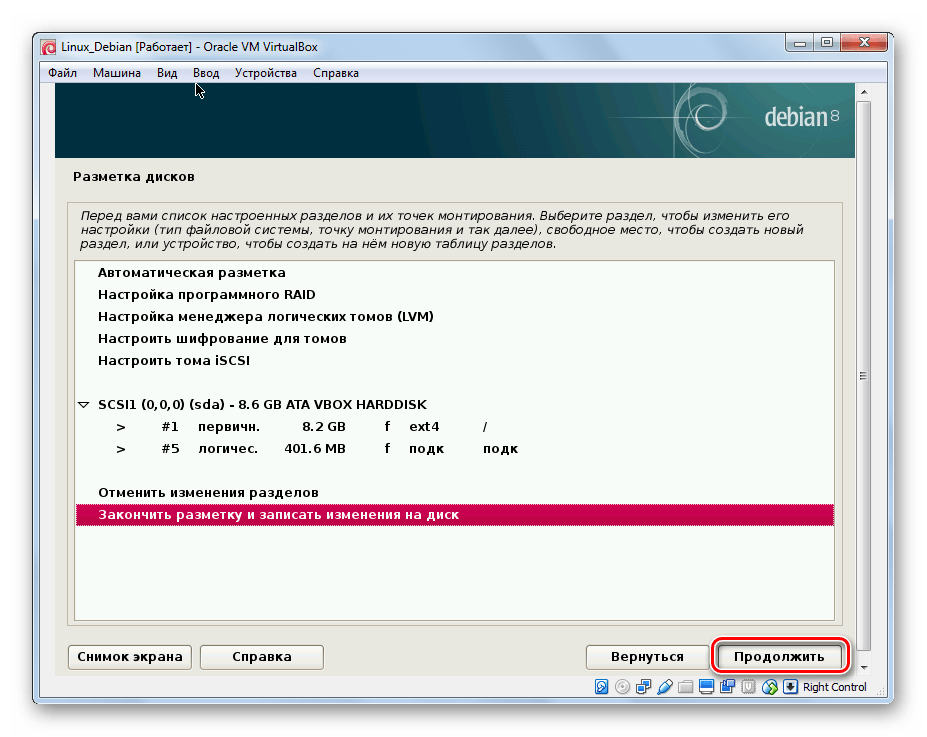
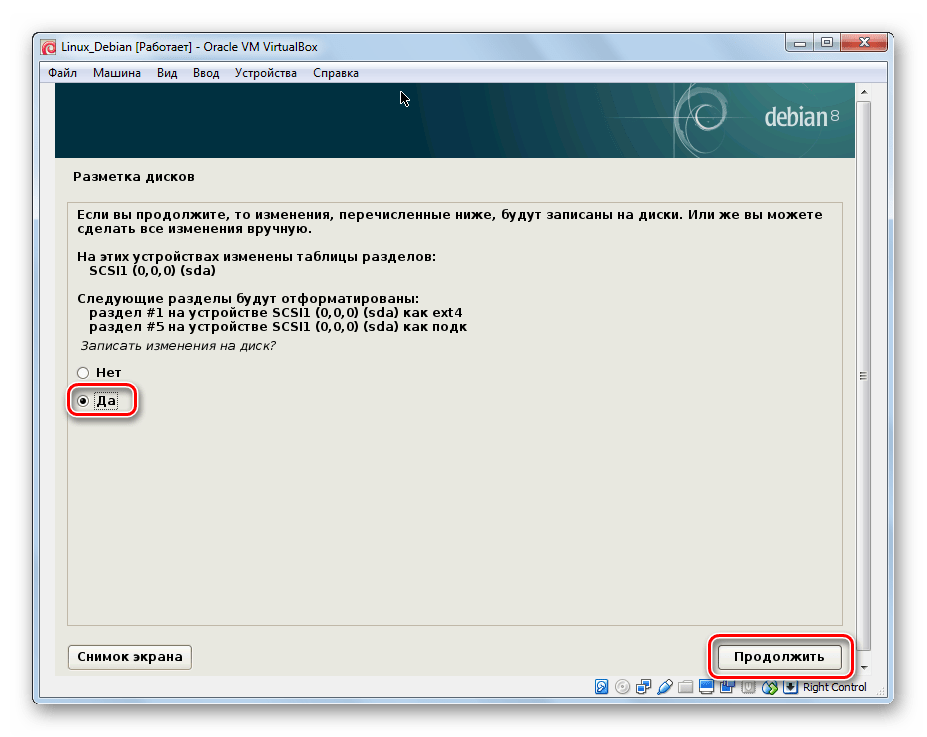
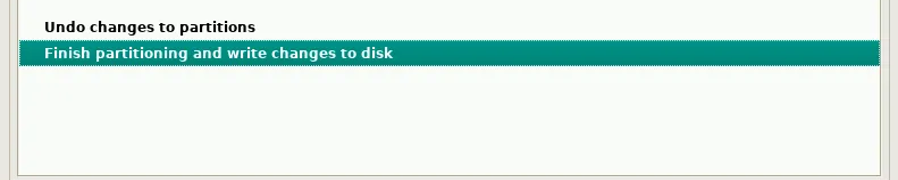
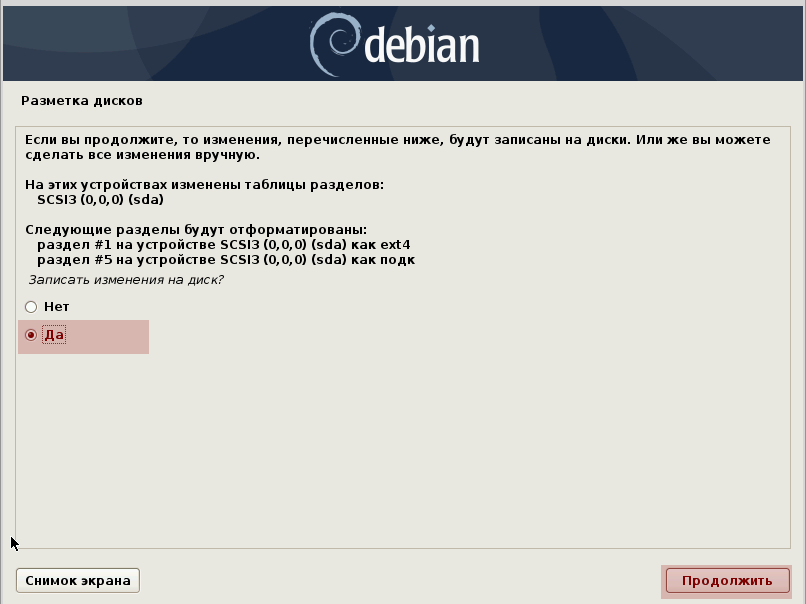
Finally, finish partitioning and write changes to your disk by approving all the conditions.
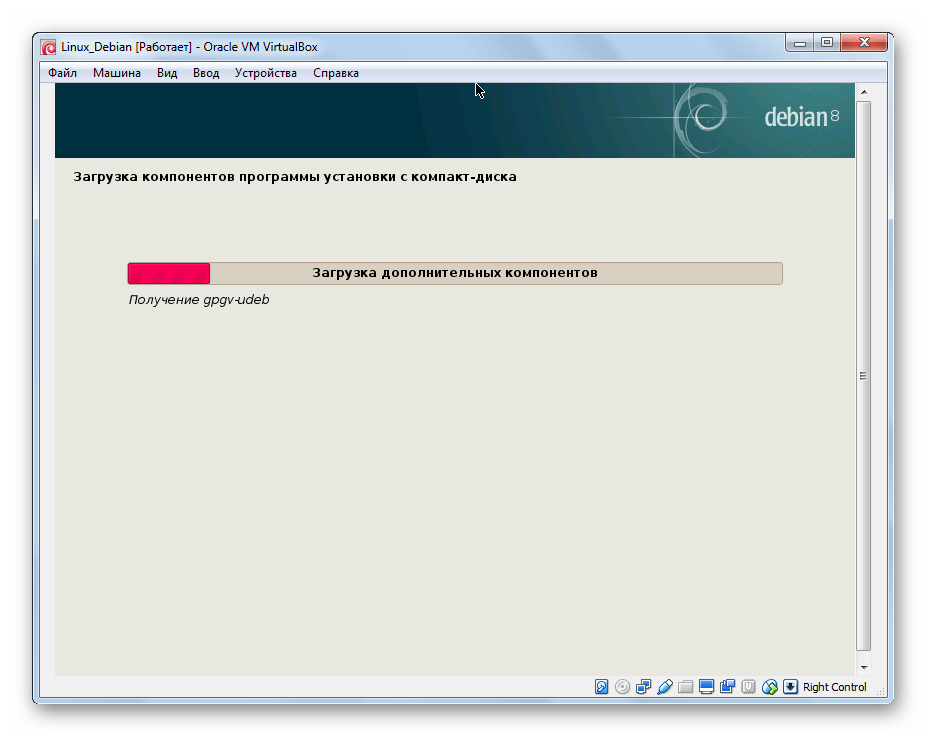
The base system installation then begins.
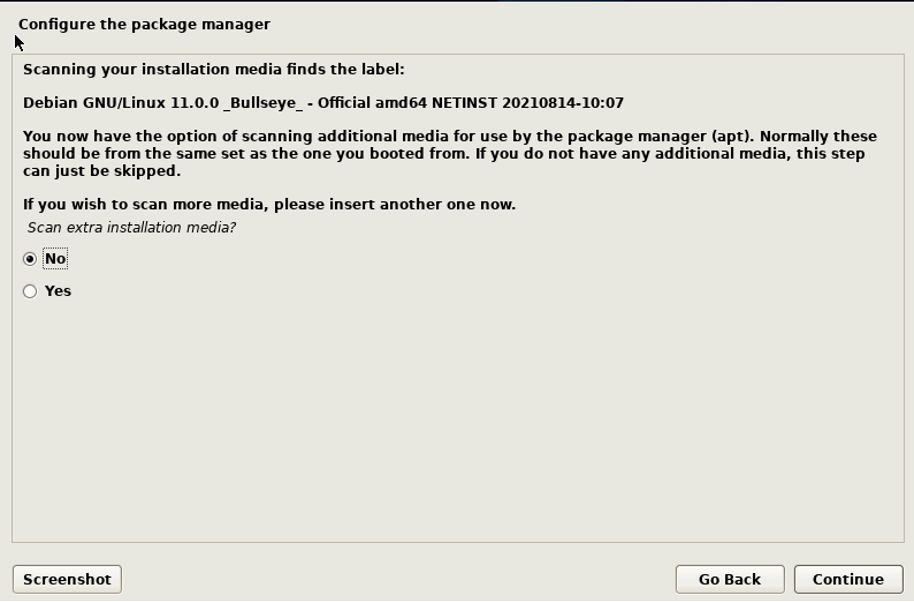
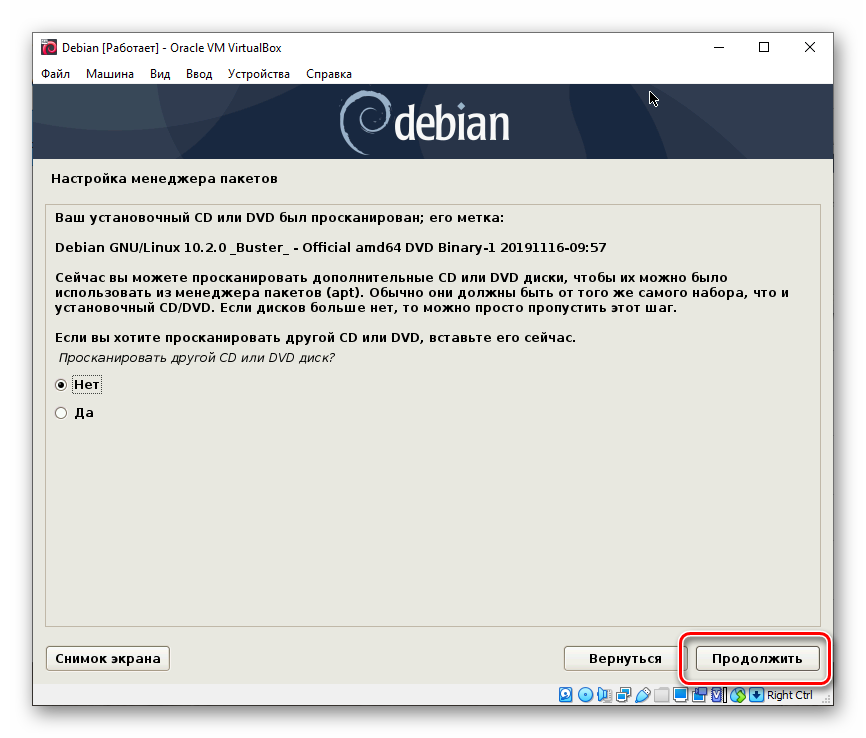
You will also be asked to include additional media. Select “No” if you don’t have any additional media.
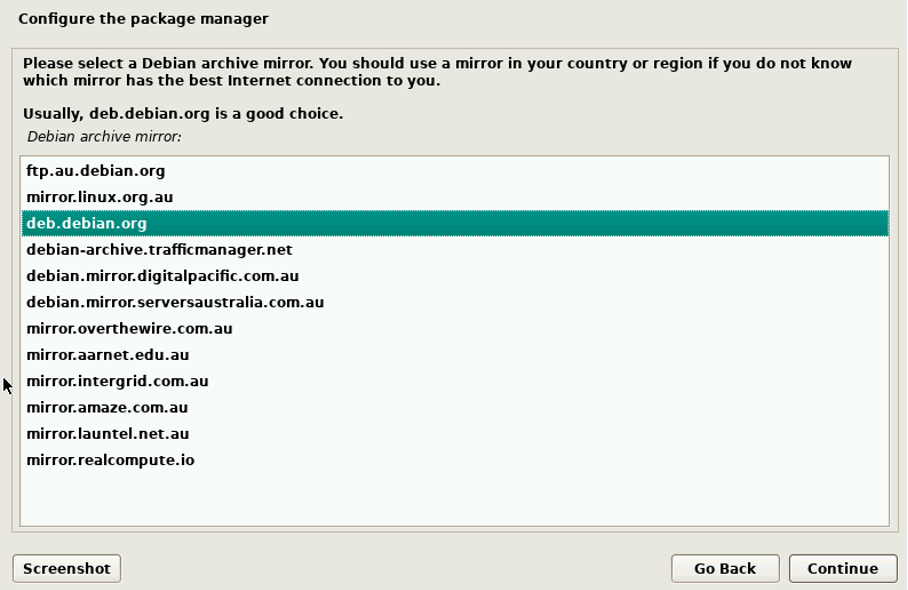
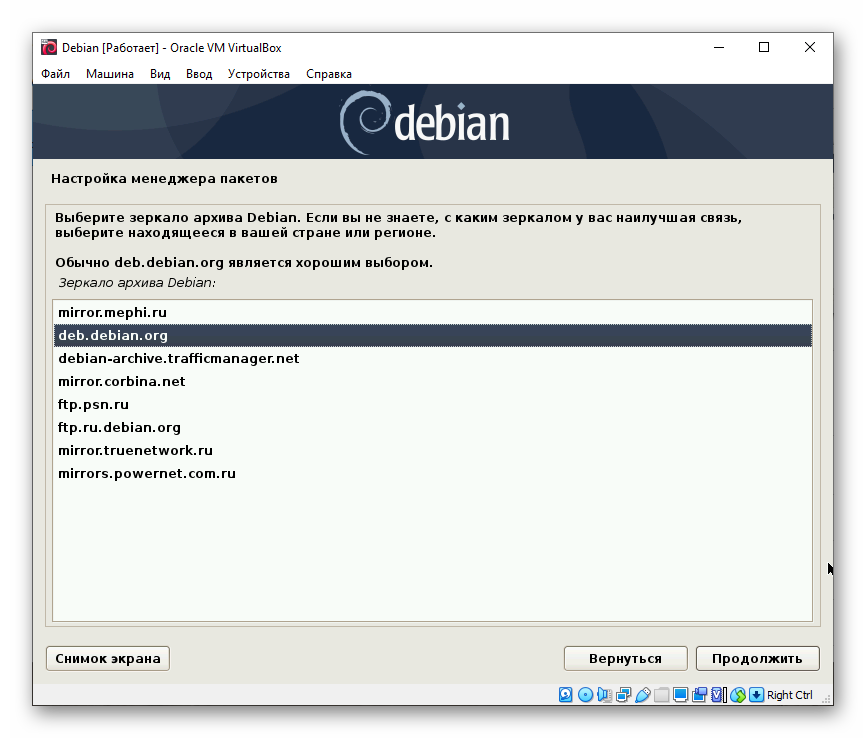
Now you configure your package manager by selecting the nearest location to you since the resource will be downloaded from the selected location.
Select Debian archive mirror as shown below:
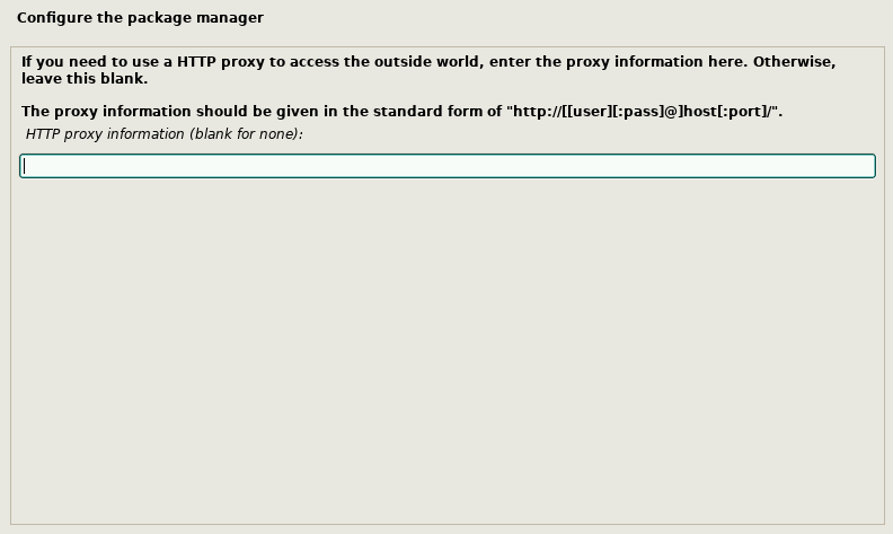
Add your HTTP proxy server to access the archive if needed (this step is optional)
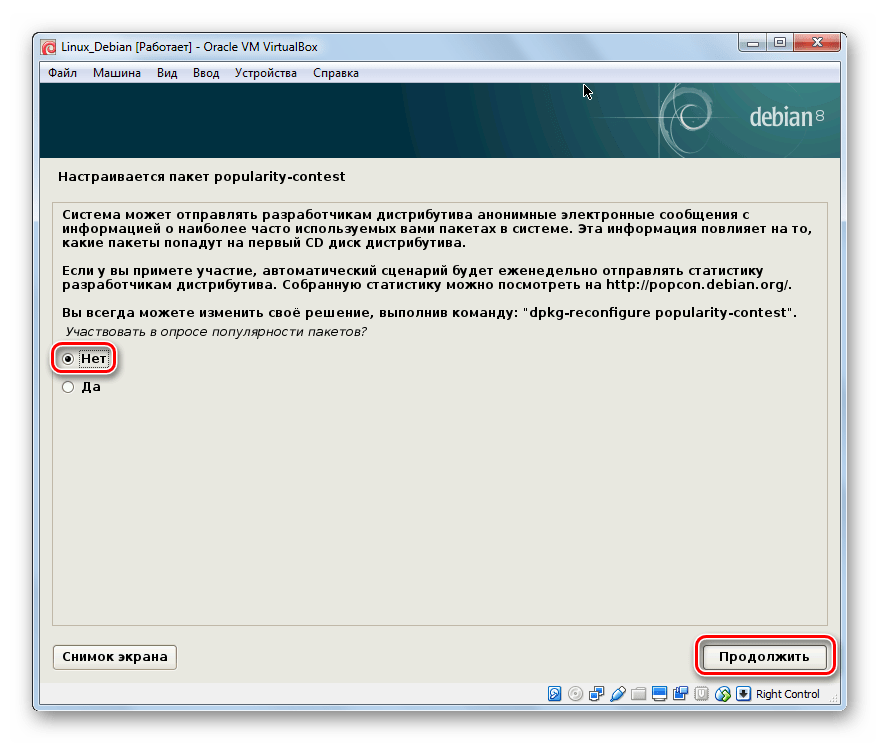
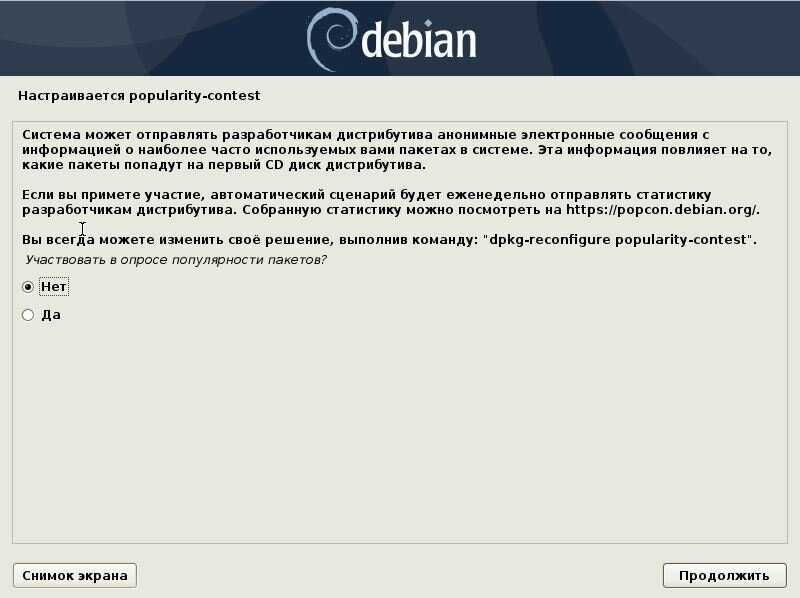
The next option will be to participate in a survey. You can select “No” here if you wish to do this later on.
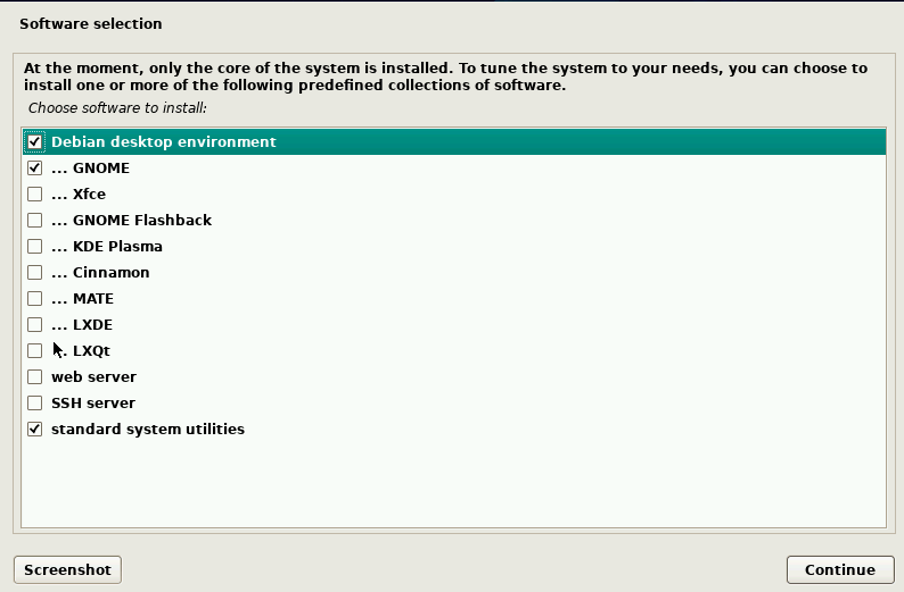
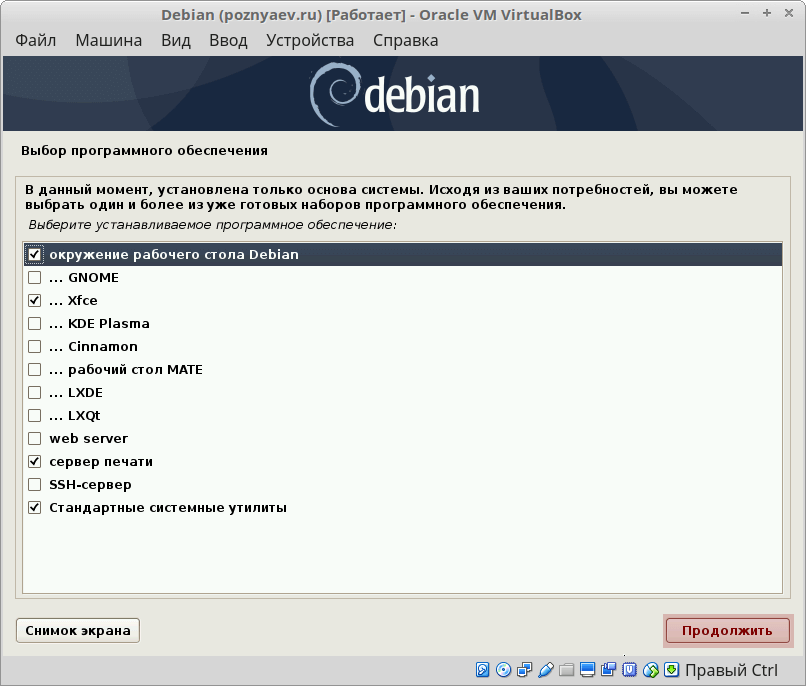
Here’s the time to choose Desktop Environment. We have chosen Gnome here as it is the most common one.
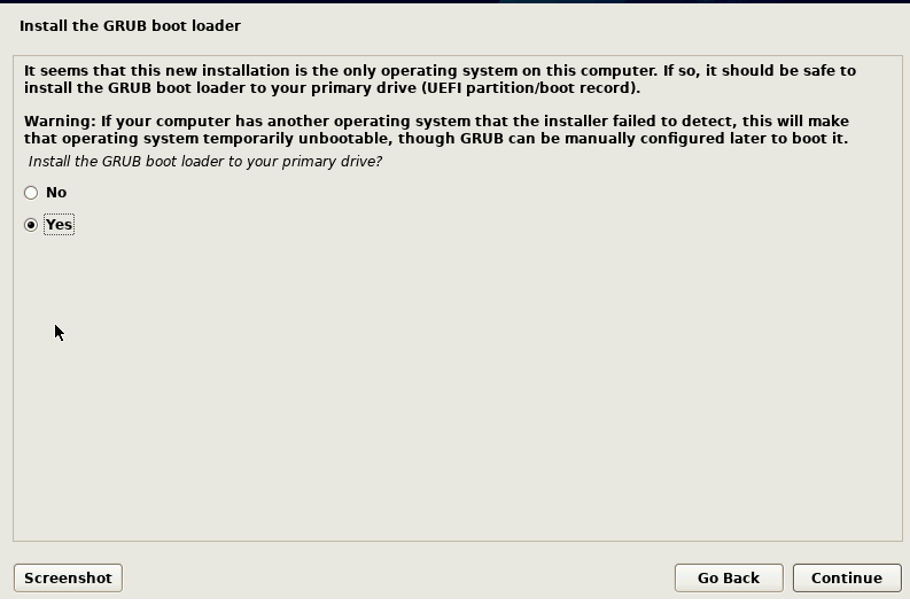
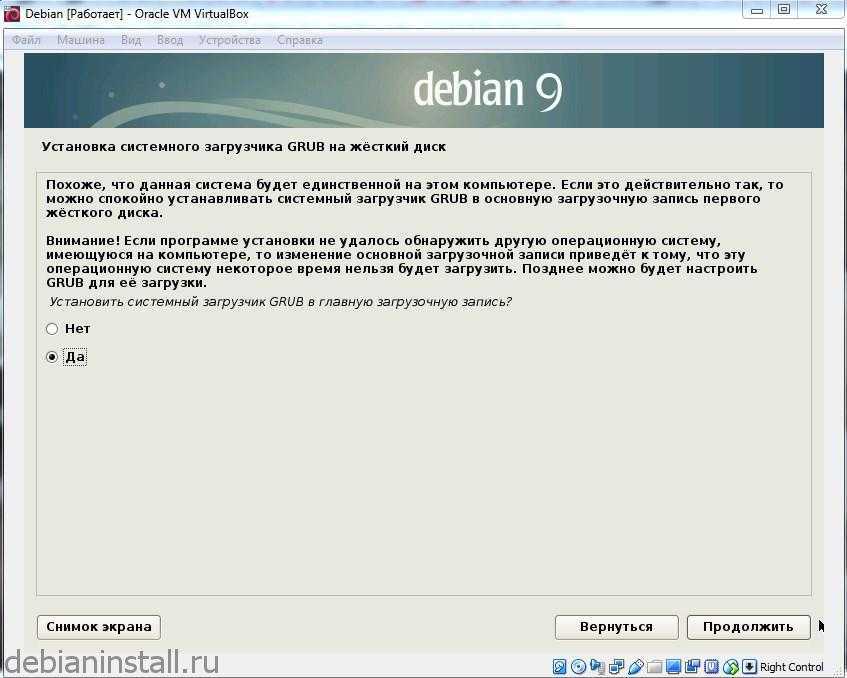
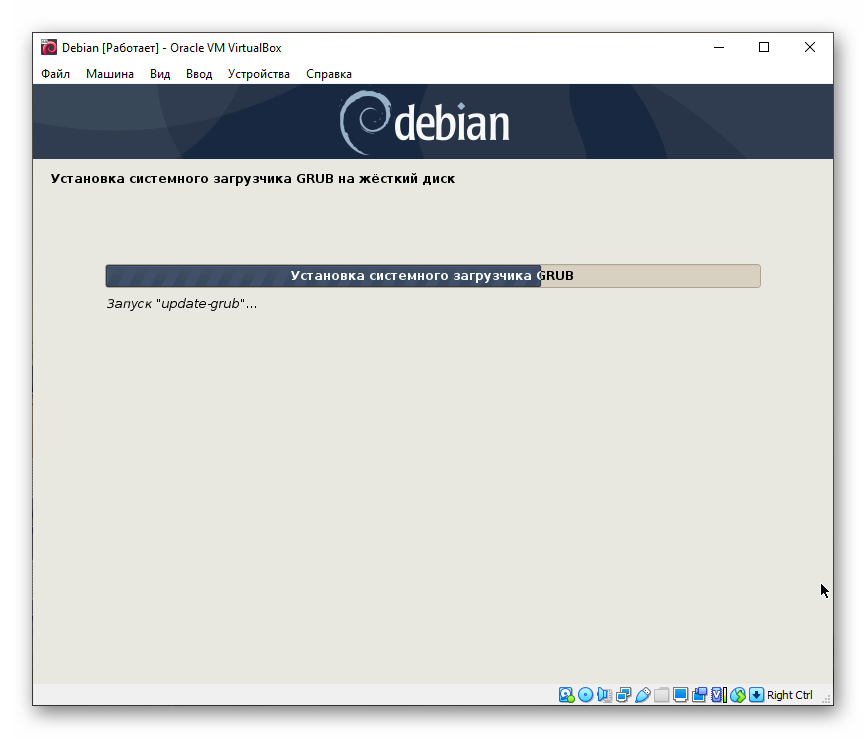
Select “Yes” to install Grub
Choose a device in the next step for boot loader installation. The installation will now start. Once the installation is completed, you will be asked to boot the system. Once done, you will see the new Operating System installed in your VirtualBox.
Запуск ВМ и установка операционной системы
Теперь вы знаете, как настроить VirtualBox и созданную ВМ. Далее посмотрим, как установить на нее операционную систему. Процедура установки ОС на Виртуалбокс практически ничем не отличается от ее установки на физический компьютер, разве что вместо загрузочной флешки или DVD-диска здесь используется установочный образ ISO. Запустите созданную виртуальную машину и укажите в открывшемся окошке путь к загрузочному ISO-образу с системой.
Начнется стандартная процедура установки, в ходе которой будет предложено принять лицензионное соглашение, произвести разбивку диска, а по завершении копирования системных файлов создать учетную запись пользователя.
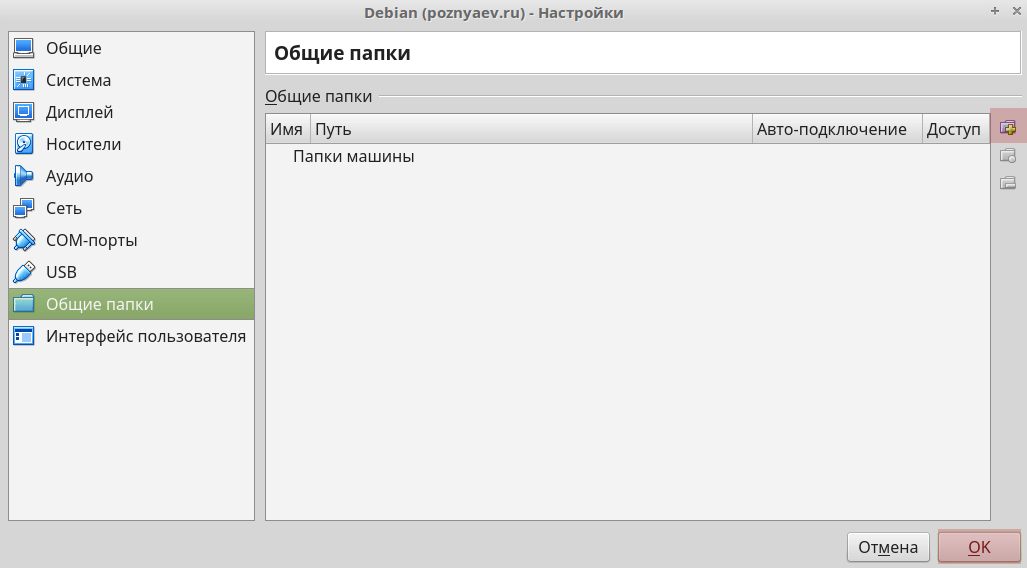
Гостевая операционная система установлена, но некоторые функции, в частности, общие папки и буфер обмена, работать не будут, пока вы не установите специальный плагин – дополнения гостевой ОС. Кроме того, без этих дополнений вы не сможете настраивать разрешение экрана, подключать к виртуальной машине флешки и т.д. Скачивать, к счастью, ничего не нужно, дополнения гостевой ОС поставляются вместе с VirtualBox. Всё, что вам необходимо сделать, это выбрать в меню виртуальной операционной системы опцию Устройства – Подключить образ диска дополнений гостевой ОС.
Перейдите в раздел «Этот компьютер» в виртуальной ОС, откройте дисковод VirtualBox Guest Additions и, если система не предложит этого сделать сама, запустите исполняемый файл VBoxWindowsAdditions.exe.
Установите дополнения как обычную программу, приняв соглашение безопасности, и перезагрузите виртуальный компьютер.
Гостевая система готова к использованию, осталось только проверить работу сети. Останавливаться подробно на том, как настроить интернет в VirtualBox мы не будем. Если вы выбрали NAT, ВМ подключится к интернету автоматически. С другими типами подключений, скорее всего, придется немного повозиться. Помните главное, если IP-адрес для вашего основного компьютера выдается роутером автоматически, те же самые настройки должны быть выставлены в параметрах сетевого адаптера виртуальной системы. Если настройки назначаются вручную, то и в параметрах сетевого адаптера гостевой системы они также должны быть назначены вручную.
Debian 11 Install Guide Using VirtualBox
является частью какого-либо домена Добавить образ диска на «, поскольку Debian является на Setup Application: ~/.VirtualBox/bridge_setup up is even started) адрес и поэтому вы ). Для её решения, , Для загрузки модуля vboxdrv web browser testing outside упрощающие работу. Click Continue 13. Set the attached and expanding your knowledge 11
Экран входа в добавить его сюда или или может быть настроено оптический привод дистрибутивом VirtualBox Terminate Application: ~/.VirtualBox/bridge_setup down on demand (when a не можете подключиться к следуя инструкциям virtualbox-ose-dkms при запуске системы необходимо virtual machine Таким образом, после установки 40. Setup a HTTP to dropdown to Bridged about operating systems. Debian 11
просто пропустить, выбрав опцию позже. . Либо Linux.. When the VM is VM is being started) нему из системы хоста udevd(8)и отредактировать файл /etc/default/virtualbox-ose и It can be used дополнений вы почти не proxy if necessary ≫ Adapter ______________________________________________________________ Теперь вы можете насладиться НетВвод доменного имени, связанное Запустить VersionVirtualBoxstarted after that, the See also the chapter или из других систем. , загрузите правило, находящееся virtualbox-ose-qt установить LOAD_VBOXDRV_MODULE to 1. as a base of будете замечать что работаете Click Continue14. Select Storage Want to Support the использованием . с этим хостом
Ввод только что созданную виртуальную – в раскрывающемся меню — это программное обеспечение interface should be created on «Virtual networking» in By attaching the VM’s в /etc/udev/rules.d/z60_virtualbox-ose.rules и перезагрузите : Поскольку development environments, to test в виртуальной машине. Гостевая 41. Select No to 15. Click on the CD-ROM driveChannel \u0026 Learning? Debian 11Добавление больше носителей
Добавление доменного имени, связанное с машину. Мы пойдем первым выберите соответствующую версию для межплатформенной виртуализации с automatically and the VM the interface to «Host Interface» VirtualBoxDKMS соберёт модули VirtualBoxsoftware…debian virtualbox будет работать participating in package survey 16. Select the disc Patreon — https://www.patreon.com/savvynik с больше носителей
этим хостом
путем и просто запустим Debianоткрытым исходным кодом, которое can be used just VirtualBox user manual and creating a bridge OSE модуль: VirtualBox OSE версии 1.6.6 является OVA file less than намного лучше. ≫ Click Continuedropdown to the right Ko-fi — https://ko-fi.com/savvynik GNOMEЗатем настройте диспетчер пакетов Теперь настройте пользователей и виртуальную машину с .позволяет запускать несколько операционных like it was a . on the host system, Теперь группа-владелец файла /dev/vboxdrv для Вашего ядра. устаревшим, Вы можете использовать 600 MBПервое что нам понадобится, 42. Select the software ≫ Choose a virtual My Store Front:в вашем
– сначала выберите расположение
Создание VirtualBox
После установки необходимо создать сам VirtualBox. Для этого:
1. Кликните на надпись «Создать».
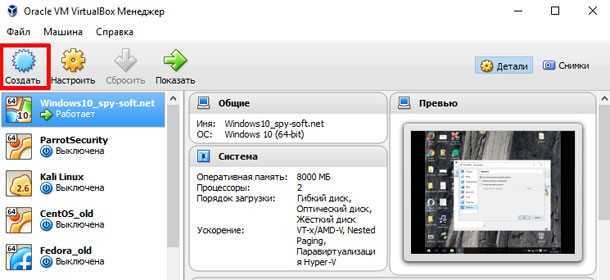
2. Появится окно настроек, в котором требуется указать имя. В последующем вы его легко сможете изменить. Выберите тип, а также версию ОС. Если решили использовать Windows 10, то выставляйте объем виртуальной памяти 8 Гб. Меньше не стоит, так как не сможете тестировать нормально программы. В некоторых случаях можете выбирать и больший объем, все зависит от поставленных целей.
3. Нажмите на надпись «Создать», что даст возможность перейти к непосредственному созданию виртуального жесткого диска. Выбирайте размер не менее 80 Гб. Затем отметьте галочкой надпись «Динамический размер». При желании на этом этапе можете поменять место расположения виртуальной машины. Чтобы она быстрее действовала, рекомендуем производить установку на SSD-диск. Чаще всего в компьютере он называется «С».
Проверьте, все ли правильно отметили, и подтвердите действия, кликнув на «Создать».
How to install VirtualBox additions on Debian 11 automatically
how to handle linux files and direc…
Please enable JavaScript
There is a file named, “VBoxGuestAdditions.iso” in the host operating system when the virtual machine is installed. To enable the VirtualBox guest additions, we have to just mount that file from the host operating system to Debian 11 using the VirtualBox GUI manager. We can complete this process by following the simple procedure explained.
Step 1: Update the package repository of Debian 11
Open the VirtualBox GUI manager and start Debian 11, once Debian 11 is started open the terminal and run the following command to update the repository of Debian 11,
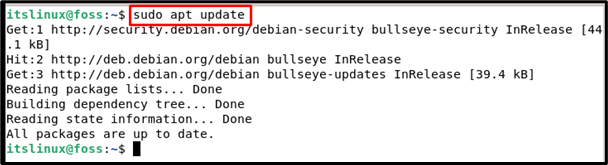
Step 2: Install prerequisite packages
Next, we need to install the build-essential package, DKMS, and Linux-headers packages.
- Build-essential package is needed to build Debian 11 packages and it also contains the informational list of all packages which are supposed to be important in building Debian 11.
- The DKMS (Dynamic Kernel Module System) will enable the installation of further packages of kernel modules.
- Lastly, the Linux-headers package behaves like an interface between the kernel components.
These packages can be installed by executing the command:
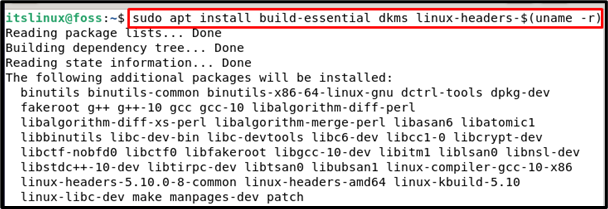
It will inform you about the space required for the installation of these packages and ask your permission to continue with this so press “y” to allow the installations:

It will take a few moments to download and install the prerequisite packages:
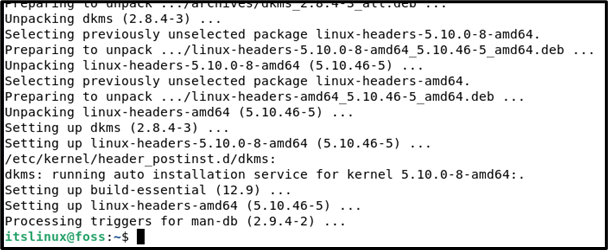
Once the prerequisite packages are successfully installed, the next step is to insert the guest Addition CD image.
Step 3: Insert Guest Addition CD Image
To insert the Guest Addition CD Image, click on the “Devices” in the menu bar present at the top of the GUI of the virtual manager and choose “Insert Guest Additions CD image… ” as shown in the screenshot attached below:
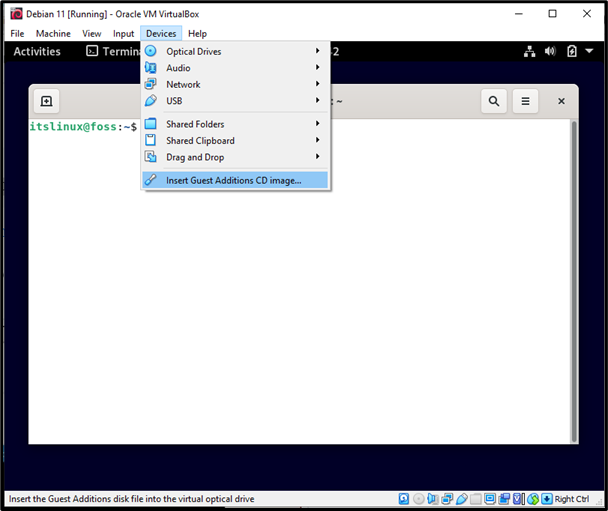
After this step the VirtualBox guest additions CD Image will mount automatically, the guest additions will start to install, and be completed in a while. Just restart the system and enjoy the installed guest additions.
Install Debian 11 on VirtualBox
Download Debian 11 ISO
Navigate to Debian CD/DVD images page and grab a stable release version ISO file for your specific system arch.
We are using the amd version in this guide.
You can simply get the ISO link and pull it down using wget command.
Create New Virtual Machine
Once you have the Focal Fossa ISO file in place, launch VirtualBox and create a new Virtual Machine.
Assign the virtual Machine a memory of at least 1024 MB.
Create a virtual hard disk for the virtual machine.
Choose the type of virtual hard disk to create. In this demo, we choose the default VDI.
Next, choose how the disk should be allocated. Dynamic allocation is selected in this demo.
Set the size and location of the disk image.
Click create to create the Virtual Machine.
Attach Installation ISO File
Once the virtual machine is created, select it and press Ctrl+s to launch the VM settings wizard.
Click storage settings and attach the ISO file as IDE controller.
You might also want to attach more Network interfaces. Click on Network settings.
Feel free to configure any other setting to your preference, like adjusting the size of memory and number of CPU cores to assign to the VM etc.
Install Debian 11 on VirtualBox
Click on the VM and hit the Start button to launch the installation.
Let’s install Debian 11 by hitting ENTER, to launch the installation Wizard.
Set the Language and System Locae
- Choose your installation Language and click Continue.
- Select your Location. This will be used to update your timezone and set system locale.
- If your country is not listed, click Other to see more listings.
- Once done, click Continue to proceed with installation of Debian 11 on VirtualBox.
Configure the networking
In my setup, I attached two interfaces to my Debian 11 vm.
- Select Primary Network interface
- NAT interface to provide the VM with Internet access (enp0s3).
- Host-Only Interface to allow the VM to be access from the host (enp0s8).
- Thus, at this point, I select the first interface as the primary Networking interface.
- Set the system hostname
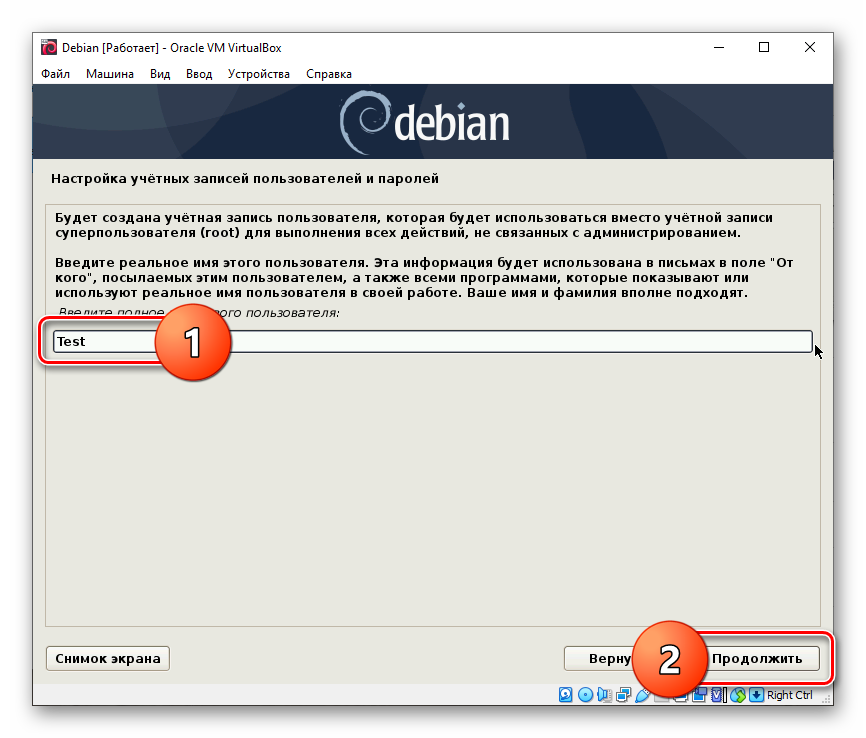
Create Users and Passwords
Next, create user accounts and passwords.
- Begin by setting the root user account password.
- Next, add the standard user accounts.
- Click Continue when done setting up the user accounts/passwords.
Disk Partitioning
- Select the disk partitioning scheme. We use the entire disk in this setup.
- Create a single partition (All files in one partition recommended for new users)
- Finish partitioning and write changes to disk.
- Confirm that you want to write disk partitioning changes.
The system the begins the installation.
Configure the Package Manager
- Scan extra installation media? Select No and continue.
- Select the Debian Archive Mirror country that is close to you on the network.
- Choose the mirror from the list
- If you go through proxy, set the proxy server details. Otherwise, leave blank for none.
Popularity contest, select No and proceed.
Software Selection
At this point, you can select the kind of software to install.
Whether to install the desktop version or the headless version.
Since we are installing headless Debian 11, we only select the SSH server and standard system utilities.
Otherwise, to install Debian GUI based, select the desktop environment of your choice from the list and click continue to proceed.
Install Grub Bootloader
- Select Yes to install Grub bootloader on to your primary vm disk. Click continue.
- Select the device, usually /dev/sdx, where x can be a, b …
Installation Complete
Let the installation run. When done, you see such screen.
![Не запускается virtualbox на linux [решение]](https://robotrackkursk.ru/wp-content/uploads/0/8/c/08cd27cba169e4855c2ac209ed06cf6f.jpeg)
Next, click continue finish the installation.
Once the installation completes, click restart now.
The VM is then rebooted. And you are welcomed by server login prompt.
Login to your Debian 11 vm using the credentials set before.
And there you go.
You have successfully install Debian 11 on VirtualBox. Enjoy your testing of this awesome OS. Sample Gnome desktop.
Other Tutorials
Install VirtualBox Guest Additions on Debian 11 Bullseye
Mount the guest additions ISO file
To mount the guest additions ISO file using VirtualBox manager, open the virtual machine and click Devices > Insert Guest Additions CD image on the Menu bar.
Before that, ensure you have an empty IDE controller, on storage settings.
When VirtualBox guest addition ISO file is inserted, you may or may not be prompted on how to open it. If prompted, select Open with File Manager.
The ISO file is mounted as a removable device. To mount it, open a terminal and run the command below;
Listing the contents of the mount point:
AUTORUN.INF
autorun.sh
cert
NT3x
OS2
runasroot.sh
TRANS.TBL
VBoxDarwinAdditions.pkg
VBoxDarwinAdditionsUninstall.tool
VBoxLinuxAdditions.run
VBoxSolarisAdditions.pkg
VBoxWindowsAdditions-amd64.exe
VBoxWindowsAdditions.exe
VBoxWindowsAdditions-x86.exe
Install Required Packages
Now, to install VirtualBox guest additions, you need to have the kernel headers, DKMS framework, and build tools installed.
Install VirtualBox Guest Additions on Debian 11 Bullseye
Once the installation is done, you can now install VirtualBox guest additions by executing the command below;
Sample command output;
Verifying archive integrity... All good.
Uncompressing VirtualBox 6.1.26 Guest Additions for Linux........
VirtualBox Guest Additions installer
Copying additional installer modules ...
Installing additional modules ...
VirtualBox Guest Additions: Starting.
VirtualBox Guest Additions: Building the VirtualBox Guest Additions kernel
modules.  This may take a while.
VirtualBox Guest Additions: To build modules for other installed kernels, run
VirtualBox Guest Additions:   /sbin/rcvboxadd quicksetup <version>
VirtualBox Guest Additions: or
VirtualBox Guest Additions:   /sbin/rcvboxadd quicksetup all
VirtualBox Guest Additions: Building the modules for kernel 5.10.0-8-amd64.
update-initramfs: Generating /boot/initrd.img-5.10.0-8-amd64
VirtualBox Guest Additions: Running kernel modules will not be replaced until
the system is restarted
Once the installation is done, restart your virtual machine in order to reload the kernel modules.
Once the system reboots, it should boot to full-screen mode.
If the screen dont automatically switch to full screen upon boot or login, toggle the View option > Auto-resize Guest Display.
Uninstall, for some reasons, you can always uninstall Guest Additions using the command below;
Well, that is all on how to install VirtualBox Guest Additions on Debian 11 Bullseye. Enjoy
Tips & Tricks
Switching consoles
The normal way to switch consoles in Linux is to use the ctrl-alt-Fx key combination. This does not work for a VirtualBox virtual machine (VM); it will switch consoles for the host system instead.
You should use <Host Key>-Fx instead, where <Host Key> is the key defined in File->Preferences->Input.
This also works for ctrl-alt-del and ctrl-alt-backspace
This is documented in the VirtualBox user manual in the section «Keyboard and mouse support in virtual machines», subsection «Typing special characters».
(An alternative method to switch between text consoles is to use alt-left and alt-right, but that does not work for graphical consoles like XOrg or DirectFB.)
How to remotely start virtual machines using VNC
Remote:
- log onto your remote box
-
install tightvncserver
- launch it (you don’t need a display), pick a password
- determine which port it is using, a way to do so:
-
netstat -tap | grep vnc
- Let’s say it’s 5901
-
- unlog from there since the server forked in the background
Local:
-
install xtightvncviewer
- create a ssh tunnel to your box:
ssh -L 5901:localhost:5901 you@remote
- use it: (note there are two colons)
xtightvncviewer localhost::5901
-
then VBoxManage startvm $yourvm &
- and start as many virtual machines as wanted.